Bare-metal Install
This section covers the bare-metal install process for putting QuantaStor onto physical server hardware (rather than into a guest VM). QuantaStor installs as an operating system so no software needs to be installed on a given server to prepare the system. QuantaStor is Linux based and has an extensive HCL in order to support server models from all major manufacturers.
Contents
BIOS Configuration Checks
Proper configuration of the BIOS settings is very important to successful installation and continuous operation of the system. Settings like power save options which could cause the system to inadvertently go into Sleep Mode or Hibernate are important to disable by putting the system into a Performance power save profile.

Boot Order
Before installing QuantaStor from the ISO, two changes must be made to the BIOS. First the USB or CD/DVD device with the QuantaStor ISO media must be selected as the primary boot device so that the install media loads at the initial install time. Second, the system disk, (the disk the system will boot to after installation has completed) should be the selected hard disk to boot from and assigned to the second position in the BIOS boot order. After installation is complete you will need to remove the ISO installation media.
Power Save Settings
Make sure that your storage appliance server is set to the Performance settings. You do not want the drives to go into power save mode as this can cause stability problems. QuantaStor is not designed to hibernate or sleep like a desktop operating system.
IPMI/iDRAC Settings
Be sure to apply an IP address to the server's IPMI port so that you can remotely access the console. This is especially important for triage of connectivity and network issues.
Boot/System Disk Configuration

Hardware RAID1
It is highly recommended that QuantaStor be installed to a mirrored (RAID1) pair of system disks so that no downtime is experienced in the event of a disk failure of the boot/system disk. The underlying Linux operating system on which QuantaStor builds has support for software RAID which could accomplish this but the recovery scenarios would be somewhat complex. As such the most efficient route is to use a hardware RAID mirror using the same RAID controller that you're using for your storage pools. Note that currently you must set aside two full disks for QuantaStor's system disks in order to make a RAID1 mirror to install too. QuantaStor has very limited storage needs so two small capacity 250GB drives will suffice for the boot/system drive (any type will work HDD/SSD and SAS/SATA). For deployment as a Virtual Storage Appliance the QuantaStor OS needs only a modest 30GB plus the amount of GB in RAM of disk space, though 50-100GB or more is recommended for larger configs.
Creating the RAID1 Mirrored System Disk
The first step will be to use the RAID controller's BIOS based configuration system to create a RAID1 mirror using two disks. With the 3ware controllers you can enter the BIOS by pressing Alt-3 during boot, and with the MegaRAID you can enter the WebBIOS by pressing Ctrl-H during boot. Please refer to the vendors documentation for complete details on how to create a RAID1 mirror using a pair of disks. For MegaRAID this will involve creating a Disk Group 0 with both disks and then a single Span with a single Virtual Drive.
Software RAID1 for Boot/System Disk Configuration
Software RAID for the boot device is not recommended. We recommend using two boot drives in hardware RAID1 as that is by far the easiest configuration to setup, maintain, and monitor through the QuantaStor web management interface. That said, it is possible to setup QuantaStor with mirrored boot drives using the mdraid software RAID driver using the general Ubuntu Linux documentation available online. If you do so you'll need to make sure that QuantaStor doesn't recognize the MDRAID swap and boot devices as storage pools '0' and '1', and this is done by creating a file called /etc/qs_poolblacklist.conf.
/etc/qs_poolblacklist.conf
The contents of the file should look something like this when you're done editing it:
UUID=28d9d8b6-9fcc-4a66-9993-efc90c88f121
UUID=c2eec0d4-24da-4366-93e4-919f02c92198
To get the UUID of the storage pools you can get the information from the command 'qs pool-list' or you can get the information from 'qs-showlog' and look for the warning messages around the storage pools that it could not start. After you've edit the file you'll need to restart the QuantaStor management service like so:
service quantastor restart
Starting the Installation from ISO/USB media
Preparing the ISO/USB media
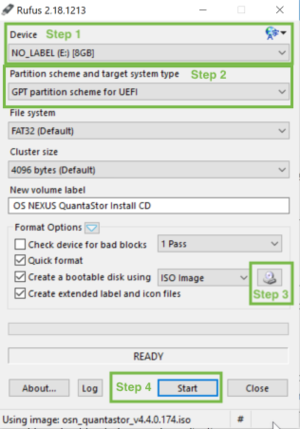
For bare-metal installation we recommend using a 8GB or larger USB stick. Once you've downloaded the ISO file from the OSNEXUS web site you can put it onto your USB device using software like usbwriter. Another option is to burn a DVD and use a portable USB DVD device to install from. Detailed instructions on how to put QuantaStor on to USB media is provided here for both Windows and Linux.
Insert and Boot from the QuantaStor USB Install Media
After connecting your QuantaStor Install USB stick to the server you will see the QuantaStor screen appear and it will automatically select 'English' as the default language and begin the installation process.
Selecting a hostname
The first question you will be asked as part of the installation process is what do you want to name the host. By default the name 'quantastor' is given, but you can give the system any valid host name. If you're setting up multiple appliances you should give them each unique names. You can also change the name later through the web management interface using the Storage System Modify dialog.
Selecting a network port
The second step in the console level installation process is the selection of which port to use for network communication during the install process. If the new QuantaStor system has a single network interface then it will automatically attempt to configure the using DHCP; if DHCP is not available then standard details will need to be provided (Static IP Address, Subnetmask, and gateway if applicable). If multiple ports are detected a menu will be provided allowing you to choose which interface to use for the management port. The installation process will use the network to try to get more recent versions of packages than those that are on the CD.
Selecting the device to install the QuantaStor OS
Finally, the configuration wizard will ask which partitioning scheme to use. We recommend 'Guided installation, use entire disk'. If you are planning to mirror your boot drive (highly recommended) then you'll want to use the Hardware RAID controller's configuration BIOS to create a RAID1 logical drive first. The next screen will ask you which disk you want to use as the system boot disk, at that point you'll select your RAID1 mirrored system/boot drive.
WARNING, this disk will be reformatted as part of the installation process so be
careful to choose a disk that does not have data on it you need.
Bare-metal Installation is Complete
That's all the key questions you will be asked as part of the installation process. After the installation completes the system will reboot and will start-up the QuantaStor system. At this point you can login using the 'qadmin' user account and 'qadmin' password so that you can get the IP address of the system. To get the IP address just type 'ifconfig' at the command prompt after you have logged in. You'll see an entry for 'eth0' with an IP address assigned to it. Enter that IP address into your web browser to connect to your QuantaStor storage system via your favorite web browser so that you can start to configure the rest of the system.
A video of the installation process is available on the main web site in the Videos section.