Globus Connect Server v4 Integration
Globus Connect Server delivers advanced file transfer and sharing capabilities on your network.
This article is to provide installation steps for Globus Connect Server v4, along with how to integrate QuantaStor to be used as an endpoint for Globus Connect Server v4. In our testing, we used Ubuntu 18.04 LTS. The steps below assume that you have a system already installed your operating system of choice for Globus Connect Server v4, and that a QuantaStor storage appliance is currently installed, configured, with a storage pool.
An endpoint for Globus Connect Server v4 can either be configured for a single network share from QuantaStor, or for an entire storage pool where each network share below is available. For the purpose of this article, we have used a single network share to be used as an endpoint.
Installation / Setup
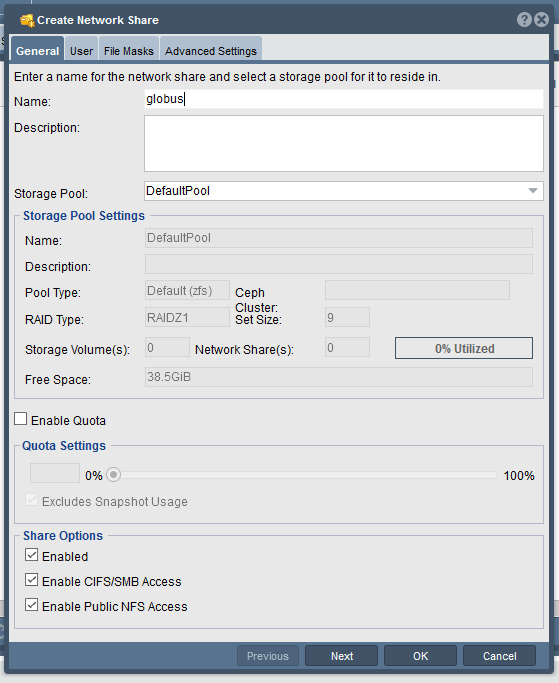
Step 1: Configure a network share in QuantaStor to be used as an endpoint for Globus Connect Server.
Step 2: Create a user on the Globus Connect Server to be used for the endpoint. You will be prompted for this later when activating the endpoint.
Step 3: Mount the network share from the QuantaStor storage appliance on the Globus Connect Server
root@qsglobus01:~# mkdir /mnt/globus
root@qsglobus01:~# mount -t nfs 10.0.27.48:/export/globus /mnt/globus
root@qsglobus01:~# df -h
Filesystem                 Size  Used Avail Use% Mounted on
udev                       1.9G     0  1.9G   0% /dev
tmpfs                      395M  792K  394M   1% /run
/dev/sda1                   20G  3.0G   16G  16% /
tmpfs                      2.0G     0  2.0G   0% /dev/shm
tmpfs                      5.0M     0  5.0M   0% /run/lock
tmpfs                      2.0G     0  2.0G   0% /sys/fs/cgroup
tmpfs                      395M     0  395M   0% /run/user/1000
10.0.27.48:/export/globus   39G     0   39G   0% /mnt/globus
