Network Shares
QuantaStor Network Shares provide NAS (Network-Attached Storage) access to storage pools via NFSv3, NFSv4, SMB2, and SMB3 protocols. To provision a Network Share first a Storage Pool must be created from which Network Shares may be provisioned. With QuantaStor's storage grid technology one can provision Network Shares from any pool on any system in the grid regardless of where it is located. QuantaStor also has Network Share Namespaces which span systems and make it easy to categorize Network Shares into folders which are called namespaces. QuantaStor Network Shares support a broad spectrum of features including quotas, user & group quotas, compression, encryption (inherited from the pool), remote-replication, snapshots, cloning, snapshots of snapshots, Avid integration, and more. Each Network Share resides within a specific Storage Pool and storage pools can move between systems (much like a VM can move between hypervisor hosts) if configured in high-availability mode. Storage Pools may be used to provision and serve NAS storage (Network Shares) and SAN storage (Storage Volumes) at the same time.
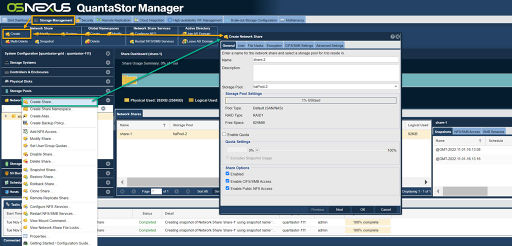
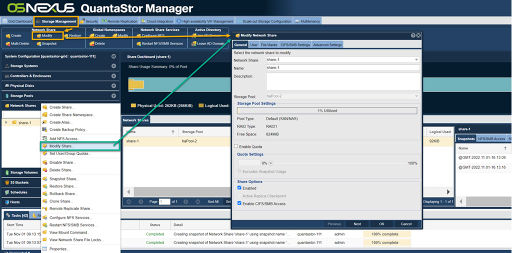
To create a Network Share right-click on a Storage Pool and select Create Share.... Alternately, select the "Network Shares" section from the tree view and then choose Create from the "Network Share" toolbar. Network Shares can be concurrently accessed via both NFS (Network File System) and CIFS (Common Internet File System) protocols. After providing a name, optional description for the share, and select the Storage Pool in which the Network Share will be created. There are a few other options you can set including protocol access types and a share level quota. From the Encryption tab one can apply Software Encryption and optionally set an encryption passphrase. When a share is provisioned with encryption, it shall remain encrypted for its entire life span. After a Network Share has been created/provisioned it may be modified via the "Modify Network Share" dialog from the "Network Shares" toolbar or right click on a Network Share and selecting Modify Share.... These options all fall under the General, User, File Masks, CIFS/SMB Settings and Advanced Settings tabs.
Quota Management - General tab
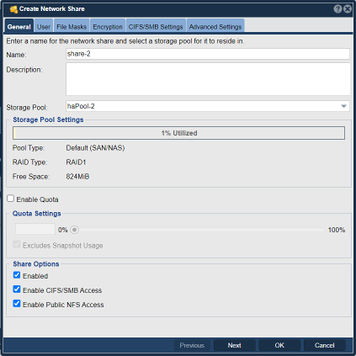
Each Network Share may be configured with a quota to limit how much storage users can access within the share. Quotas are adjustable from both the "Create Network Share" and "Modify Network Share" dialogs. Quotas are important in shared environments with heavy storage users or when charge-back accounting necessitates setting quotas. Network Shares with no quotas assigned may use all the available free space in the Storage Pool in which it resides. To enable hard quota capacity limits on a share select "[x] Enable Quota" and then move the slider bar or enter a specified quota amount. When typing in a specific quota capacity the suffixes of TB, GB, MB are all allowed.
QuantaStor network shares can be managed directly from the Microsoft Management Console (MMC) console Share Management section from Windows Server. This is often useful in heterogeneous environments where a combination of multiple different filers from multiple different vendors is being used.
It is also possible to set this capability globally for a system by customizing the underling configuration file for Server Message Block (SMB) which is outlined here.
Enabled
Select the "[x] Enabled" check-box to enable CIFS access to the network share. CIFS is a dialect of SMB. When you first select to enable CIFS access the default is to make the share public with read/write access. To adjust this so that you can assign access to specific users or to turn on special features you can adjust the CIFS settings further by selecting the "[x] Enable CIFS/SMB Access" check box.
For additional information see Varonis, CIFS vs SMB: What’s the Difference?
Enable CIFS/SMB Access
The "[x] Enable CIFS/SMB Access" option acts as a master switch to enable/disable CIFS/SMB Access for the Network Share while preserving other share options.
Enable Public NFS Access
By default, "[x] Enable Public NFS Access" is checked, you can un-check this option to turn off NFS access to this share. Later you can add NFS access rules by right-clicking on the share and choosing 'Add NFS Client Access...'.
Controlling SMB/CIFS User & Group Access - User tab
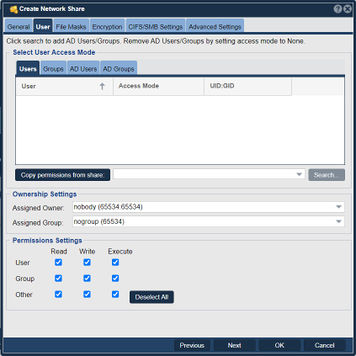
User and group access via the SMB/CIFS protocol is adjustable from the User tab in both the Network Share Create and the Network Share Modify dialogs. After selecting the User tab one is presented with a group of tabs which categorize storage grid users and groups separately from Active Directory (AD) Users and Groups. Unless a given share is configured as public each user that needs access to the share must be explicitly assigned as a Valid User or Admin User for the share. To assign groups of user's access to a given share use the Groups and/or AD Groups section to assign access at the group level. Admin Users are given special rights to adjust the Windows Access Control Lists (ACLs) associated with a given share so that they may manage access control to the share from the Windows side and within the Microsoft Management Console (MMC). Storage grid users which were added via the Users & Groups tab within QuantaStor may also be assigned access to shares. These users and groups have Unix UIDs and GIDs which are auto-generated but they may also be changed via the create and modify dialogs for users and groups respectively.
Ownership Settings
Separately from controlling specific SMB/CIFS access are the Ownership Settings which sets the POSIX UID (User ID) and GID (Group ID) ownership settings for a given network share. This setting is important for both SMB and NFS access. The owner of the share is allowed to change the ownership of files and subdirectories of the share and to assign SMB ACLs to the share to delegate management to other users and groups from within Windows. Note that the Windows ACL settings need to work together with the User Access Mode settings discussed above. For example, if an AD user Mary is given access via adjustment of Windows ACLs from an administrator accessing a given share via the MMC, the Mary user account also needs access via an AD User or AD Group setting on the share of Valid User which grants her access.
Permissions Mask - File Masks tab
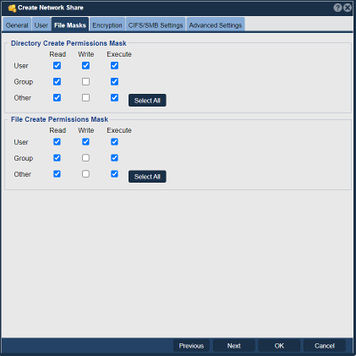
The Permission Settings set the read, write, and execute permissions for the assigned share. The User column applies to the owner of the share whereas the Group and Other columns refer to group members and non-group user access to the share. In most cases the User column should be set such that the Owner of the share has access to read/write/execute.
Adjusting Default File Permissions Mask Settings - File Masks tab
When new files and directories are created within a given network share, they will inherit the file and directory permissions mask settings indicated here.
CIFS/SMB Settings - CIFS/SMB Settings tab
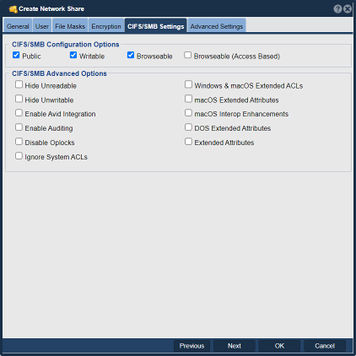
The CIFS/SMB settings allows setting CIFS/SMB Configuration and Advanced Options.
Avid(tm) Integration / Unityed Media VFS Support
Unityed Media is a special Samba VFS (Virtual File System) module that's integrated into QuantaStor to provide Avid Media Composer(tm) users with capabilities typically only available on Avid Nexus hardware. To enable the special share features for Avid media sharing simply check the box indicating "[x] Enable Avid Integration". With Avid integration enabled SMB users each get a separate Avid meta-data MXF folder which enables them to concurrently work on the same Avid project folders at the same time.
Hide Unreadable & Hide Unwritable
To only show users those folders and files to which they have access you can set these options so that things that they do not have read and/or write access to are hidden.
When creating or modifying a Network Share there are a number of advanced options which can be set to tune the share to work better in a Windows or OS/X environment including options for extended attributes, and for hiding unreadable and/or unwritable files.
Extended attributes
Extended attributes are file-system features where extra metadata can be associated with files. This is useful for enabling security controls (ACLs) for DOS and OS/X. Extended attributes can also be used by a variety of other applications so if you need this capability simply enable it by checking the box(es) for DOS, OS/X and/or for plain Extended Attribute support.
Advanced Configuration Options - Advanced Settings tab
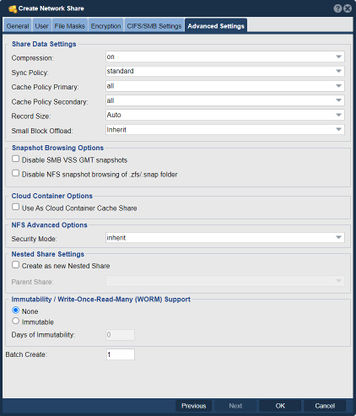
There are several advanced configuration options available to be adjusted for Network Shares including compression, sync policy, record size (similar to block size), extended attributes, and special features like Avid Media Composer(tm) integration. Options for Snapshot browsing, Cloud container cache, NFS security, and Nested share creation are available.
Data Compression
Network Shares and Storage Volumes inherit the compression mode and type from whatever is set for the Storage Pool from which they are provisioned unless explicitly adjusted. Compression levels may be adjusted specifically for any given Network Share to meet the needs of the data contained within the share. For network shares that contain files which are heavily compressible you might increase the compression level to gzip (gzip6), but note that it'll use more CPU power for higher compression levels. For network shares that contain data that is already compressed, you may opt to turn compression 'off'.
Note, this feature is specific to ZFS based Storage Pools.
Cache Sync Policy
The Sync Policy indicates the strategy that the pool uses to optimize writes to a given network share. Standard mode is the default and uses a combination of synchronous and asynchronous write modes to ensure consistency while optimizing write performance. If I/O write requests have been tagged as SYNC_IO then all IO is first sent to the file-system intent log (ZIL) and then staged out to disk, otherwise the data can be written directly to disk without first staging to the intent log. In the Always mode the data is always sent to the file-system intent log first irrespective of whether the client has specified a given write request as SYNC. The Always mode is generally a bit slower but technically safer if the client is not properly tagging the IO. Databases and virtualization platfoms generally mark all write I/O as SYNC. An SSD based write log will greatly accelerate storage pool performance for all workloads and systems using the SYNC write mode. With an SSD write log in place IOs are combined into transaction groups which greatly improves overall IOPs performance. The Sync Policy for each Network Share is inherited from the Storage Pool from which the share is provisioned but may be adjusted on a per-share basis using the Modify Network Share dialog.
Disable Snapshot Browsing
Snapshots can be used to recover data and by default your snapshots are visible under a special ShareName_snaps folder. If you don't want users to see these snapshot folders you can disable it.
Note, you can still access the snapshots for easy file recovery via the Previous Snapshots section of Properties page for the share in Windows.
CIFS Configuration Options
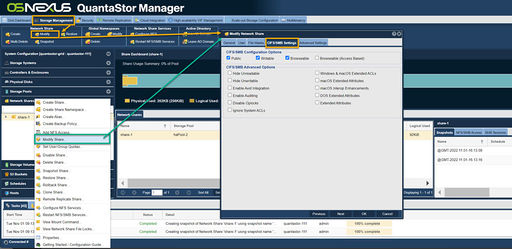
There are a number of custom options that can be set to adjust the CIFS/SMB access to your network share for different use cases. Under the 'CIFS/SMB Settings' tab the 'Public' option makes the network share public so that all users can access it. The 'Writable' option makes the share writable as opposed to read-only and the 'Browseable' option makes it so that you can see the share when you browse for it from your Windows server or desktop. The 'Advanced Options' tab allows modification of Share Data Settings, Snapshot Browsing Options, Cloud Container Options, NFS Advanced Options, and Nested Share Settings.
NFS Access Management
QuantaStor supports NFS access via NFSv3 and NFSv4 at the same time. To use one mode versus another simply change the NFS mount options at the client side to use ones preferred protocol. NFS access may be managed via Kerberos but in general NFS access is managed by allowing or disallowing access to specific IP addresses and/or networks. In QuantaStor these NFS access entries are called Network Share Client Access entries and sometimes NFS Client Access entries. NFS access entries appear in the tree view as child objects of the Network Share and can be modified/edited to apply special options or deleted by using the right-click on Add NFS Access... from the pop-up menu when the share or Client Access entry is selected.
Configuring NFS Services
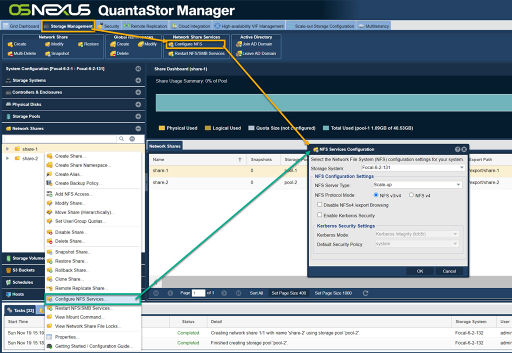
The default NFS mode is to support both NFSv3 and NFSv4 but the service may be configured via the NFS Services Configuration dialog to force the system into NFSv4 mode. To access this dialog select the Storage Management tab from the Main Tab, then Network Share from the tree view, then Configure NFS from the Network Share Services toolbar. One can also right click on a Network Share in the tree view and select "Configure NFS Services..." from the right click menu.
Controlling NFS Access
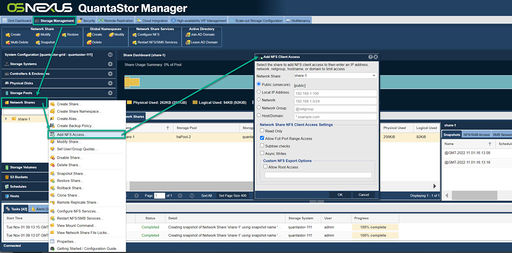
NFS share access is filtered by IP address. This can be done by right clicking on a network share, and selecting "Add NFS Access...". By default the share is set to have [public] access. This dialog allows one to enable access to specific IP address, a range of IP addresses, or to specific networks.
NFS Client Access Settings & Custom Options
Often times shares access will require special options like no_root_squash and these are all adjustable in the from within the "Modify NFS Client Access" dialog and in the Advanced Settings section in the Add NFS Client Access dialog. To access the Modify NFS Client Access... dialog simply expand the Network Share in the tree view, then right-click on an access entry and select "Modify NFS Client Access..". Various NFS client access options are presented including "Read Only", "Allow Full Port Range Access", "Subtree checks", and "Async Writes". You can also add custom options such as "no_root_squash" in the space provided below.
Active Directory Configuration
QuantaStor systems can be joined to an AD domain so that CIFS/SMB access can be applied to specific AD users and AD groups.
Note: that each QuantaStor system can only be joined to a single AD domain and that each system must be individually joined to an AD domain.
To configure an Active Directory either select "Configure Active Directory" from the Network Share Services of the Network Share Services toolbar or right click on a network share in either the center or left panes and select "Configure Active Directory...".
Joining an AD Domain
To join a domain first navigate to the "Network Shares" main tab section. Next select "Configure CIFS" from the toolbar, or by right-clicking in the "Network Shares" section and selecting "Configure CIFS Services..." from the pop-up menu. Check the box to enable active directory, and provide the necessary information. KDC is most likely your domain controllers FQDN (DC.DOMAIN.COM).
Note, Your storage system name must be <= 15 characters long.
If there are any problems joining the domain please verify that you can ping the IP address of the domain controller, and that you are also able to ping the domain itself.
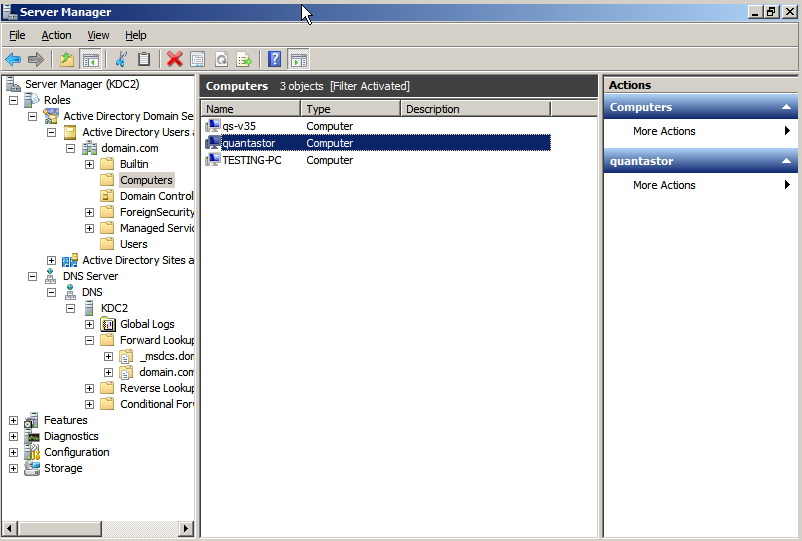
Once a given QuantaStor system has been joined to an AD domain, verify that it has been added by logging into the AD Domain Controller and then check under the Computer entry tab for the system.
Active Directory User & Group Name/ID Caching
QuantaStor caches AD user names and their associated Unix user ID and group ID (UID/GID) information to accelerate user and group searching from within the web UI. If one has recently added users or groups to an Active Directory configuration then the user or group name should be explicitly specified when searching since the QuantaStor service cache may be stale. User and group specific lookups do not rely on the cache so they will return a result even if the cache is out of date.
Active Directory Caching for Large Enterprise Deployments
For large Active Directory environments (10K-100K+ users and groups) it can take a long time for QuantaStor to gather information from AD to populate QuantaStor's internal cache. If it takes too long the scan will timeout and the AD information list presented to the user in the web user interface will be empty. To account for the slow interaction with some AD servers in large environments QuantaStor has some advanced options for pre-caching information for large Active Directory environments which is documented and outlined in this section.
Leaving an Active Directory Domain
To leave a domain first navigate to the Network Shares section and press the Active Directory Configuration button in the toolbar or by right-clicking in the "Network Shares" space and selecting "Active Directory Configuration" from the pop-up menu. Uncheck the checkbox to disable Active Directory integration and press OK. To remove the Computer entry from to AD domain controller one must specify the Domain Administrator username and password. After pressing OK the selected QuantaStor system will leave the domain.
Verifying Users Have CIFS/SMB Passwords
Older QuantaStor v2 & v3 systems were designed such that user accounts could not be implicitly used for SMB access, just management access. If a given user has the CIFS Ready property set to Password Change Required then the password for that user must be changed before the user account can be used to access SMB/CIFS shares. To do this simply select the user from the User & Groups section then select "Set Password" to change it via the change password dialog. Administrator users may change the password without having to supply the old password. After the password has been changed the property will update and will now show up as SMB/CIFS Ready.
