VM/VSA Install
QuantaStor may be installed on both bare-metal servers or as a guest VM using any of the major hypervisors including VMware ESXi, Microsoft Hyper-V, Citrix XenServer, and Linux KVM. VM installations are best for remote-site DR configurations, NAS Gateways, and small scale remote-office or cloud NAS use cases. When QuantaStor is installed as a guest VM this is known as a Virtual Storage System (VSA).
Contents
- 1 Installing to VMware Workstation 9 (Virtual Storage System)
- 2 Installing to VMware ESXi (Virtual Storage System)
- 3 Installing to Oracle VirtualBox (Virtual Storage System)
- 4 Installing to Citrix XenServer v7.x (Virtual Storage System)
- 5 Installing to Microsoft Hyper-V (Virtual Storage System)
- 6 Installing QuantaStor VSA to an Amazon EC2 Instance
Installing to VMware Workstation 9 (Virtual Storage System)
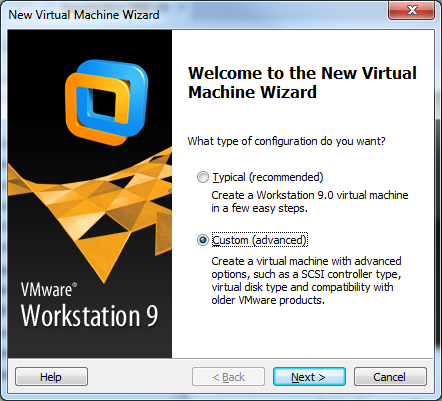
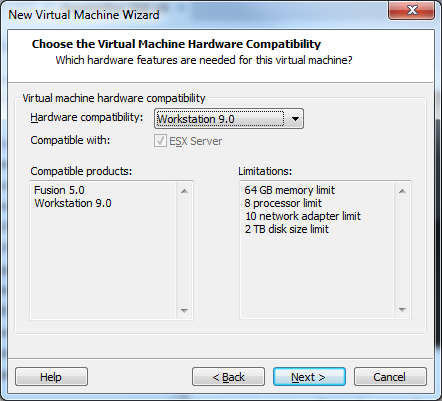
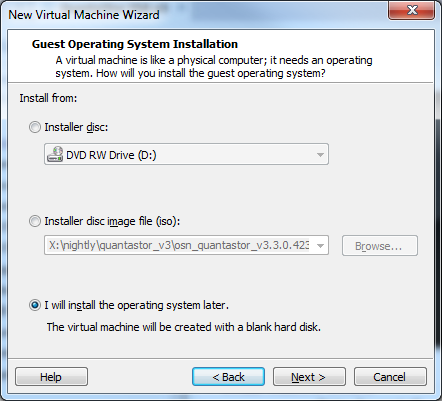
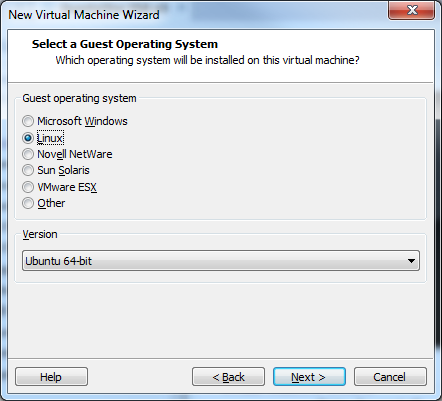
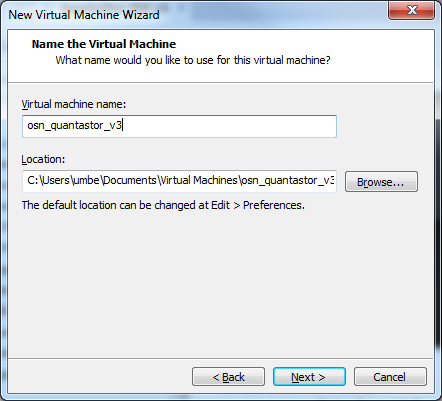
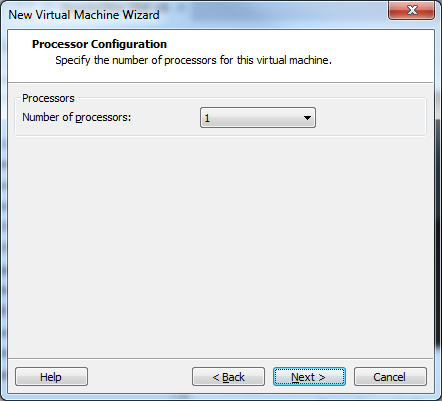
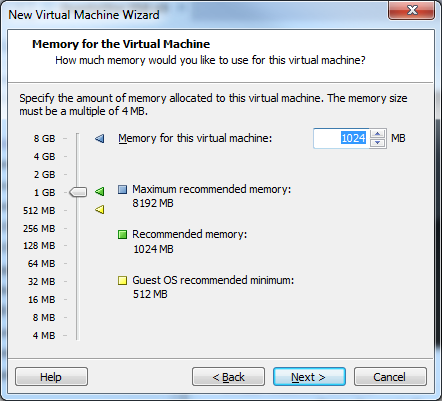
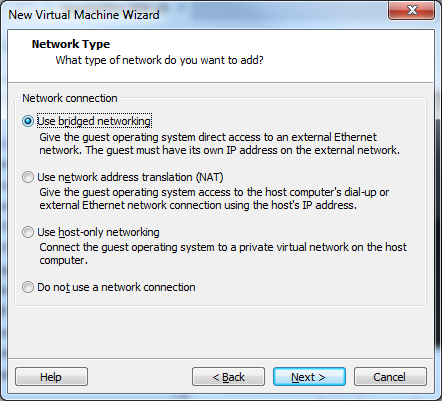
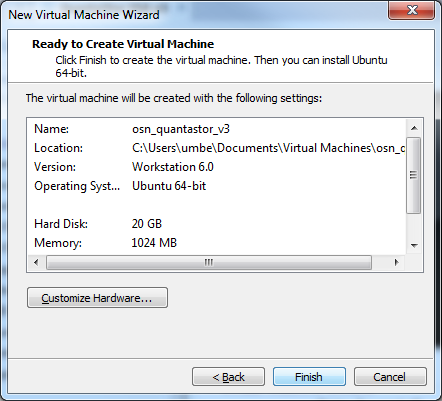
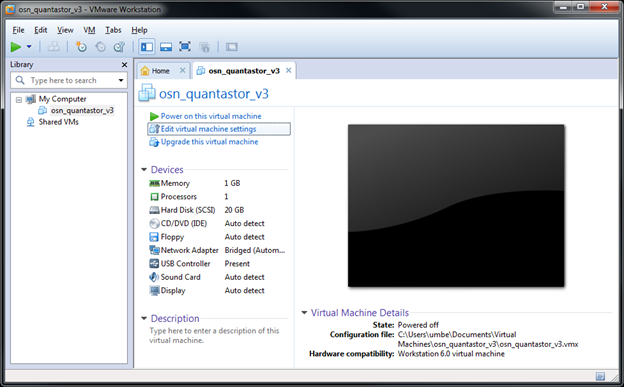
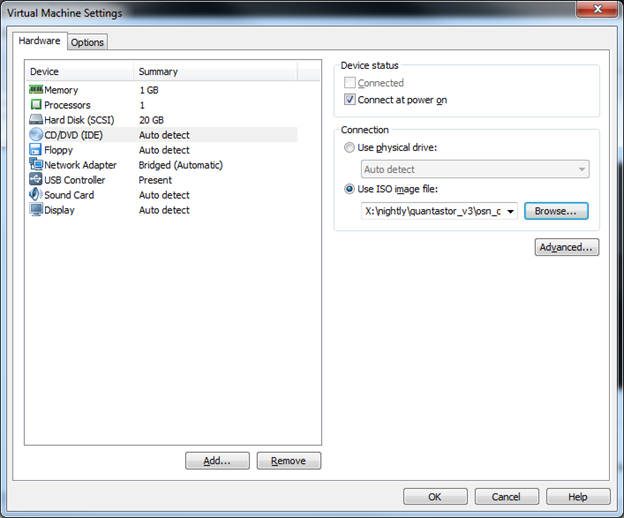
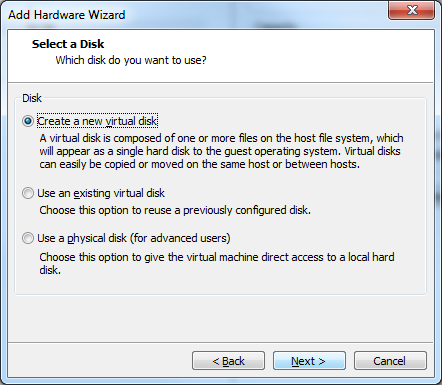
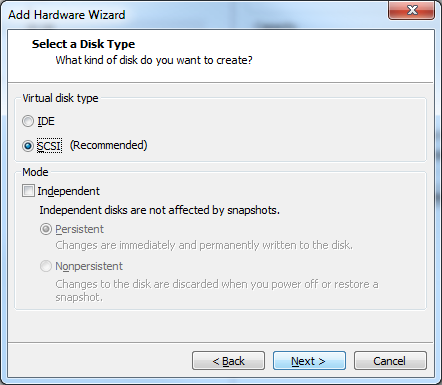
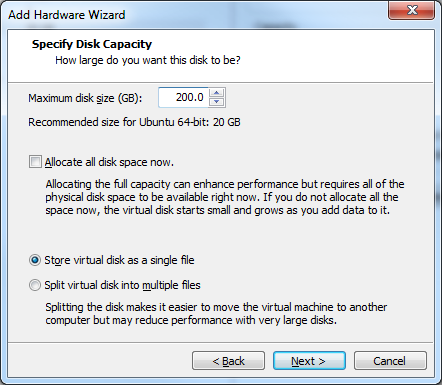
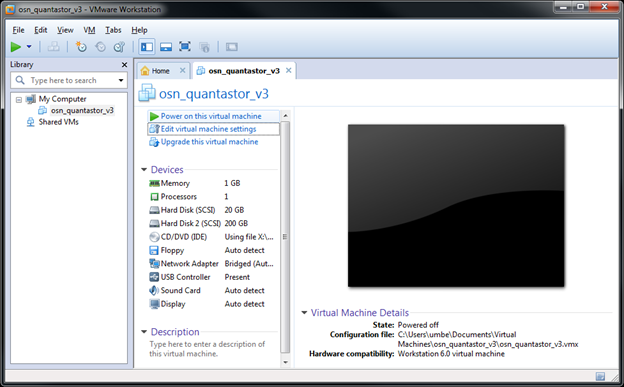
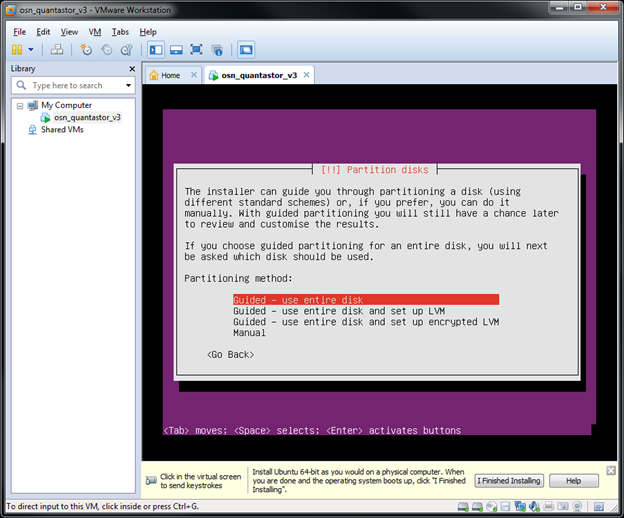
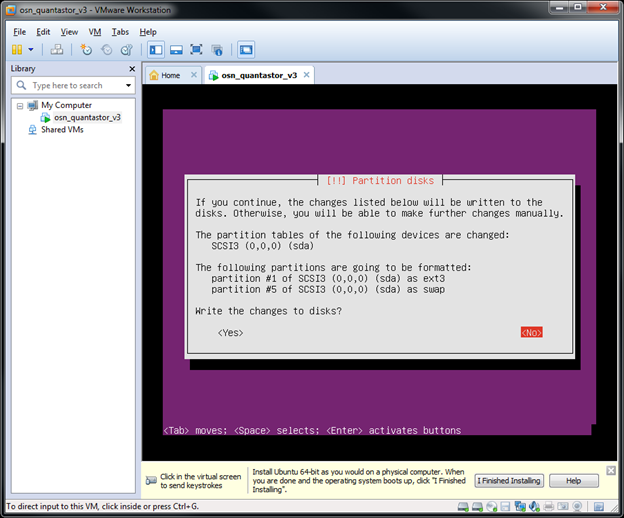
There is just one key step to successful installation on VMware Workstation 9 and that is to *not* use the Easy Installer. The Easy Installer will bypass the QuantaStor custom installation steps and will result in installing just Ubuntu Server. To bypass 'Easy Installer' and ensure the QuantaStor custom installation steps are run, simply choose 'I will install the operating system later.' and the virtual machine will be created with a blank hard disk. After you have created the VM instance you can then 'Edit Virtual Machine Settings' in order to point it to your QuantaStor CDROM or ISO image and begin the install.
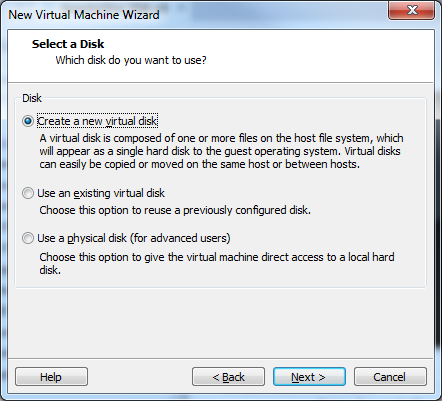
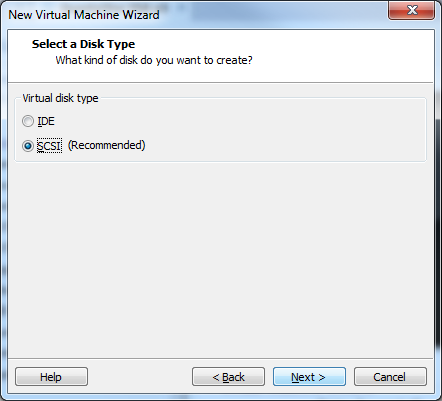
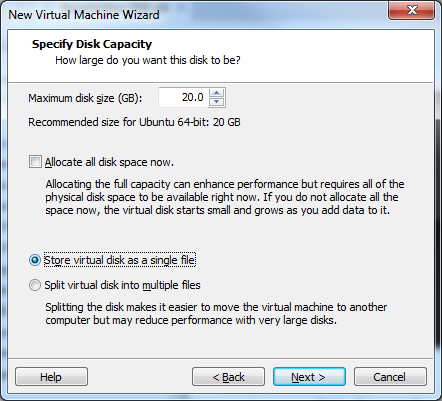
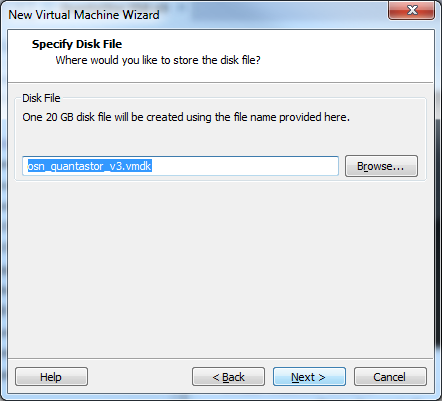
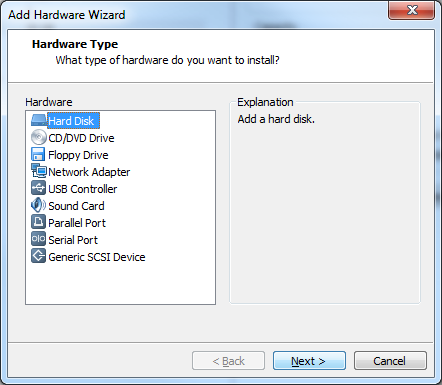
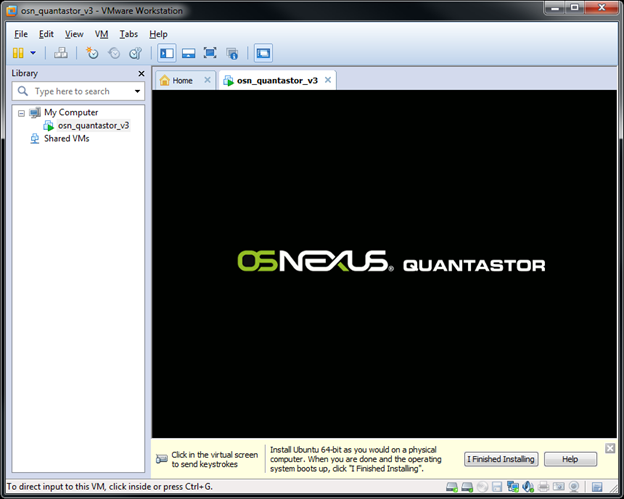
Here are a series of screenshots to illustrate the installation process:
Note that the default console user is 'qadmin' and the default password is 'qadmin'. The console account is completely separate from the QuantaStor web management interface account which is 'admin' with the initial password of just 'password'.
Installing to VMware ESXi (Virtual Storage System)
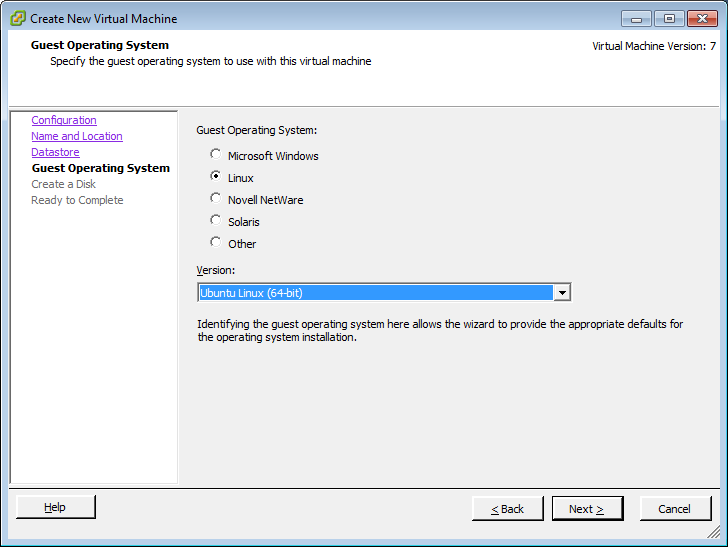
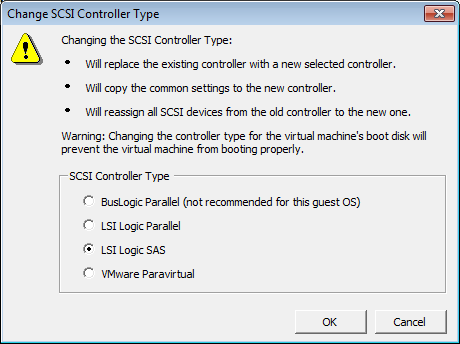
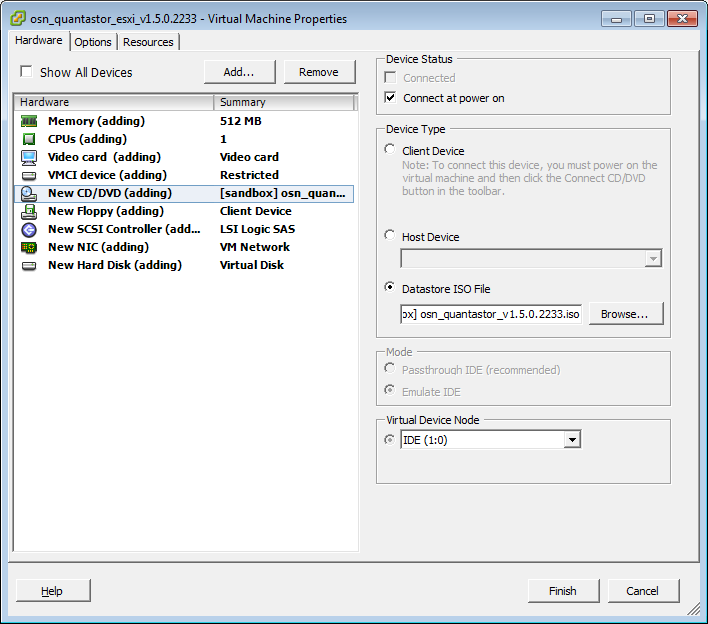
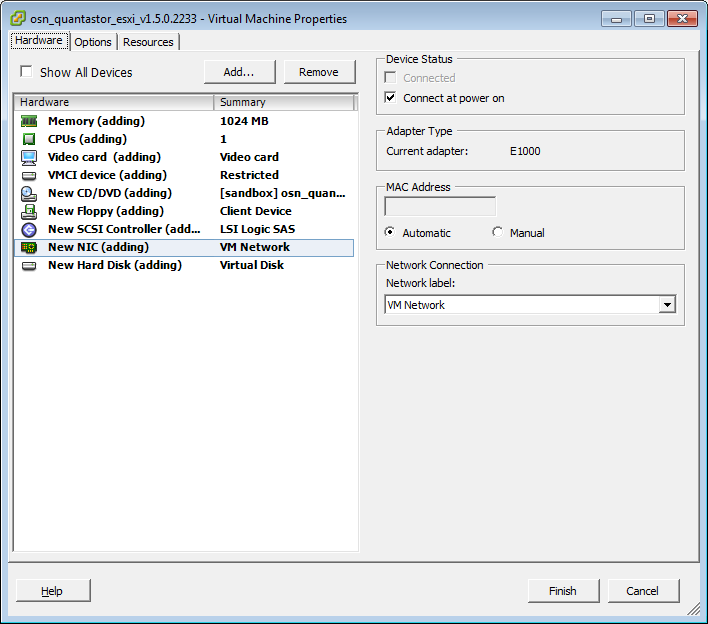
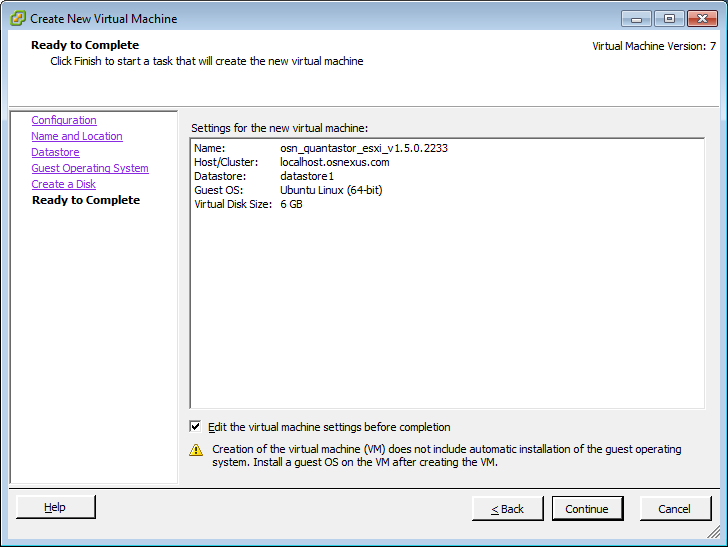
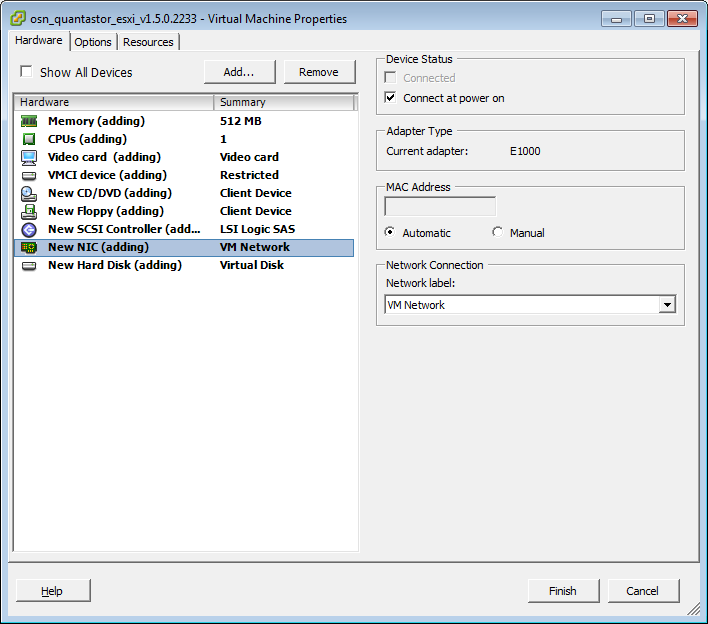
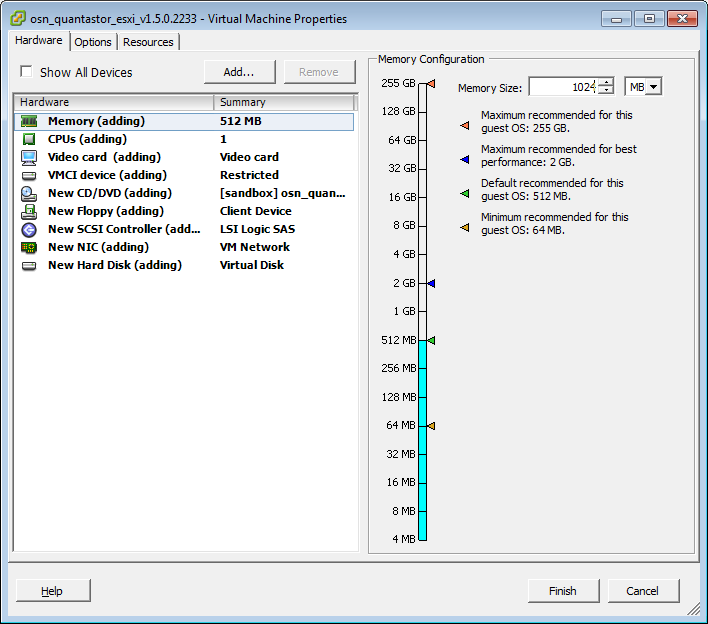
Using VMware with ESXi requires some specific settings to be chosen as part of the VM creation process. In this section we'll go step by step through each screen the VM creation wizard in the vSphere Client so the overall process is a snap.
Installing to Oracle VirtualBox (Virtual Storage System)
Getting a QuantaStor storage system setup as a virtual system is one of the easiest ways to get started with QuantaStor to test out the features and get a feel for the product. To install QuantaStor as a VirtualBox virtual system you'll first need to download the virtual system from our downloads page, and you'll need to install the latest version of VirtualBox from their website http://www.virtualbox.org.
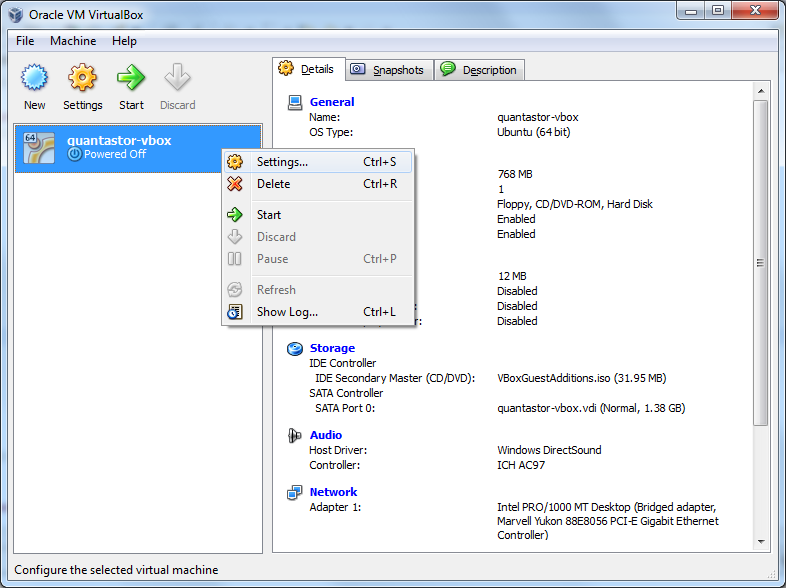
Once you have the quantastor_vsa_ovf.zip file downloaded you'll need to unzip the file. In there you will find a file with a .ovf extension and some associated files, that's what you'll be importing as a virtual system. Now you'll need to startup VirtualBox and select 'Import System...' from the 'File' menu. Next you'll select the .ovf file that you unzipped from the quantastor_vsa_ovf.zip in the previous step. That's all there is to it. Note that by default QuantaStor is setup to use Bridged Networking so that your hosts can access the exported iSCSI targets exposed by the VM.
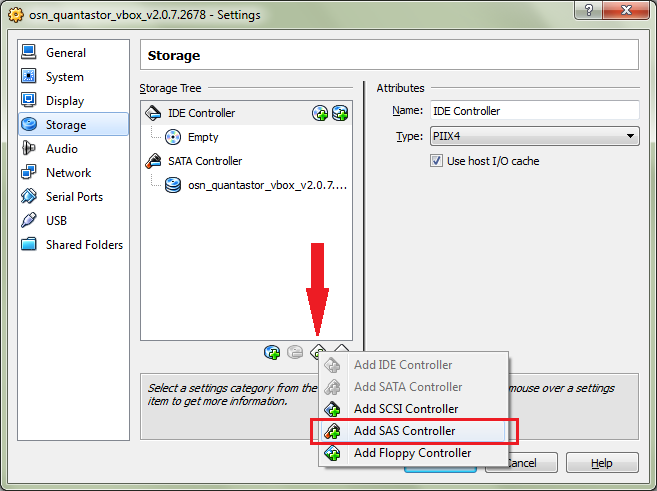
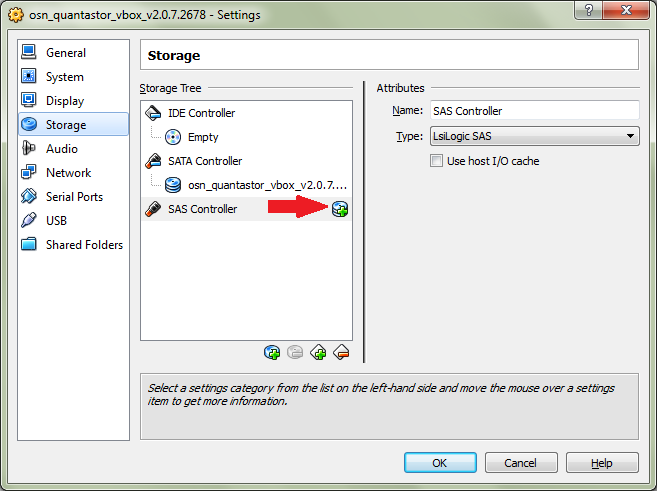
Adding disks to your QuantaStor Virtual Storage System
Configuring your QuantaStor VSA VirtualBox System
Now that you have one or more disks attached to your imported system, all you need to do now is to start it up and configure it as per the general Getting Started Guide.
Installing to Citrix XenServer v7.x (Virtual Storage System)
Running QuantaStor as a virtual storage system (VSA) can be installed from our ISO. There are just a few steps to get started.
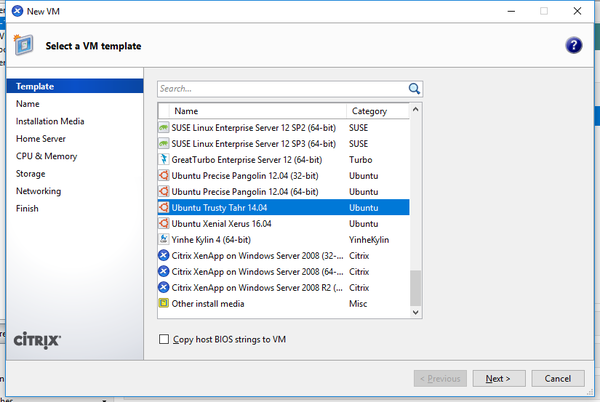
After clicking the 'New VM' option, you will need to select the 'Ubuntu Trusty Tahr 14.04' option and click 'Next'.
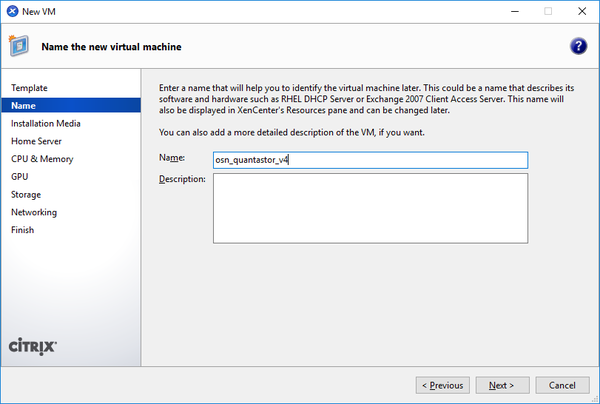
Next you'll need to name the virtual machine and click 'Next'.
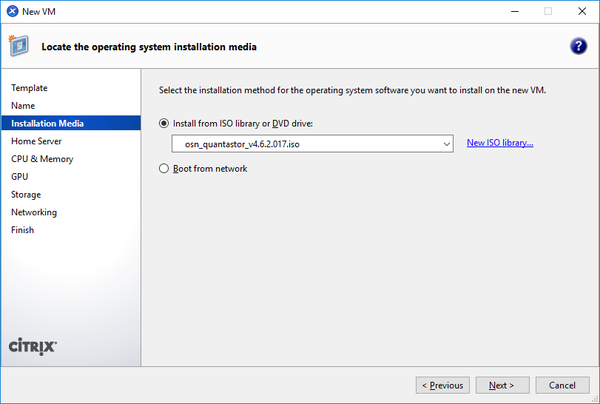
Next select the ISO image that you intend to install from, whether this is from an ISO library or DVD drive. Select the latest QuantaStor ISO and click 'Next'.
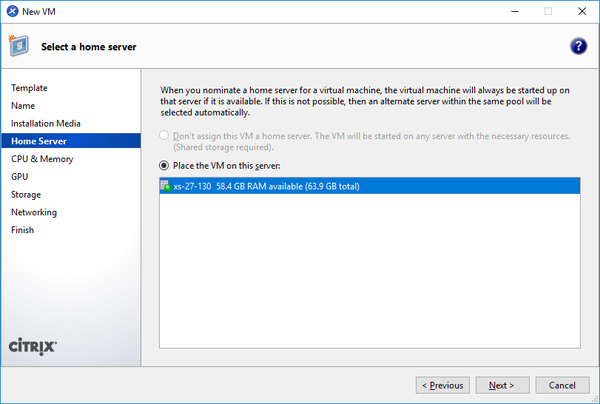
Next select the home server and click 'Next'.
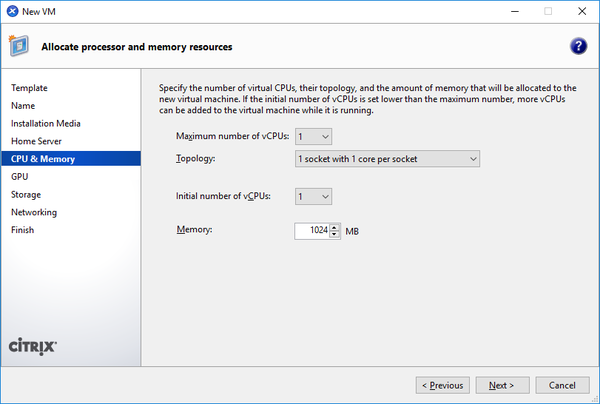
Next allocate processor and memory resources. For a test environment 1 vCPU and 1GB of RAM is fine, but you will need 2GB of RAM if you're using scale-out NAS. Click 'Next'.
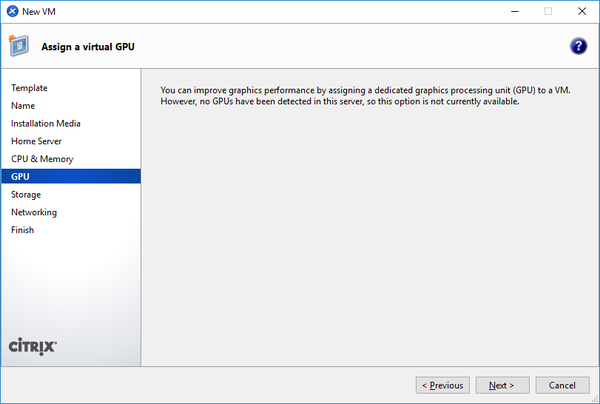
You might be given an option to assign a virtual GPU. In this example we don't have a GPU and for QuantaStor you won't need one so just click 'Next'.
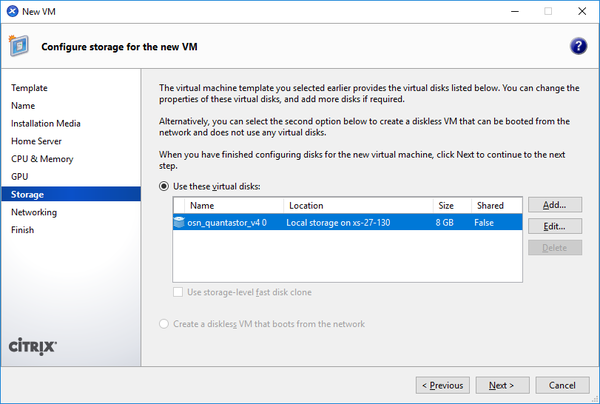
Next configure the storage. We recommend 6GB or more for your virtual machine, but more than 32GB is unnecessary unless you plan to install custom applications on your virtual storage system. Click 'Next'.
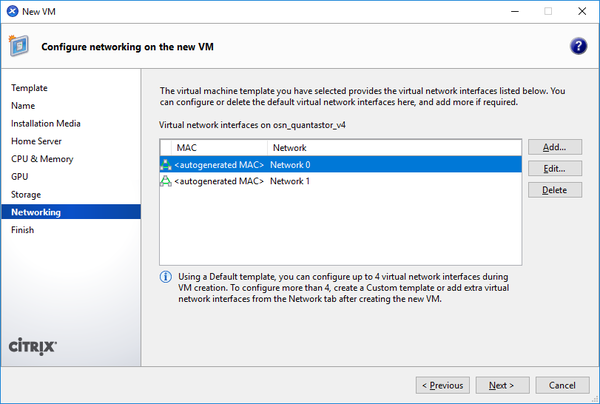
Next configure networking. We would recommend at least 1 virtual network interface. Click 'Next'.
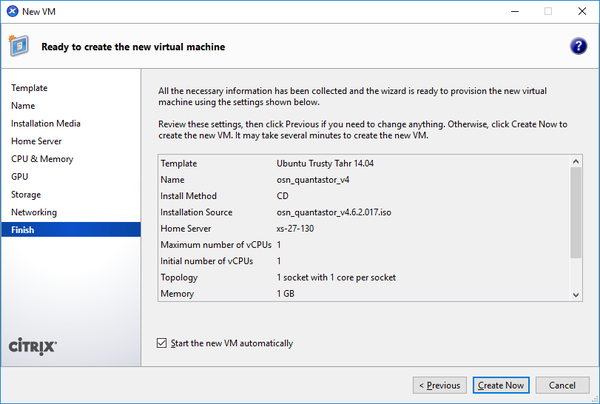
Now you're ready to create the virtual machine. Take a moment to go over the selected configuration. When you are happy to proceed click 'Create Now'.
Installing to Microsoft Hyper-V (Virtual Storage System)
Running QuantaStor as a virtual storage system (VSA) can be done by installed from ISO, but there's a few configuration changes that you'll need to make after you create the virtual machine.
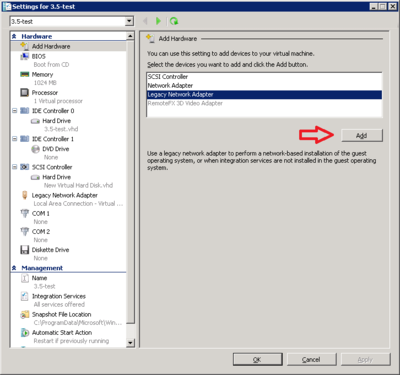
One change is to add a Legacy Network Adapter as the installation process will not be able to access the network using the standard adapter. To do this navigate to the VM's settings. In the 'Add Hardware' section, add a 'Legacy Network Adapter'. Now configure this to your choosing. Then select the network adapter created from the create VM wizard, and remove it.
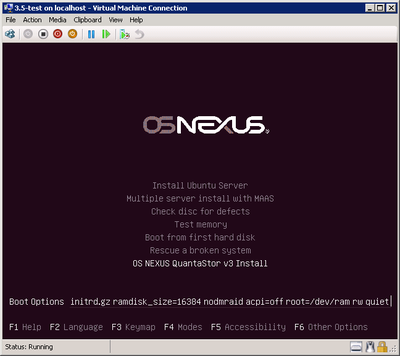
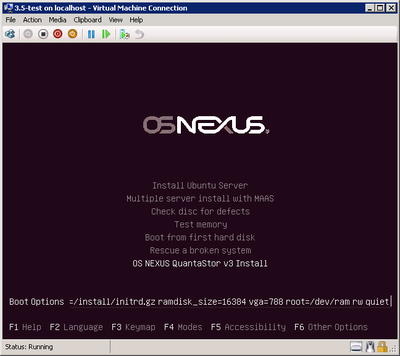
The next change is during the installation of QuantaStor. When the iso is first being loaded hit the 'f6' key when on the language selection screen (you may have to hit it before you see the screen as Hyper-V sometimes doesnt load the screen in time before the language is selected). This will bring up an options screen. Hit 'f6' again to bring up 'Other Options', and then hit escape to close it. This step is to bring up the boot options string that we will now modify. In the boot options string that is listed remove 'nodmraid' and 'acpi=off'. You will also want to add the field 'vga=788' to fix some graphical issues that occur sometimes. Now hit enter to start the installation.
The options on the left should be changed to look like the options on the right.
You can now install QuantaStor onto your virtual machine just as you would any other operating system. Note that you should allocate at least 1GB of RAM to your QuantaStor VM and you should allocate at least a 30GB + the number of GB in RAM virtual hard drive for use as your boot/system disk. Example: A system with 32GB in ram should have atleast 62GB in hard drive space.
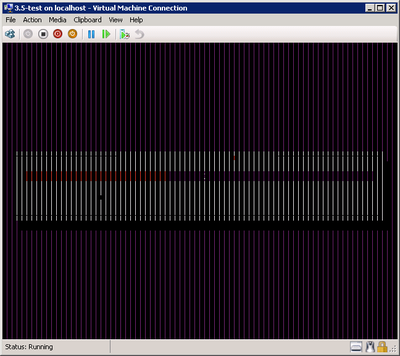
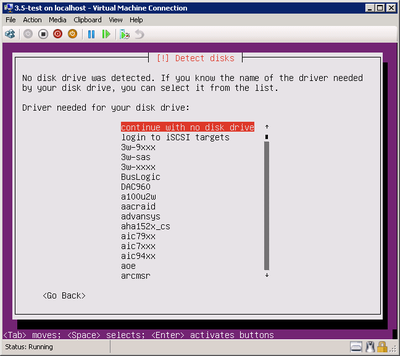
Here are some of the problems you may encounter if you do not make these changes. As you can see the graphics might not be displayed properly, and the disks may not be discovered.
Installing QuantaStor VSA to an Amazon EC2 Instance
The following steps summarize the process for installing QuantaStor in the Amazon AWS cloud by starting with an Ubuntu Server 14.04 image and then upgrading it to a QuantaStor Virtual Storage System.
Selecting an Amazon Machine Image
We currently do not have an Amazon Machine Image for QuantaStor so the installation procedure requires upgrading a stock Ubuntu Server 14.04 image to use as a starting point. You'll find these in the AMI image marketplace here: https://aws.amazon.com/marketplace/pp/B00JV9JBDS
EC2 Firewall Configuration
Be sure to open up the TCP port 3260 to your QuantaStor system so you can access your iSCSI devices from other machines in the cloud. Next you'll need to open up the TCP port 22 on your QuantaStor system so you can login to the SSH to the console. You'll also need access to port 22 for remote replication. Finally, open up port 80 and/or 443 so that you can access the QuantaStor web management interface, and if you're going to be replicating between a local QuantaStor instance and your Amazon Cloud instance you'll need to open TCP port 5151. In summary, open the TCP ports 80, 443, 5151, & 3260.
EC2 PEM Files / SSH Login
When you create and download your .pem key file, remember to use PuttyGen to convert the .pem key into a .ppk private key that you can load into Pageant, after that you'll be able to login to the system as 'ubuntu'. If you're not familiar with PuTTY, it is a free SSH client for Windows that allows you to login to the QuantaStor console remotely over a secure connection. You'll need to login to your Ubuntu Server Amazon Machine Image using SSH in order to upgrade/convert it to a QuantaStor system. PuTTY is available here [1]:
Upgrading the Amazon Machine Image
To install QuantaStor onto your Amazon machine image after you have it created you'll need to login to the VM via SSH and run these commands:
echo "deb http://packages.osnexus.com/packages trusty main" > /etc/apt/sources.list.d/osnexus.list
wget http://packages.osnexus.com/packages/osnexus.gpg
apt-key add ./osnexus.gpg
apt-get update
apt-get install qstorservice qstormanager
Installing the QuantaStor Kernel
QuantaStor requires a number drivers which are not included with the standard AWS Ubuntu 3.13 kernel. As such a kernel upgrade is required to upgrade the system to a QuantaStor kernel build. This is done by running the following script as root:
sudo qs-kernelupgrade
Note that the qs-kernelupgrade stage will pause and report some grub errors and dkms errors as it goes along and these should be ignored. Please give the upgrade process at least 20 minutes to run. After the kernel upgrade is complete and you're presented with the command prompt again, it'll be time to reboot the VM.
reboot now
After the reboot verify that the system started with the new kernel. You'll want to see 4.4.0-112-generic in the output from running uname like so:
root@ip-10-XXX-XX-XXX:~# uname -a
Linux ip-10-XXX-XX-XXX 4.4.0-112-generic #135~14.04.1-Ubuntu SMP Tue Jan 23 20:41:48 UTC 2018 x86_64 x86_64 x86_64 GNU/Linux
Install Remaining Packages
Now to finish we need to install winbind and update the kerberos default config file:
apt-get update
apt-get install winbind ceph radosgw
cp /etc/krb5.default /etc/krb5.conf
Now verify that the AD config script is working:
/opt/osnexus/quantastor/bin/qs_cifs_dc_setup.py --get_service_config
You should see some output that looks like this:
security =  user
workgroup =  WORKGROUP
realm =
kdc =  QS-KDC
trusteddomain =
