Cloud Containers / NAS Gateway
NAS Gateway / Cloud Container Management
Cloud Containers represent a bucket that has been mapped to a Network Share within QuantaStor. When data is stored in a Cloud Container it frees up space locally on the system, however, reading data back from object services can be slow and can incur a fee or egress.
When creating a Cloud Container on your QuantaStor system, it will appear as a Network Share, which can be accessed via NFS and CIFS.
Object services are beneficial for users who need to store data that does not require frequent access. QuantaStor can be configured to be a NAS gateway for object storage providers, including:
- QuantaStor Scale-Out Object
- Seagate Lyve
- Amazon S3
- Microsoft Azure Blob
- and other S3-compatible services
Note: A Cloud Container can only be used by one QuantaStor system at a time. If you need to add it to another system, please disable it from the first system before activating the container on another.
Adding Cloud Provider Credentials
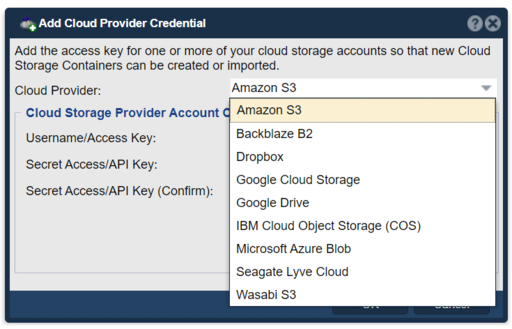
Before you begin, you will need to provide the QuantaStor system access to your object service using the 'Add Credentials' dialog available in the Cloud Credentials area of the WebUI.
Once the 'Add Cloud Provider Credentials' is open, you can select your Cloud Provider and enter the Secret Access Keys.
Note: The credentials for your object service can be found in the security/authentication pages of your object service accounts. In most cases, these will be provided as an 'Access Key' and 'Secret Access Key'. Other providers may use something else.
Once your credentials have been added, you can begin creating cloud containers within QuantaStor.
Creating a Cloud Container
Step One
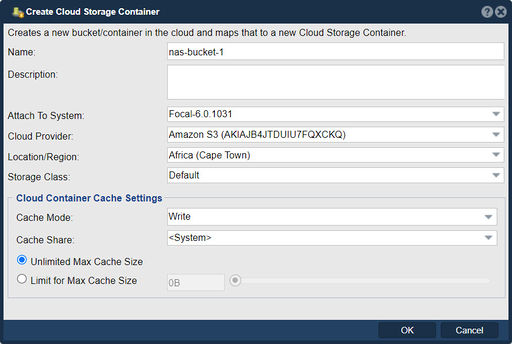
Create a Cloud Container using the 'Create Cloud Storage Container' dialog.
Step Two
Ensure all fields are completed by following the instructions below:
- Name: Type your name as per the bucket naming rules standard. Names for buckets should be unique.
- Description: Optional. Type a description you would like for this Cloud Container.
- Attach to System: Select the system you would like to assign the Cloud Container to.
- Cloud Provider: Select the Cloud Provider, which should have your credentials added from earlier.
- Location/Region: Select the desired location for the bucket.
- Storage Class: Select the desired storage class. In most circumstances, default is the most suitable option.
If you are not sure about any of the above, please contact support@osnexus.com.
Step Three
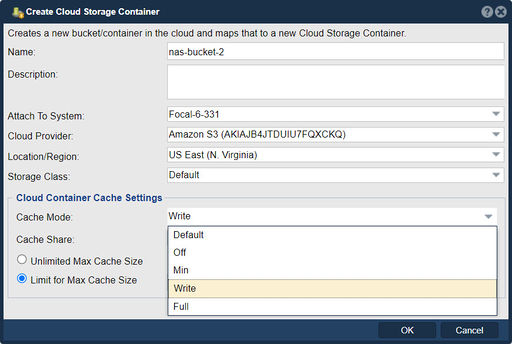
In 'Cloud Container Cache Settings', define the 'Cache Mode' For more information on these modes, see below:
- Write: Files opened for read only are read directly from the object service. Writes and read/write files are buffered to cache first.
- Full (Recommended): All reads and writes are buffered to and from cache. When data is read from the object service, it is buffered to cache as well. In this mode, files in the cache will be sparse files.
- Minimal: Similar to “Off”, except that files opened for reads and writes will be buffered to the cache. Files opened for writes will be more compatible, but will use minimal cache space. Some file operations may not be available with this mode.
- Off: With this mode, the cache will read and write directly to the object service, without any caching. Some file operations may not be available with this mode.
Define the 'Cache Share'. The default option is <System>, which uses the system drive, but a Network Share can be designated if available.
Once satisfied with your selections click OK to create your Cloud Container.
Navigation: Cloud Integration --> Cloud Storage Containers --> Cloud Container --> Create (toolbar)
Once the Cloud Container has been created, you can configure Network Share users and permissions via the Network Shares section of the Web interface: Managing Network Shares
Cloud Container Operations
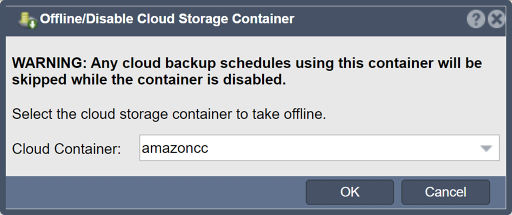
Offline/Disable access to a Cloud Container on a a QuantaStor System: Disable Cloud Container
Navigation: Cloud Integration --> Cloud Storage Containers --> Cloud Container --> Disable (toolbar)
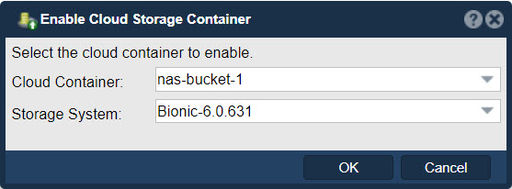
Enabling access to a offline Cloud Container on a a QuantaStor System: Enable Cloud Container
Navigation: Cloud Integration --> Cloud Storage Containers --> Cloud Container --> Enable (toolbar)
For additional information: Cloud Containers/NAS Gateway
Delete Cloud container: Delete the cloud container from the system. This will remove the cloud container from the system, but retain the bucket in the cloud. You can re-add the cloud container later using the 'Add Cloud Container' dialog. To permanently delete the bucket and its contents select "Delete bucket and contents from the cloud."
Importing existing Cloud Containers to a QuantaStor System: Import/Add Cloud Container
Permanently deleting a Cloud Container, it's objects and it's bucket in the Object Storage: Delete Cloud Container
Cloud Provider Support
QuantaStor has support for most major public cloud object storage vendors including Amazon AWS S3, IBM Cloud Object Storage (S3 & SWIFT), Microsoft Azure Blob and others. The sections below outline the configuration steps required to create authentication keys required to make an object storage "bucket" available as NAS storage within QuantaStor.
Amazon Cloud Storage Configuration Steps
Backblaze B2 Cloud Storage Configuration Steps
[Backblaze B2 Cloud Integration]

