IO Performance Tuning
Contents
My Setup
This testing was done with the following setup:
Windows 2008 R2
- four 10GbE ports
Quantastor
- four 10GbE ports
- LSI 9750-8i Controller
- 24 drives
- raid0
MPIO
Setup
Results
LACP
LACP (link aggregation control protocol) involves bonding ports to act as a single network connection. Instead of having to split the traffic across multiple networks, setting up LACP allows for the ports to be viewed as one large port. This also means that if one of the connects fails, the LACP will still be able to function (just at reduced performance).
For our setup the four network connections on the Windows side were bonded together, and the four network connections on the Quantastor side were bonded together. They were then connected to each other through our switch.
Setup
Setting up LACP on the Quantastor side is very simple. First create a bonded group of Ethernet ports. This can be done by first navigating to the "Network Ports" tab under the "Storage System" section. Right click in the empty space under the network ports and select "Create Bonded Port". Assign the port the desired IP address and select the ports to be bonded. In our setup we bonded all four ports together. The last step is to right click on the storage system and select "Modify Storage System". At the very bottom under "Network Bonding Policy", select LACP. Everything is now setup for LACP on the Quantastor side.
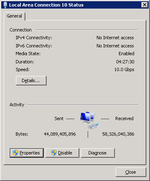
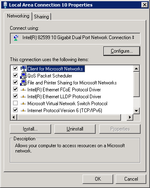
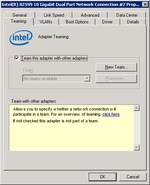
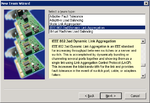
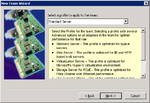
Setting up LACP on the Windows side requires a little bit more effort. Navigate to Control Panel --> Network and Internet --> Network Connections. On one of the network connections, right click and select "Properties". In the properties window select "Configure". In the "Teaming" tab check the box "Team this adapter with other adapters" and click "New Team". Provide a name for the team, and then select the network connections that are to be bonded together. For team type choose "IEEE 802.3ad Dynamic Link Aggregation". The next step is to choose the profile to apply to the team. My setup used the "Standard Server" option. Now that your team is configured select it from the list of network connections and assign an IP address.
The last step is to configure your switch to used LACP. Being that this will be different from switch to switch you will have to check your user manual on how to configure LACP.
Cautions with LACP
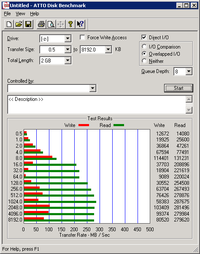
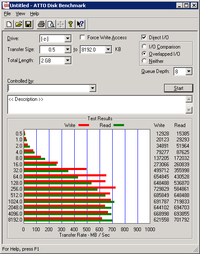
Be careful if you decide to use LACP. I would highly recommend first trying the MPIO setup like talked about above. After doing a performance run of MPIO, setup LACP and run the performance tests again. Doing this will allow you to have a target IO performance mark to try and meet. With our testing LACP seemed to be very sensitive to different filtering techniques that were allowed by the switch. Turning LACP on while leaving all of the default settings resulted in a large drop in IO performance. This will be different from switch to switch but a drop in performance by 80% (roughly what we saw) was discomforting. After some tweaking of the settings in the switch the performance became closer to what was seen with MPIO.
Results
|
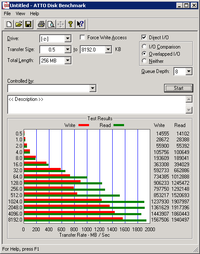
The picture on the left was when LACP was setup with the default settings in the switch we were using. As you can see the performance suffered greatly. On the right is what the results looked like after some tweaking of the settings in the switch. As you can see, with just some minor tweaking large performance differences can occur. |
Jumbo Frames
Jumbo frames depending on the setup can have a large impact on the IO performance. Jumbo frames sends larger sized packets, allowing for larger Ethernet payloads. This lets more data be sent with each packet and in most cases results in better performance.
For our setup I first configured everything as I did with MPIO using a direct connection between the Windows box and the Quantastor box. I then went and changed all the settings as specified below.
Setup
To setup Quantastor to use jumbo frames first navigate to the storage system section. Then under the "Network Ports" tab, right click on the port in which you would like to configure to use jumbo frames. Select "Modify Network Port" from the context menu. Now set the MTU as 9000. Complete this for every port you plan on using jumbo frames with.
To setup Windows to use jumbo frames first navigate to Control Panel --> Network and Internet --> Network Connections. On one of the network connections, right click and select "Properties". In the properties window select "Configure". From here under the advanced tab there should be an option for jumbo packets. Select this and change its value to 9000. Complete this for every port you plan on using jumbo frames with.
You may also have to go into your switch and enable jumbo frames as well. This will vary from switch to switch.
Cautions with Jumbo Frames
For jumbo frames to work the MTU must be set as the same for all devices (all the connected machines and switches). If the packet is not recognized by a device, the packet can be dropped. This is just one example of an issue with jumbo frames. When we tried configuring our setup to go through a switch we encountered issues such as this.
Results
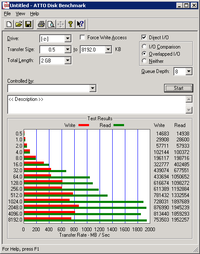
As you can see below jumbo frames had the best results out of what we tested. The read IO speeds was the largest by far of all of our testing, and the write IO performed very strongly as well.
