Upgrade Manager
Contents
- 1 Upgrade Manager Overview
- 2 QuantaStor Advanced Upgrades
- 3 Upgrading QuantaStor via Re-install / Boot Drive Swap
- 3.1 Step 1. Backup Configuration Files
- 3.2 Step 2. Log Review & System Health Check
- 3.3 Step 3. Document & Verify Network Configuration
- 3.4 Step 4. Verify Remote Console Access
- 3.5 Step 5. Power Off Systems
- 3.6 Step 6. Remove Old Boot Media and Install QuantaStor on New SSD Boot Media (RAID1)
- 3.7 Step 7. Install Latest Version of QuantaStor on New Boot Media (RAID1)
- 3.8 Step 8. Boot Newly Installed QuantaStor and Re-apply Network Settings
- 3.9 Step 9. Restore the QuantaStor Internal Database from Backup
- 3.10 Step 10. Verify Configuration
- 3.11 Step 11. Power on JBODs, Reboot, Import Pools
- 3.12 Step 12. Power off Upgraded Server and JBODs, Upgrade Next System
- 3.13 Step 13. Power on All Systems, Import Pools
- 3.14 Step 14. Re-create the Site Cluster and Cluster Heartbeat Rings
- 3.15 Step 15. Verification & Testing
- 4 Grid Sync Override
Upgrade Manager Overview
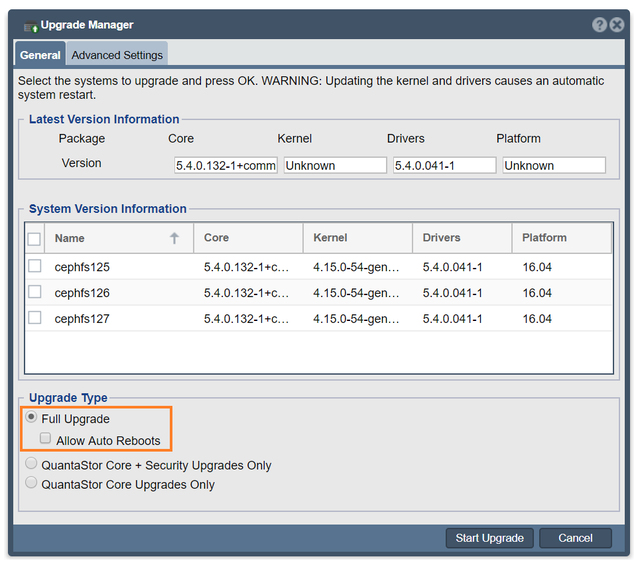
The QuantaStor Upgrade Manager web interface provides user controls over kernel, driver, security and core QuantaStor package updates. It can be accessed by clicking on the Upgrade Manager button in the Storage Management tab.
Full Upgrade
For a Full Upgrade, check the radio button on the Upgrade Manager dialog box. Full Upgrades include kernel, driver, security and all of the latest QuantaStor core package updates.
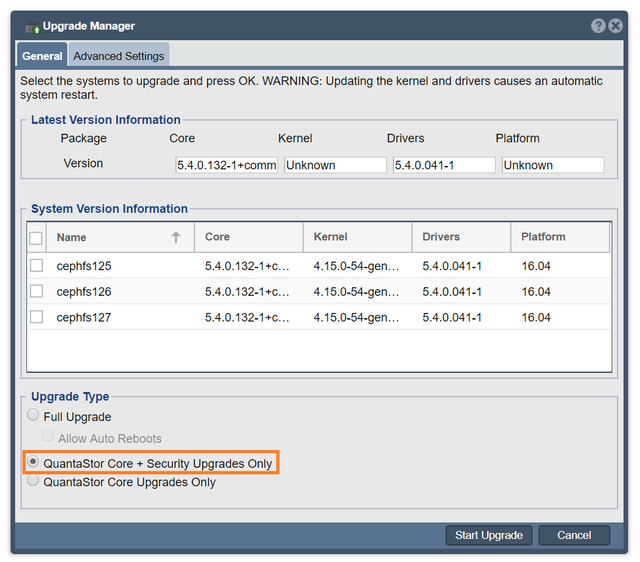
QS Core + Security Only Upgrade
The QS Core + Security Only Upgrade includes security and QuantaStor core package upgrades only.
QuantaStor Core Only Upgrade
The QuantaStor Core Only Upgrade Includes only QuantaStor core package upgrades.
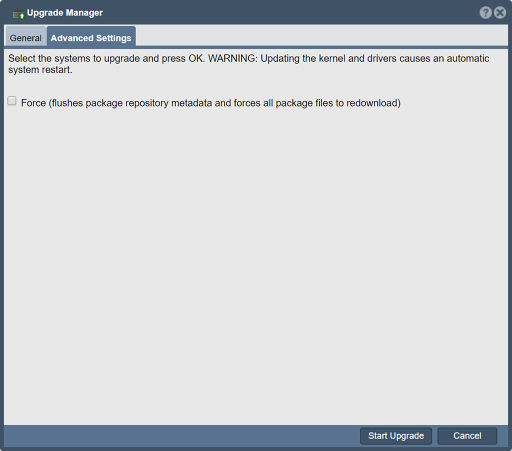
Advanced Settings
The force option will flush the package repository metadata and force all package files to redownload.
QuantaStor Advanced Upgrades
Using the QuantaStor CLI, advanced users can control QuantaStor upgrades at a granular level with QuantaStor's CLI Upgrade Commands. Use cases for upgrading Quantastor using the CLI include implementing custom Linux kernels for public or private cloud deployments on Virtual Machines.
Upgrading QuantaStor via Re-install / Boot Drive Swap
When upgrading from early versions of QuantaStor and jumping multiple major revisions such as 3.x to 5.x it can often be faster to install QuantaStor from scratch onto new media and then recover the configuration by restoring a backup of the QuantaStor internal database onto the new system. By preserving the old boot media this also provides an easy roll-back option should one need to revert back to the old configuration for any reason.
NOTE: The following guidelines are provided to give insight to the re-install based upgrade procedure but are intended to be done with OSNEXUS Support (support@osnexus.com) assistance.
Step 1. Backup Configuration Files
1) Upload the logs for all the servers to be upgraded. This provides the support team with the information needed to check the hardware configuration and to determine if anything could complicate the upgrade. 2) Backup the contents of the following directories into a tar file and put that on a share on your network that can be accessed later. Backup these files for each QuantaStor host to be upgraded.
- /etc/
- /var/opt/osnexus/
- /var/lib/ceph/
Step 2. Log Review & System Health Check
If the systems have degraded pools or a degraded Ceph cluster it's generally best to address those issues first before upgrading whenever possible. Similarly, if there's faulty hardware it's good to replace any bad components before upgrading.
Step 3. Document & Verify Network Configuration
After installing the latest version of QuantaStor to your new boot media one needs to restore the network configuration to the same settings as before. This should be done before the old QuantaStor configuration database is re-applied.
Things to document per server:
- hostname
- DNS addresses
- NTP addresses
- domain suffix
- ports used for cluster heartbeat
Things to document per port:
- IP address
- MAC address
- subnet mask
- MTU
- gateway
- parent/child ports (for VIFs/VLANs/bonded ports)
- pool association (for HA VIFs / Site VIFs)
Step 4. Verify Remote Console Access
The upgrade process may require multiple reboots and if there are network configuration issues remote access to the console will be needed. This makes it important to verify remote access via iDRAC, iLO, IPMI, CIMC or other remote baseboard access method before starting the install.
Step 5. Power Off Systems
Power off both systems in a given cluster pair, you'll need a maintenance window for this. Also power off any JBODs connected to the cluster pair and leave them off until later.
Step 6. Remove Old Boot Media and Install QuantaStor on New SSD Boot Media (RAID1)
QuantaStor systems use a simple SSD based RAID1 mirrored boot/system device for the operating system. When you remove the old media and put the new media in one will need to go into the RAID controller BIOS to setup a new RAID1 mirror on the new SSD media. Minimum suitable SSD media for QuantaStor boot is 2x datacenter grade SATA SSD with a capacity of 200GB or more. SATADOM boot media is to be avoided due to it's low reliability.
Step 7. Install Latest Version of QuantaStor on New Boot Media (RAID1)
When upgrading we always recommend upgrading to the latest version. The latest ISO image is available at osnexus.com/downloads and can be used for both network based installs and installation via USB media such as a thumb drive. QuantaStor is designed to auto-upgrade the internal database from any older version of QuantaStor so one can upgrade from QuantaStor 2.x to QuantaStor 5.x or any other combination so it's ok to jump forward multiple versions at once. You'll be upgrading one system at a time and then importing the pool as the last step.
Step 8. Boot Newly Installed QuantaStor and Re-apply Network Settings
In order to apply the network configuration settings you'll need to apply a temporary Trial Edition license key. This can be gathered via the form on the osnexus.com/downloads page. After applying the temporary license you can re-apply all the network configuration settings from Step 3 except for any HA cluster VIFs. That will be done at the final steps after the pool has been imported.
- [Storage Management] -> Modify Storage System... -> Restore system hostname from default 'quantastor' back to it's original name
- [Storage Management] -> Modify Storage System... -> Apply NTP server settings
- [Storage Management] -> Modify Storage System... -> Apply DNS server settings
- [Storage Management] -> Modify Network Port... -> Update all the network ports to their proper network configuration (see Step 3)
Step 9. Restore the QuantaStor Internal Database from Backup
To restore the internal QuantaStor system database you'll need to login to the system via the IPMI console or via SSH. Once logged in you'll run a series of commands outlined below to replace the QuantaStor database with the backup of it captured in Step 1. Note, the internal database is located here:
/var/opt/osnexus/quantastor/osn.db
Now it's time for stopping the quantastor service, restoring the DB, clearing some cluster config data from the DB, and then restarting the service. These are the steps to do that once you've logged into the system console as 'qadmin' user.
sudo -i
service quantastor stop
cp osn.db.backup /var/opt/osnexus/quantastor/osn.db
cd /opt/osnexus/quantastor/bin
qs_service --reset-pool-ha --reset-cluster
service quantastor start
Step 10. Verify Configuration
Login via the QuantaStor web UI to verify the configuration. Note that it is normal for the pool to be missing with various warnings at this stage as the JBODs should still be powered off. Because other systems are currently powered off, servers may be listed as disconnected. It is safe to ignore this state at this point in time.
Step 11. Power on JBODs, Reboot, Import Pools
It's time to power on the JBODs and then reboot the QuantaStor system you've just upgraded. After the reboot import the pool if it is not already started and running. Verify access to shares and volumes. Verify network configuration settings. Run the Configuration Analyzer to see if there are any important configuration issues to be addressed.
Step 12. Power off Upgraded Server and JBODs, Upgrade Next System
Repeat Steps 6 thru 10 on the other server(s) in a given HA cluster until all systems are upgraded.
Step 13. Power on All Systems, Import Pools
At this point everything is upgraded and now all systems should be powered on. Verify that the nodes are communicating with each other in the grid. After that you'll be ready to setup the HA cluster and VIFs config again so that the pools can move back to HA status and move between systems again.
Step 14. Re-create the Site Cluster and Cluster Heartbeat Rings
In Step 9 we cleared out the HA cluster information because the cluster configuration from earlier versions of QuantaStor to newer versions is quite different and needs to be recreated.
- Create the Site Cluster in the 'High-availabilty VIF Configuration' section
- Add a second Cluster Heartbeat Ring to the Site Cluster
- Create a HA Group on each of the HA Storage Pools
- Re-create the VIFs for each of the HA Storage Pools per the information collected in Step 3.
Step 15. Verification & Testing
- Perform an HA failover of each pool to ensure proper storage connectivity to back-end devices from both systems
- Verify all Storage Volumes and Network Shares are accessible by client systems and users.
- Upload logs again for final review by OSNEXUS Support
- Done!
Grid Sync Override
In some scenarios one may upgrade QuantaStor systems such that the new configuration has completely new IP addresses for each system but the grid database has the old stale IP address information for the other systems. With that stale information the QuantaStor systems are not able to link up and synchronize. The easy fix for that is to just delete the Storage Grid object and then recreate the Storage Grid and add the systems back in. In some cases though, especially when there are multiple clusters configured it can be disruptive to recreate the Storage Grid. To address this need there's a way to force a change to the Grid Preferred Port IP address manually but it does require SSH login to the current QuantaStor primary system in a given Storage Grid.
Step 1. Login to the QuantaStor primary storage system as 'qadmin' or 'root' via SSH or IPMI console, this is the one with the special icon on it when you login to the WUI. Step 2. Run qs sys-list to get a list of the systems in your Storage Grid:
qs sys-list
You will see output like this, one line for each system in your storage grid:
Name State Service Version Firmware Version Kernel Version UUID
smu-qa57-60 Normal 5.7.0.145+next-17ad986 scst-3.5.0-pre 5.3.0-62-generic 9eb06052-9687-0862-27b5-a70e0ea1d57f smu-qa57-61 Normal 5.7.0.145+next-17ad986 scst-3.5.0-pre 5.3.0-62-generic d60b9c27-3bc1-50dd-1b03-b7d42bb42a25 smu-qa57-62 Normal 5.7.0.145+next-17ad986 scst-3.5.0-pre 5.3.0-62-generic 7a47785b-609c-f4ec-07cf-0ad9dd6fa69b smu-qa57-63 Normal 5.7.0.145+next-17ad986 scst-3.5.0-pre 5.3.0-62-generic 64197d2a-0822-8113-9c79-5744174c0ed2
Note the UUID column, you'll need those UUIDs to make special override files with the correct IP address for each of the systems. Using the above example, if smu-qa57-60 is the Storage Grid primary you would login via SSH and then run these commands to tell it how to communicate with the remote systems:
echo "10.1.2.3" > /var/opt/osnexus/quantastor/d60b9c27-3bc1-50dd-1b03-b7d42bb42a25.gpp
echo "10.1.2.4" > /var/opt/osnexus/quantastor/7a47785b-609c-f4ec-07cf-0ad9dd6fa69b.gpp
echo "10.1.2.5" > /var/opt/osnexus/quantastor/64197d2a-0822-8113-9c79-5744174c0ed2.gpp
Once the Storage Grid has synchronized and the IP address information for the remote hosts is accurate again one would delete these files like so:
ls /var/opt/osnexus/quantastor/*gpp
rm /var/opt/osnexus/quantastor/*gpp


