Ubuntu Software RAID1 (UEFI): Difference between revisions
mNo edit summary |
mNo edit summary |
||
| Line 1: | Line 1: | ||
NOTE: This page is for older QuantaStor 4 and 5 deployments, please see this page for [https://wiki.osnexus.com/index.php?title=QuantaStor_6_-_Software_RAID1_Install_Procedure deploying software RAID1 boot with QuantaStor 6 and newer]. | |||
Depending on the operating system, creating the software RAID1 is as easy as a few extra steps during the installation process. | Depending on the operating system, creating the software RAID1 is as easy as a few extra steps during the installation process. | ||
Latest revision as of 21:14, 14 January 2025
NOTE: This page is for older QuantaStor 4 and 5 deployments, please see this page for deploying software RAID1 boot with QuantaStor 6 and newer.
Depending on the operating system, creating the software RAID1 is as easy as a few extra steps during the installation process.
Below are a few screenshots of the process to create a software RAID1 with QuantaStor on Ubuntu Bionic. The process is almost identical with QuantaStor on Ubuntu Xenial.
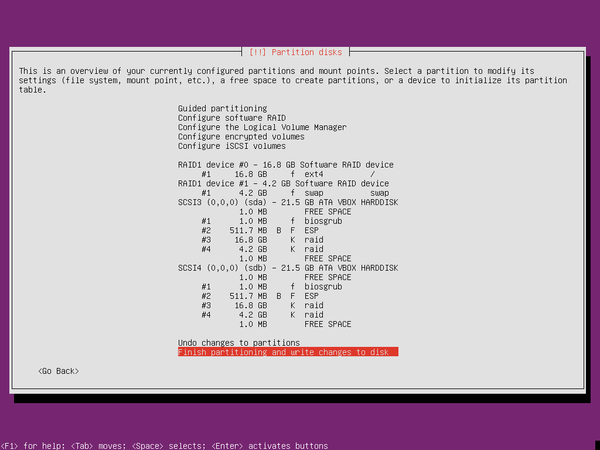
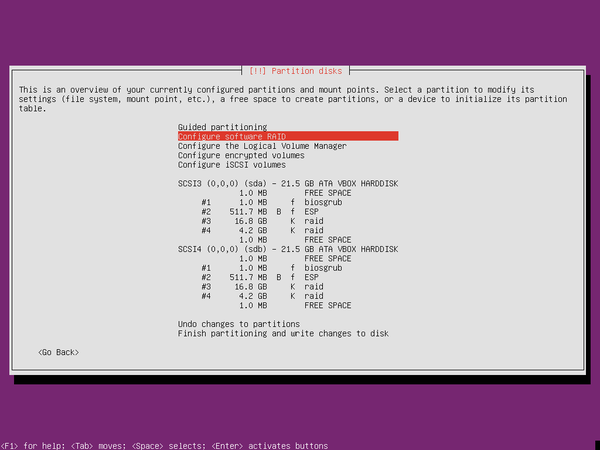
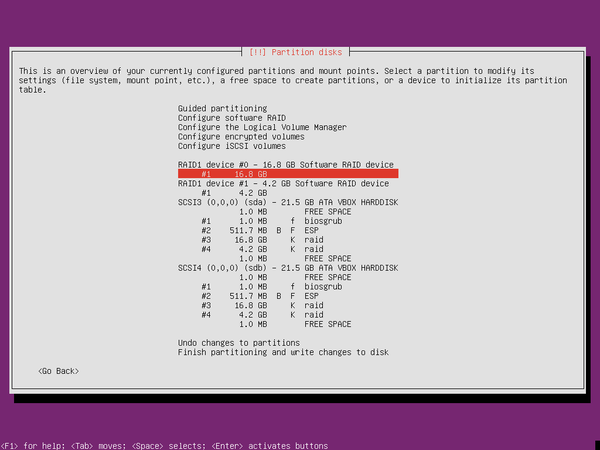
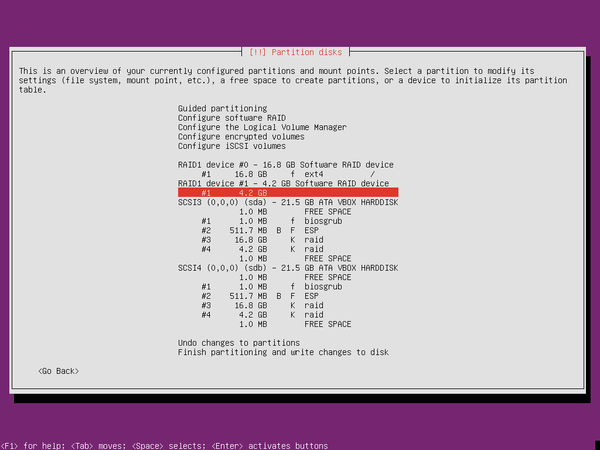
If you are familiar with creating partitions and would like to see the partition table summary, please see the below image. You may also finish the installation as normal and skip ahead to step 40. If you are not familiar with the partitions, follow the instructions below.
There should be four partitions per device, 1MB for the biosgrub (for UEFI and legacy boot), 512MB for the EFI boot, and two RAID partitions, sized accordingly, which will be eventually be put in a RAID to be used for the root filesystem and swap. Software RAID1 is expected to be used on each of the two RAID partitions per device.
Instructions
- Step 1 - When you are prompted to install QuantaStor on a disk like below, press the ‘ESC’ key
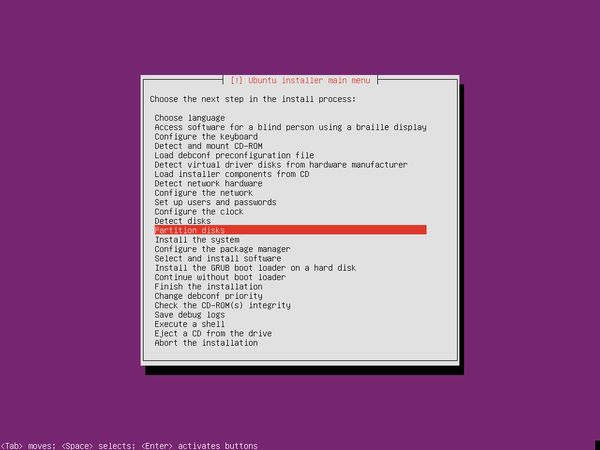
- Step 2 - Select the ‘Partition disks’ option and press the ‘Enter’ key
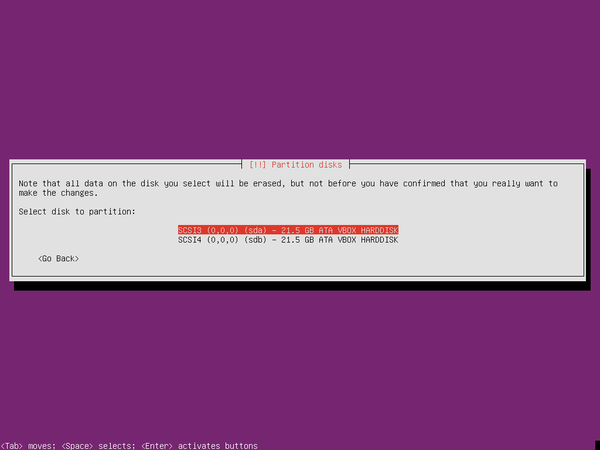
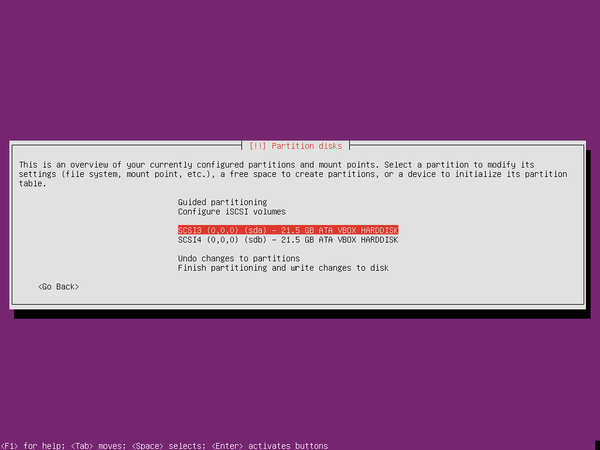
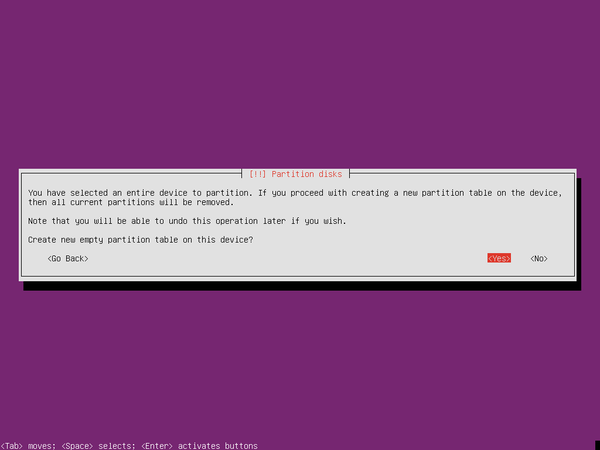
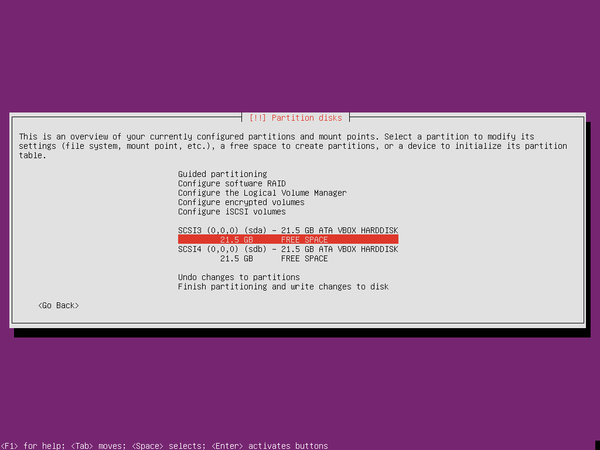
- Step 3 - You’ll be presented with your disks, depending on whether there is existing data on them, you may need to wipe the partition table. Select your first RAID device, and press the ‘Enter’ key
- Step 4 - Select ‘<Yes>’ and press the ‘Enter’ key
- Step 5 - Do the same for the other RAID device you intend to use. You should now be presented with your RAID devices, and they should have “FREE SPACE” beside them. Select the area below the device, where you will see the “FREE SPACE” and press ‘Enter’
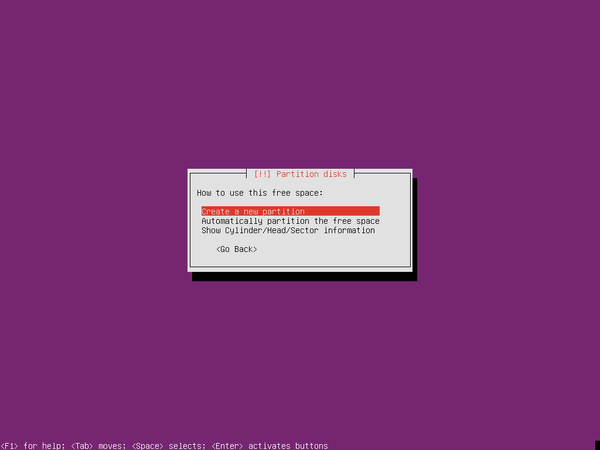
- Step 6 - Press the ‘Enter’ key to select ‘Create a new partition’
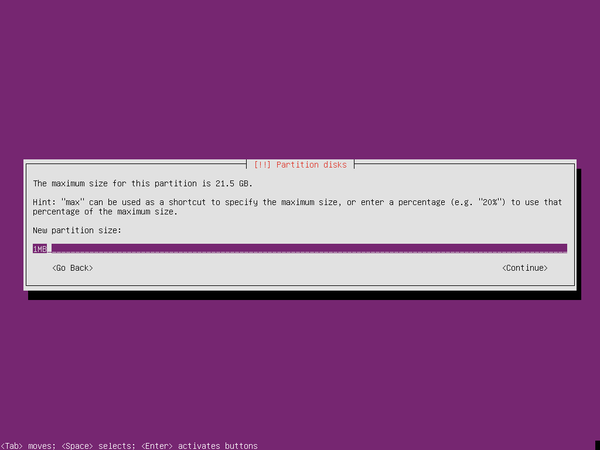
- Step 7 - For the first partition; which will be for biosboot and for UEFI plus legacy boot. It’s not required, but we recommend creating it anyway. Enter 1MB for the partition size and press ‘Enter’ to confirm
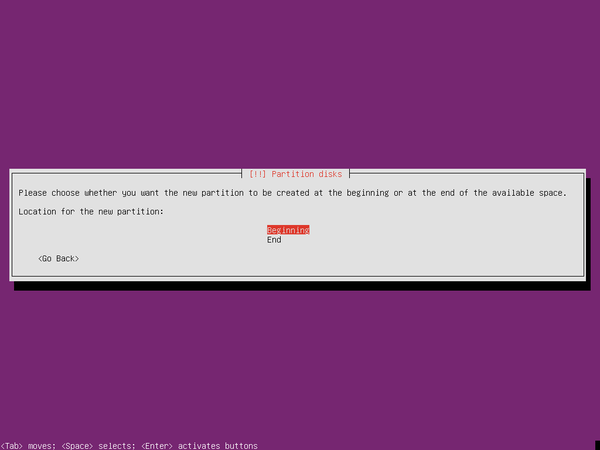
- Step 8 - Press the ‘Enter’ key to select ‘Beginning’
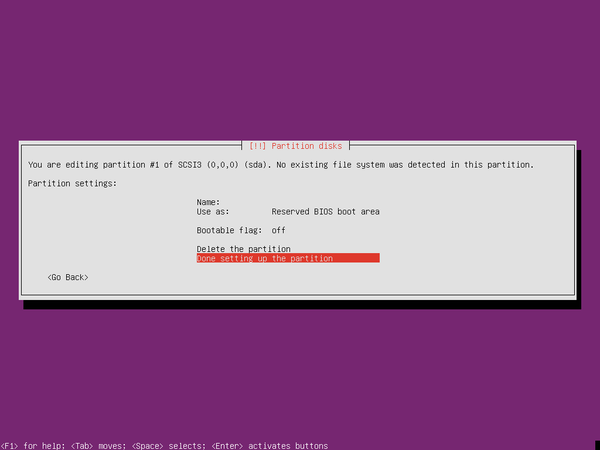
- Step 9 - Use ‘Reserved BIOS boot area’ and press the ‘Enter’ key on ‘Done setting up the partition’ to confirm
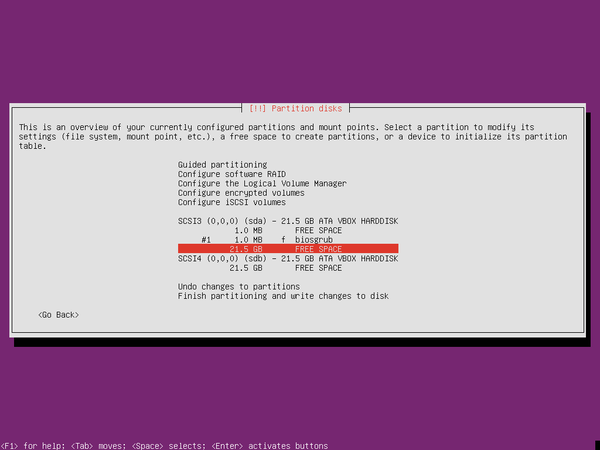
- Step 10 - Select the available space on the device, and press the ‘Enter’ key
- Step 11 - Press the ‘Enter’ key to create a new partition
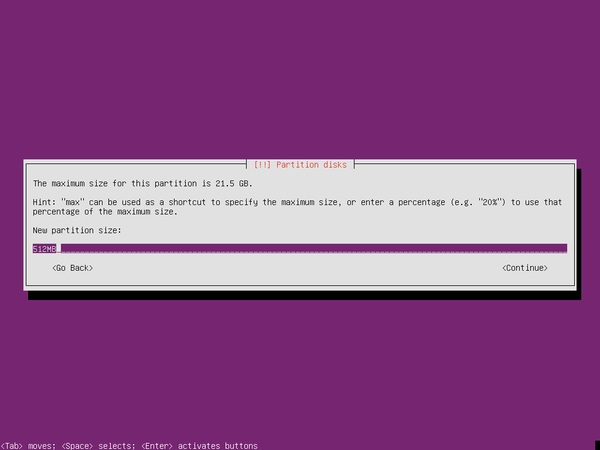
- Step 12 - For the second partition; which will be for the UEFI boot, we recommend using 512MB. Enter the value in the field and press the ‘Enter’ key
- Step 13 - Press the ‘Enter’ key to select ‘Beginning’
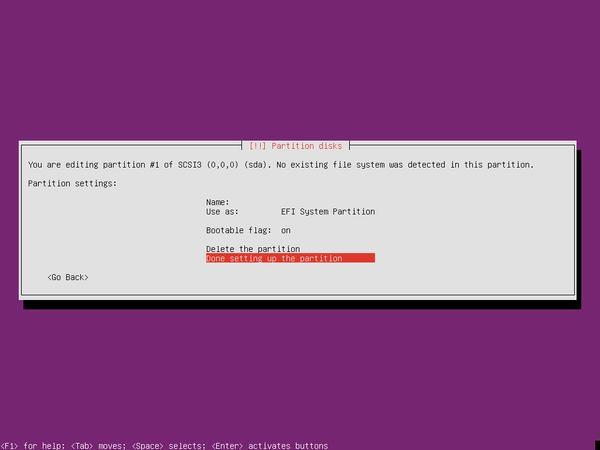
- Step 14 - Use ‘EFI System Partition’ and press the ‘Enter’ key on ‘Done setting up the partition’ to confirm
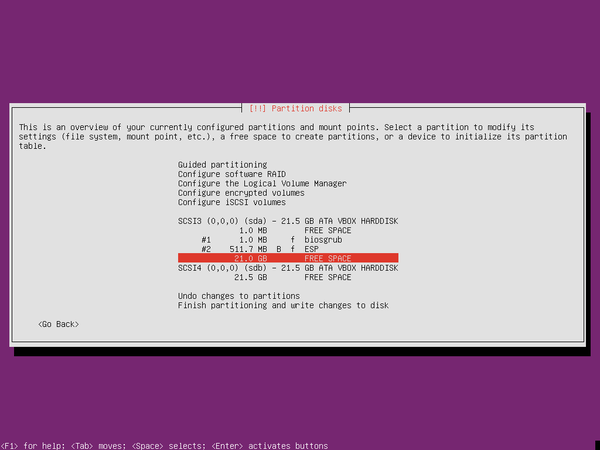
- Step 15 - Select the available space on the device, and press the ‘Enter’ key
- Step 16 - Press the ‘Enter’ key to create a new partition
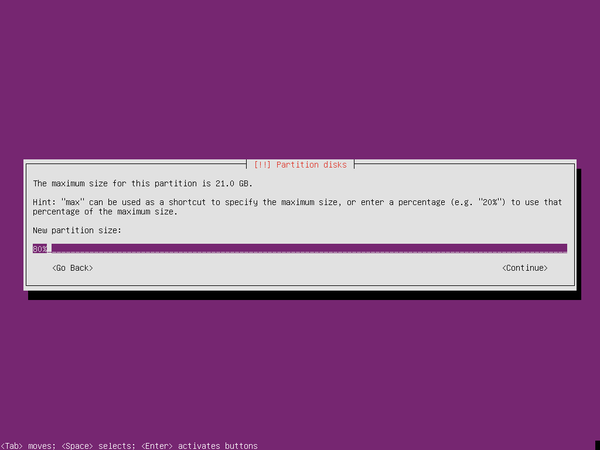
- Step 17 - For the third partition, which will be used as one of the two RAID volumes being created, using at least 80% of the device is a good general rule. Enter “80%” and press the ‘Enter’ key to confirm
- Step 18 - Press the ‘Enter’ key to select ‘Beginning’
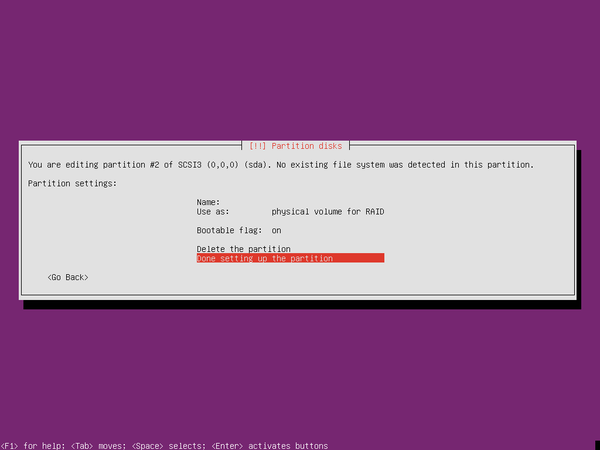
- Step 19 - Use ‘physical volume for RAID’ and press the ‘Enter’ key on ‘Done setting up the partition’ to confirm
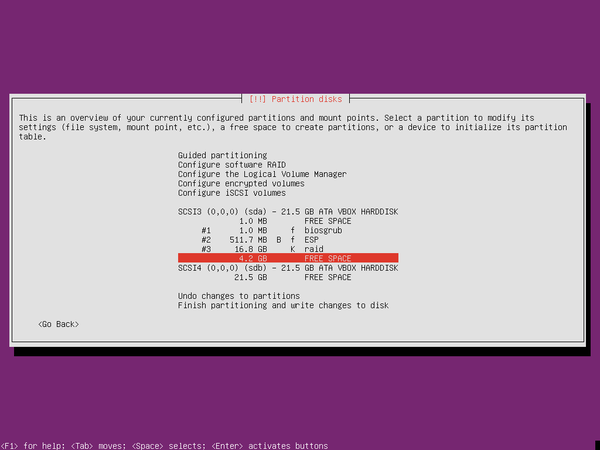
- Step 20 - Select the remaining space on the device, and press the ‘Enter’ key
- Step 21 - Press the ‘Enter’ key to create a new partition
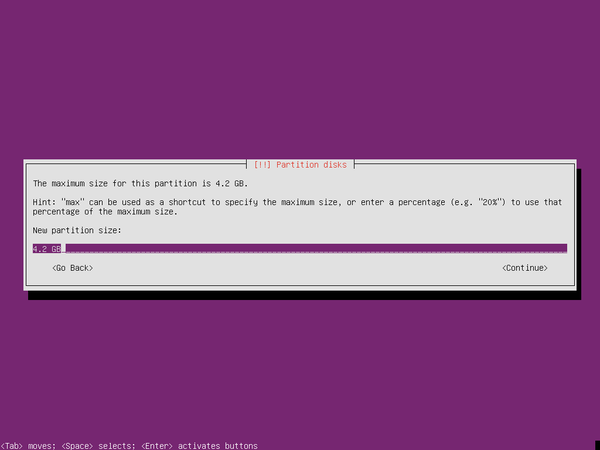
- Step 22 - For the fourth and final partition, press the ‘Enter’ key to confirm and use the remaining space on the device
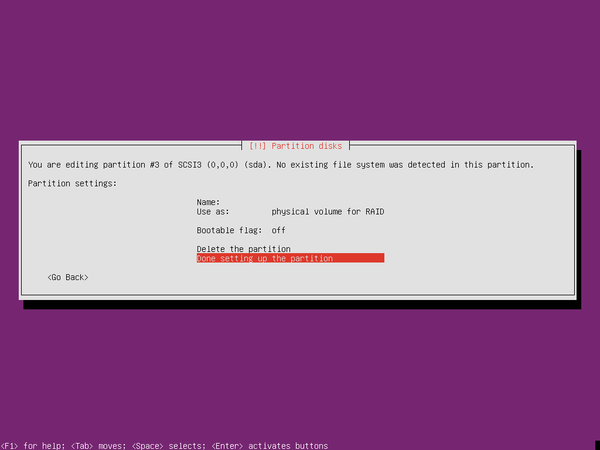
- Step 23 - Use ‘physical volume for RAID’ and press the ‘Enter’ key on ‘Done setting up the partition’ to confirm
- Step 24 - Repeat the earlier steps and create the partitions on the other device. Select ‘Configure software RAID’ and press the ‘Enter’ key. If prompted to write changes, select ‘<Yes> and press ‘Enter’ to confirm
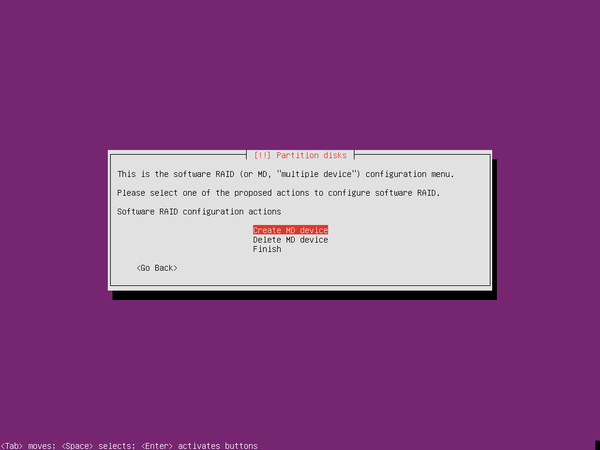
- Step 25 - Press the ‘Enter’ key to create the first RAID volume
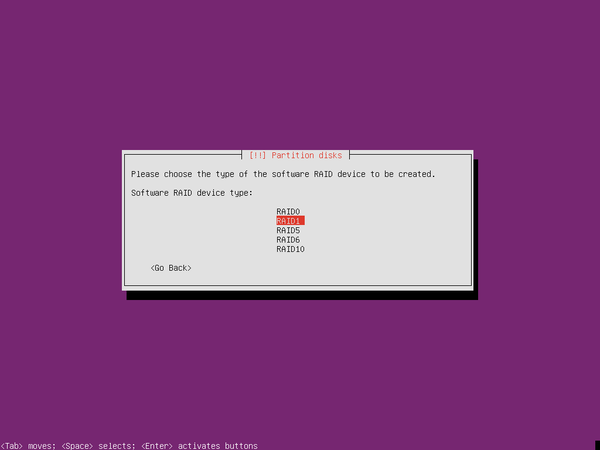
- Step 26 - Select ‘RAID1’ and press the ‘Enter’ key to confirm
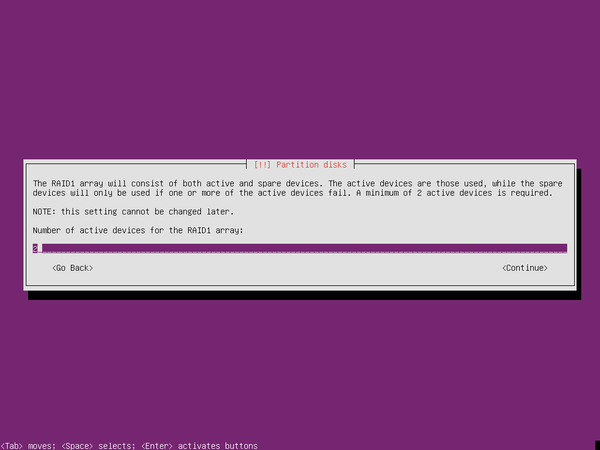
- Step 27 - Check that the number of active devices is set to ‘2’ and press the ‘Enter’ key to confirm
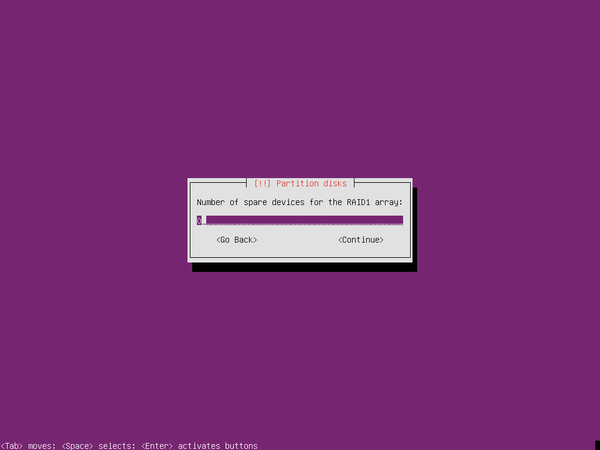
- Step 28 - Press the ‘Enter’ key to confirm 0 spare devices, unless spare devices are configured, then change the value accordingly
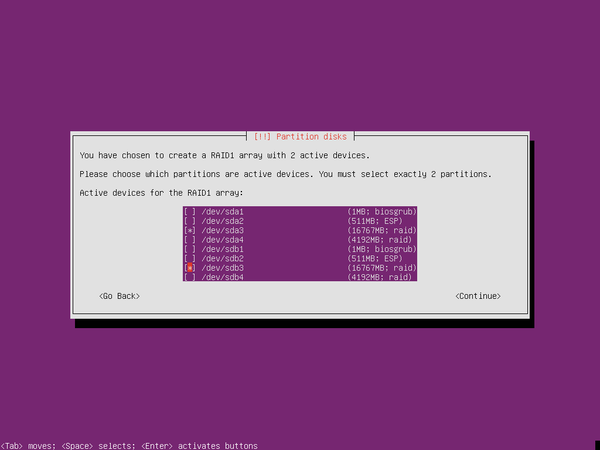
- Step 29 - Select the third partitions created on each device. Press the ‘Enter’ key to confirm
- Step 30 - Press the ‘Enter’ key to create the second RAID volume
- Step 31 - Select ‘RAID1’ and press the ‘Enter’ key to confirm
- Step 32 - Check that the number of active devices is set to ‘2’ and press the ‘Enter’ key to confirm
- Step 33 - Press the ‘Enter’ key to confirm 0 spare devices, unless spare devices are configured, then change the value accordingly
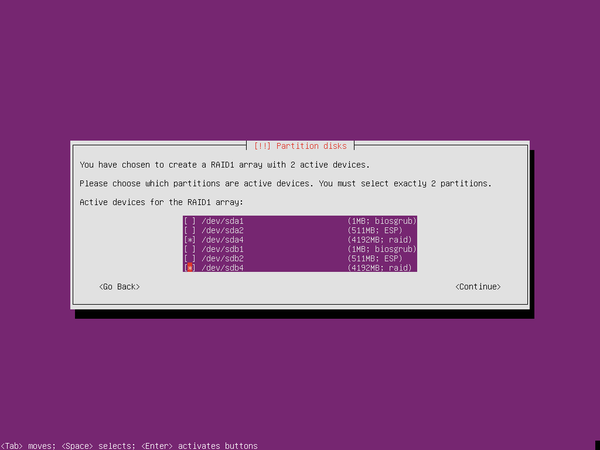
- Step 34 - Select the fourth partitions created on each device and press the ‘Enter’ key to confirm
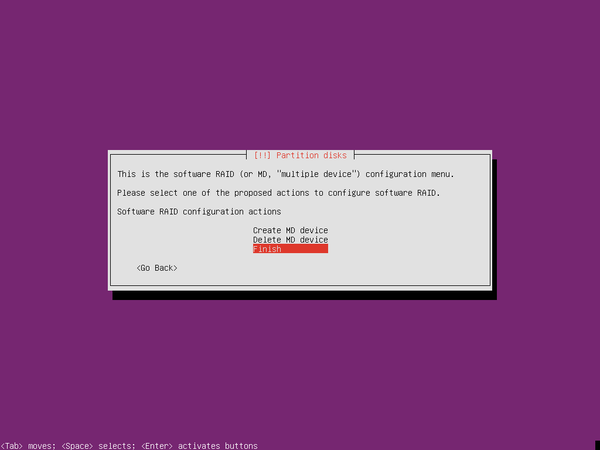
- Step 35 - Select ‘Finish’ and press ‘Enter’ to confirm
- Step 36 - Select the empty space of the first RAID volume partition and press the ‘Enter’ key
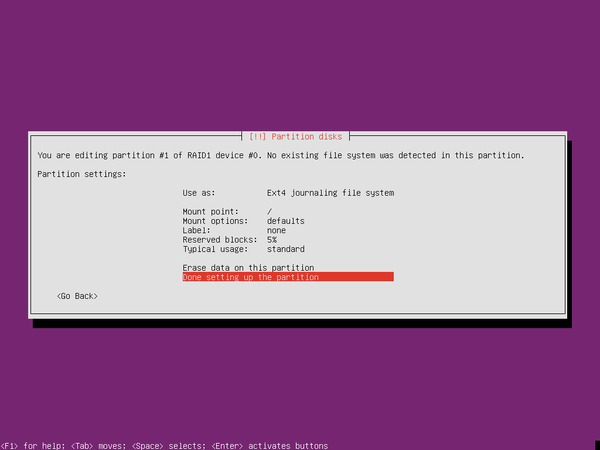
- Step 37 - Modify the parameters for the partition to ‘Ext4 journaling file system’ and ‘/’ like the below. Select ‘Done setting up the partition’ and press the ‘Enter’ key to confirm
- Step 38 - Select the empty space of the second RAID volume partition and press the ‘Enter’ key
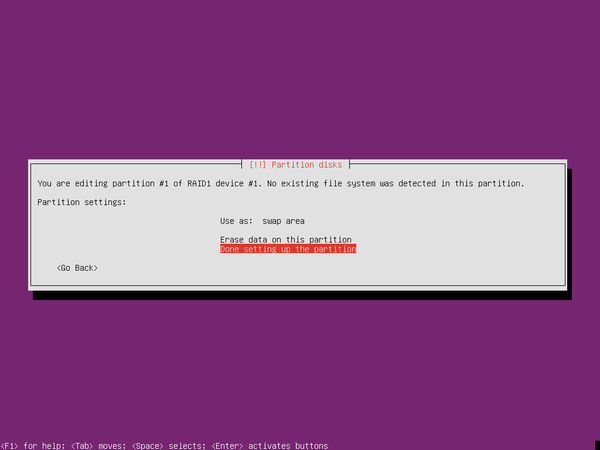
- Step 39 - Modify the parameters for the partition to swap area’ like the below. Select ‘Done setting up the partition’ and press the ‘Enter’ key to confirm
- Step 40 - Select ‘Finish partitioning and write changes to disk’ and press the ‘Enter’ key to confirm. The system should now start to install
- Step 41 - Log into the system, elevate to root and check the current efibootmgr details with
efibootmgr -v. Make a note of the file name for the ubuntu boot entry. For example “\EFI\ubuntu\shimx64.efi”. You should see something like the below
root@qs1:~# efibootmgr -v
BootCurrent: 0005
Timeout: 0 seconds
BootOrder: 0005,0000,0001,0004,0002,0003
Boot0000* UiApp FvVol(7cb8bdc9-f8eb-4f34-aaea-3ee4af6516a1)/FvFile(462caa21-7614-4503-836e-8ab6f4662331)
Boot0001* UEFI VBOX CD-ROM VB2-01700376         PciRoot(0x0)/Pci(0x1,0x1)/Ata(1,0,0)N.....YM....R,Y.
Boot0002* UEFI VBOX HARDDISK VBf65e2ed8-da02bb65        PciRoot(0x0)/Pci(0xd,0x0)/Sata(0,65535,0)N.....YM....R,Y.
Boot0003* UEFI VBOX HARDDISK VBb000695e-353e023b        PciRoot(0x0)/Pci(0xd,0x0)/Sata(1,65535,0)N.....YM....R,Y.
Boot0004* EFI Internal Shell    FvVol(7cb8bdc9-f8eb-4f34-aaea-3ee4af6516a1)/FvFile(7c04a583-9e3e-4f1c-ad65-e05268d0b4d1)
Boot0005* ubuntu        HD(2,GPT,e0653691-0967-413a-8951-ad25478313fe,0x1000,0xf4000)/File(\EFI\ubuntu\shimx64.efi)
- Step 42 - Use
dd if=/dev/sda2 of=/dev/sdb2to copy the second partition data from the first device to the second device. If your two devices are not sda or sdb, change these accordingly. You should see something like the below
root@qs1:~# dd if=/dev/sda2 of=/dev/sdb2
999424+0 records in
999424+0 records out
511705088 bytes (512 MB, 488 MiB) copied, 62.5494 s, 8.2 MB/s
- Step 43 - Using the file name for the ubuntu boot entry from step 37, use
efibootmgr -c -d /dev/sdb -p 1 -L "ubuntu2" -l “\EFI\ubuntu\shimx64.efi”. You should see something like the below
IMPORTANT NOTE - Replace /dev/sdb with your second boot device as this could be different. The “ubuntu2” can be of your choosing, and the location of the shimx64.efi may differ.
root@qs1:~# efibootmgr -c -d /dev/sdb -p 1 -L "ubuntu2" -l “\EFI\ubuntu\shimx64.efi”
BootCurrent: 0005
Timeout: 0 seconds
BootOrder: 0006,0005,0000,0001,0004,0002,0003
Boot0000* UiApp
Boot0001* UEFI VBOX CD-ROM VB2-01700376
Boot0002* UEFI VBOX HARDDISK VBf65e2ed8-da02bb65
Boot0003* UEFI VBOX HARDDISK VBb000695e-353e023b
Boot0004* EFI Internal Shell
Boot0005* ubuntu
Boot0006* ubuntu2
- Step 44 - Check the RAID status for your partitions before rebooting the system with
cat /proc/mdstatif everything is healthy, you should see something like the below
root@qs1:~# cat /proc/mdstat
Personalities : [raid1] [linear] [multipath] [raid0] [raid6] [raid5] [raid4] [raid10]
md1 : active raid1 sda4[0] sdb4[1]
      4090880 blocks super 1.2 [2/2] [UU]

md0 : active raid1 sda3[0] sdb3[1]
      16365568 blocks super 1.2 [2/2] [UU]

unused devices: <none>
If you run into any difficulties whilst following the below steps. Please contact support@osnexus.com for assistance.
