Difference between revisions of "File Storage Provisioning"
m (→Create Network Share) |
m |
||
| Line 17: | Line 17: | ||
For more information, refer to the [[Network Share Configure CIFS]] page. | For more information, refer to the [[Network Share Configure CIFS]] page. | ||
| − | === | + | === Step 3: Add NFS Client Access Settings === |
| − | + | ||
| − | + | ||
| − | + | ||
| − | + | ||
| − | + | ||
| − | + | ||
| − | + | ||
Creates additional client access for the network share. Click on the [[Add NFS Client Access]] button in Workflow Manager, or rightclick on the target network share under "Network Share" and click "Add NFS Access". | Creates additional client access for the network share. Click on the [[Add NFS Client Access]] button in Workflow Manager, or rightclick on the target network share under "Network Share" and click "Add NFS Access". | ||
| Line 31: | Line 24: | ||
For more information, refer to the [[Add NFS Client Access]] page. | For more information, refer to the [[Add NFS Client Access]] page. | ||
| − | === Modify | + | === Step 4: Modify Network Share === |
Lets you control the network share's settings such as compression, quotas, and sync policies. Click on the [[Modify Network Share]] button in Workflow Manager, or the ''Modify'' button under "Network Share". | Lets you control the network share's settings such as compression, quotas, and sync policies. Click on the [[Modify Network Share]] button in Workflow Manager, or the ''Modify'' button under "Network Share". | ||
Revision as of 11:15, 10 September 2019
File storage folders are referred to as Network Shares. Network Shares may be accessed via both the NFS and the SMB protocols. A Storage Pool (ZFS or CephFS) must be created before Network Shares may be provisioned.
Contents
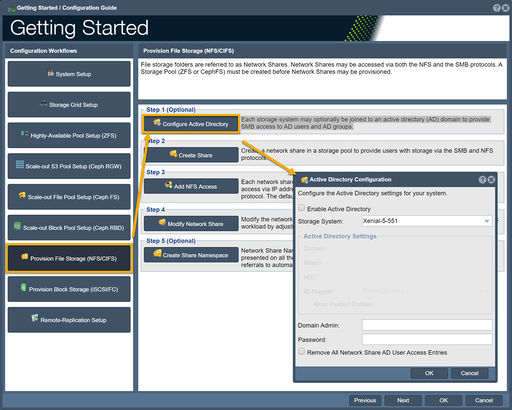
Step 1 (optional): Configure Active Directory
Each storage system may optionally be joined to an active directory (AD) domain to provide SMB access to AD users and AD groups.
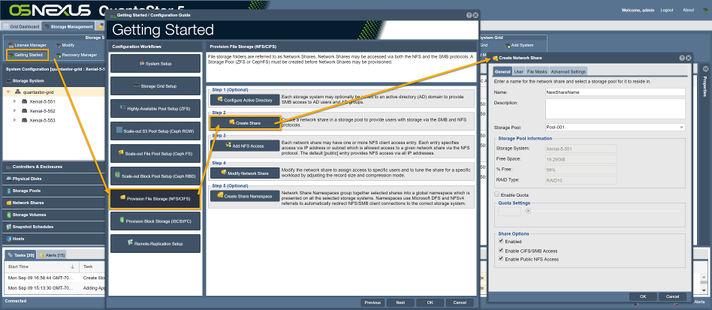
Create a network share in a storage pool to provide users with storage via the CIFS/SMB and NFS protocols. This step works with Microsoft Active Directory to assign network shares to users and groups. Set up Active Directory using the Setup Active Directory button in Workflow Manager, or click on the button Configure Active Directory in the toolbar under "Network Share" in "Storage Management".
For more information, refer to the Network Share Configure CIFS page.
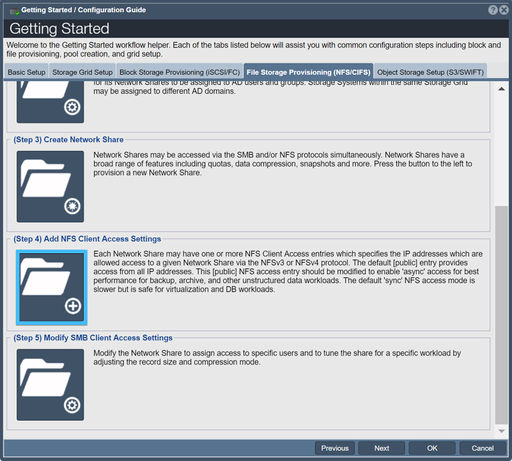
Step 3: Add NFS Client Access Settings
Creates additional client access for the network share. Click on the Add NFS Client Access button in Workflow Manager, or rightclick on the target network share under "Network Share" and click "Add NFS Access".
For more information, refer to the Add NFS Client Access page.
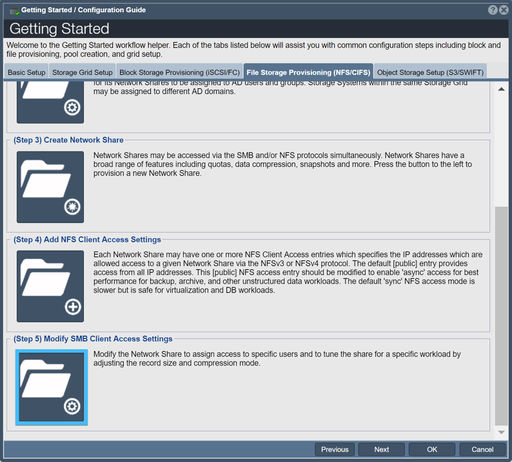
Lets you control the network share's settings such as compression, quotas, and sync policies. Click on the Modify Network Share button in Workflow Manager, or the Modify button under "Network Share".
For more information, refer to the Modify Network Share page.


