Network Share Namespace Add Remove

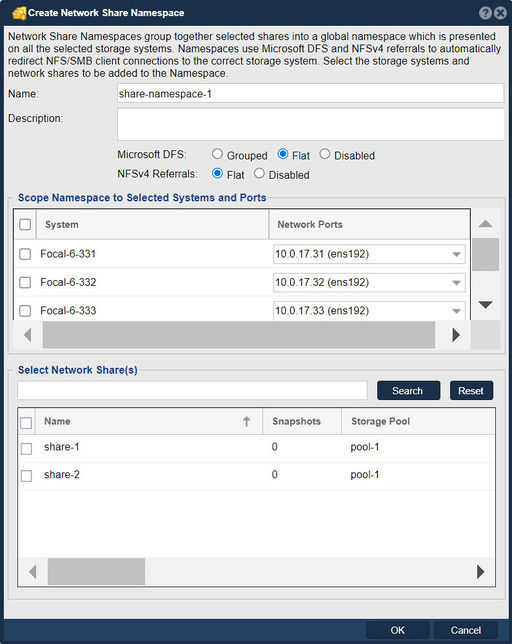
The "Create Network Share Namespace" feature in QuantaStor serves the purpose of organizing and managing network shares by creating a logical namespace or grouping for related shares. A namespace provides a centralized and hierarchical structure for organizing network shares, making it easier for users or client devices to locate and access shared resources within the storage environment. The group of appliances can include all the appliances in a grid or just a subset of appliances/storage systems in a given grid. Network Share Namespaces use the Microsoft DFS technology to redirect SMB/CIFS clients to the correct appliance where the selected Network Share resides. NFSv4 clients are directed to the correct appliance for any given Network Share using NFSv4 Referrals. Network Share Namespaces work together with Highly-Available(HA) storage pools. Accessing network shares in HA pools via a DFS or NFSv4 referrals will always redirect to a Virtual Network Interface (VIF) associated with the HA storage pool for any given Network Share.
The purpose of creating a network share namespace includes:
- Organizational Structure: Creating a network share namespace helps organize network shares into logical groups or categories based on their purpose, department, project, or user requirements. This provides a structured and hierarchical organization for managing shared resources, improving navigation and usability within the storage environment.
- Simplified Access: Network share namespaces simplify access to shared resources by providing a centralized location or entry point for users or client devices to discover and access network shares. Users can navigate the namespace hierarchy to locate the desired shares quickly, reducing the time and effort required to access shared data.
- Access Control: Network share namespaces support access control and permissions, allowing administrators to define user access rights, privileges, and restrictions for accessing shared resources within the namespace. This ensures that only authorized users or groups can access specific network shares based on their assigned permissions, enhancing data security and compliance.
- Scalability: Network share namespaces facilitate scalability by providing a flexible and scalable framework for organizing and managing network shares as storage requirements grow. Administrators can easily add, modify, or remove shares within the namespace without disrupting existing access or causing confusion among users, enabling seamless expansion and scalability of the storage infrastructure.
- User Experience: Network share namespaces improve the user experience by providing a structured and organized framework for accessing shared resources. Users can navigate the namespace hierarchy intuitively to locate and access the desired shares, enhancing usability, productivity, and satisfaction within the storage environment.
- Management and Administration: Network share namespaces simplify management and administration tasks by providing a centralized location for managing shared resources. Administrators can apply policies, configurations, and access controls at the namespace level, ensuring consistent management and enforcement of security policies across all shares within the namespace.
Overall, the purpose of the "Create Network Share Namespace" feature in QuantaStor is to provide a structured, organized, and scalable framework for managing network shares within the storage environment. This feature enhances access control, usability, scalability, management efficiency, and user experience, enabling administrators to organize and manage shared resources effectively to meet the needs of users and applications within the organization.
Navigation: Storage Management --> Network Shares --> Create Share Namespace... (right-click)