QuantaStor Manager Web Admin Guide
QuantaStor Web Administration Overview
This guide outlines all of the dialog screens presented in the QuanaStor web management interface and how to use them. This guide is also accessible within the QuantaStor web manager directly by pressing the question mark help button in the upper right hand corner of the web UI (?). Select a topic for more detail on a specific dialog or area of management. Note that for scripting and automation all operations presented via the QuantaStor web management interface are also accessible via the QuantaStor command line interface (CLI) tool (qs) and via REST APIs as outlined in the QuantaStor Developer Guide.
How to Login
The QuantaStor web administration interface is accessible via all major web browsers (Firefox, Chrome, Safari, Opera, & Internet Explorer) and has been developed in native HTML5 to be fast and responsive. After an appliance boots the text mode system console (also accessible via IPMI) will display the public facing IP addresses. On a new unconfigured system the first network port is assigned an IP address via DHCP. Simply select one of the assigned IP addresses and enter it as the address/URL inside your web browser to access the QuantaStor web administration interface.
Configuring a secure connection to the QuantaStor Manager
The Web Administration will support a secure connection when using https:// to connect. By default both types of connections are supported.
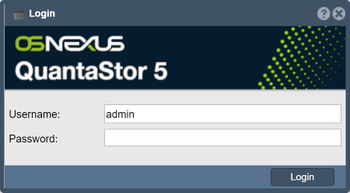
Login Screen

The default admin password for QuantaStor is simply 'password'. If you do not enter a password it will assume the default and will attempt to login to the system with 'password'. The administrator user name is simply 'admin'. It is recommended that you change the administrator password the first time you login to the system. If you are having trouble logging in, try hitting the reload button on your browser (Ctrl-F5) or clear your browser cache. Sometimes, especially after an upgrade one may need to clear the browser cache.
About this Guide
The following guide provides details into the various dialog windows used to manage the QuantaStor system. Using the help button (found in the upper right hand corner of each dialog in the QuantaStor web administration interface) on you will be taken directly to the specific page for that dialog within the wiki or you can directly browse the documentation here through the following guide.
Viewing Object Properties

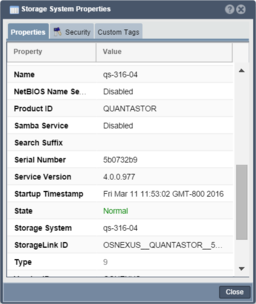
Every item you see in the QuantaStor Manager web interface is internally stored as an 'object' in the scale-out grid management system. All objects have a name and a unique ID (UUID) and several other properties. As an example a Storage Volume is a block device and is accessible via iSCSI so 'iqn' is a property of the Storage Volume. Details like 'iqn' can be viewed via the Properties' pane on the right side of the manager screen or by right-clicking on the object and selecting Properties from the menu. The resulting Properties window also contains a Security tab and a Tags section for assigning user defined custom key/value pairs to objects. Within the security tab, administrators can choose to limit who has access to the particular object.
Storage Management Tab
License Key Management
All QuantaStor editions and product features are controlled by license key. If you have a system deployment that requires additional features or capacity your system can be expanded by adding an expansion license to your existing system license. When you add a new license you must activate it within one week after adding it or it will be deactivated. To activate your license simply choose the 'Activate Online' option. Alternatively, if your system does not have internet access you can use the 'Activate via Email' option.
- License Key Management
- Adding License Keys
- Activating License Key Online
- Activating Licenses via Email
- Removing License Keys
General System Configuration & Management
These core system configuration dialogs include most of the key administrative operations use to initially configure, upgrade, and maintain your system.
- System Configuration Checklist
- Modifying System hostname & DNS configuration
- Online Upgrades
- Call Home / Alert Management Configuration
- Testing Alert Management Configuration
- Recovering System Configuration Information
- Storage System Shutdown/Restart
- Sending System Configuration and Logs to Customer Support
Network Interface Management
QuantaStor has a broad set of network management features including bonding/teaming, virtual interfaces and VLANs.
- Configuring Network Port Settings
- Rescanning Network Ports
- Restarting Network Ports
- Creating Virtual Interfaces
- Deleting Virtual Interfaces
- Creating Bonded Port
- Deleting Bonded Port
Hardware RAID Controller Management
QuantaStor supports the use of both hardware RAID and software RAID. When used together it provides many advantages both in terms of performance and ease of maintenance. Integrated hardware management modules are built into QuantaStor for LSI MegaRAID, Adaptec, HP SmartArray, Dell PERC, and other controllers. Please see our HCL for a full list of which adapters have integrated hardware management support.
- Rescanning Controllers for new Disks
- Rescanning a Specific RAID Controller
- Identifying Hardware RAID Units in an Enclosure/Chassis
- Clearing RAID Controller Events/Alerts
- Silencing Controller Alarms
- Importing Foreign RAID Units/Virtual Devices
- Creating a new Hardware RAID Unit
- Mark/Un-mark Hardware RAID Hot-spare
- Enabling SSD Caching on a Hardware RAID Unit
- Disabling the SSD Cache on a Hardware RAID Unit
Physical Disk Management
Hard disk drives of all types including SAS, SATA, and SSD appear to your QuantaStor appliance as disks. Although we use the term physical disk, in cases where hardware RAID is used the physical disk drives are actually logical drives (aka RAID units / virtual disks) coming from the hardware RAID controller. QuantaStor can also be configured to use virtual disks as storage when deployed as a virtual appliance and can also use storage devices from other storage systems when configured as a gateway appliance.
Storage Pool Management
A storage pool is a logical grouping of disks into a pool from which volumes (LUNs) and network shares can be provisioned. QuantaStor has support for ZFS Scale-Up and Ceph Scale-out pools. Once a pool is provisioned you can provision storage volumes and network shares using available space in the storage pool. One a pool is provisioned you can provision storage volumes and network shares using available space in the storage pool.
- Creating new Storage Pools
- Growing an existing Storage Pool
- Stopping/Offline Storage Pool
- Exporting a Storage Pool for Importing on another System/Appliance
- Storage Pool Recover
- Remove Hot-spare
- Deleting Storage Pools
- Identifying Storage Pools within an Enclosure/Chassis
- Starting an Offline Storage Pool
- Modifying Storage Pool Configuration Settings
- Rescanning for Newly Added Storage Pools
- Expanding Storage Pools
Network shares provide network attached storage (NAS) capabilities. Each network share is provisioned from a specific storage pool so you must first create a pool of storage before provisioning shares. Once created you can control NFS and CIFS access to network shares.
- Creating Network Shares
- Modifying Network Shares
- Configuring NFS Service Settings
- Deleting Network Shares
- Creating Network Share Snapshots
- Restoring Network Share from Snapshot
- Add Client Access
- Modify Client Access
- Remove Client Access
- Access Settings
- Restarting NFS Service
Network Shares Namespaces use Microsoft DFS and NFSv4 referrals to provide global namespace capabilities across the grid.
- Creating Network Share Namespaces
- Modifying Network Share Namespace
- Adding/Removing Shares from Network Share Namespaces
- Deleting Network Share Namespace
Storage Volume Management (iSCSI/FC LUNs)
Storage volumes (LUNs) are block devices which are made accessible via the iSCSI and/or FibreChannel protocols. Each storage volume is provisioned from a specific Storage Pool on a specific node within a grid of systems. In order to make a storage volume accessible to a host you must first add a Host to the system, then assign the storage to it.
- Creating Storage Volumes (iSCSI/FC LUNs)
- Deleting Storage Volumes
- Modify Storage Volume Properties
- Clone Storage Volume
- Snapshot Storage Volume
- Resize Storage Volume
- Assign Storage Volume to Host
- Restore Storage Volume from Snapshot
- Storage Volume Advanced Settings
Storage Volume Group Management
Storage volume groups provide a easy way to keep track of volumes when multiple are assigned or utilized for the same host. In cases where the volumes in a group reside within an Advanced storage pool you can also create snapshots of volume groups.
- Creating Storage Volume Groups
- Creating Storage Volume Group Snapshots
- Modify Storage Volume Group Properties
- Deleting Storage Volume Groups
- Cloning a Storage Volume Group
- Adding/Removing Volumes from a Storage Volume Group
Snapshot Schedule Management
Snapshot schedules can be created to make instant snapshots of volumes for quick and easy recovery and rollback of data. To take advantage of Snapshots you must create a Storage Pool based on the ZFS filesystem which is the default.
- Add/Remote Volumes from a Schedule
- Creating Instant Snapshot Schedules
- Deleting Snapshot Schedules
- Modifying Snapshot Schedules
- Enabling a Snapshot Schedule
- Disabling a Snapshot Schedule
Host Dialogs
A host entry must be added for each host that you want to assign storage volumes to. The host entry stores one or more initiator IDs which can include one or more FC WWPN and/or one or more iSCSI initiator IQNs.
- Adding a Host
- Assigning Volumes To Hosts
- Removing a Host
- Modifying Host Properties
- Adding a Host Initiator
- Removing a Host Initiator
Host Group Management
Host groups represent a collection of one or more Hosts. It's a convince object which allows you to group hosts together so that you can assign storage to the group in a single operation rather than having to assign storage to individual hosts which can take more time. Host groups are especially useful for use with VMware clusters and XenServer resource pools as in such cases all hosts in the group require shared access to the same group of disks.
- Creating Host Groups
- Adding/Removing Hosts from a Host Group
- Deleting Host Groups
- Modifying Host Group Properties
Grid Management
Multiple QuantaStor nodes can be managed as a grid. One node will be assigned to be the primary node.
- Add Nodes to the Grid
- Modify Nodes in the Grid
- Remove a Node in the Grid
- Delete the Grid
- Select the Node to be Primary
Users & Groups Tab
User Management
User Group Management
- Creating User Groups
- Deleting User Groups
- Modifying User Group Properties
- Adding/Removing Users from a Group
User Role Management
Multi-tenant Group Management (Resource Groups)
Resource Groups
- Create Resource Group
- Add/Remove Users
- Modify Resource Group
- Delete Resource Group
- Add/Remove Resources
Provisioning Quotas
- Setting Quotas on Resource Groups
- Adding/Removing Volumes to/from a Quota
- Modifying Quotas
- Deleting Quotas
- Adding/Removing Network Shares to/from a Quota
Remote Replication Tab
Remote Replication Configuration
Setting up remote replication links between grid nodes
- Create a Storage System Link
- Delete a Storage System Link
- Modify a Storage System Link
- Set the Storage System Link Password
Managing Remote Replica Associations
Setting up Replication Schedules
- Create a Replication Schedule
- Modify a Replication Schedule
- Delete a Replication Schedule
- Add or Remove a Replication Schedule
- Enable a Replication Schedule
- Disable a Replication Schedule
NAS Gateway Tab
Cloud Storage Provider
Cloud Container
- Creating a Cloud Storage Container
- Adding a Cloud Storage Container
- Enabling a Cloud Storage Container
- Modifying a Cloud Storage Container
- Deleting a Cloud Storage Container
- Removing a Cloud Storage Container
- Disabling a Cloud Storage Container
- Repairing a Cloud Storage Container
Cloud Backup Schedule
- Creating a Cloud Backup Schedule
- Modifying a Cloud Backup Schedule
- Deleting a Cloud Backup Schedule
- Updating Cloud Backup Schedule


