Overview (Getting Started)
Getting Started/Configuration Guide
Navigation: Storage Management --> Storage System --> Storage System --> Getting Started (toolbar)
Contents
- 1 System Setup
- 2 Storage Grid Setup
- 3 Setup Storage Pool - Scale-up
- 4 Scale-out S3 Pool Setup (Ceph RGW)
- 5 Scale-out File Pool Setup(CephFS)
- 6 Scale-Out Block Pool Setup (Ceph RBD)
- 7 Provision File Storage (NFS/CIFS)
- 8 Provision Block Storage (iSCSI/FC)
- 9 Remote-Replication Setup
- 10 Cloud Integration
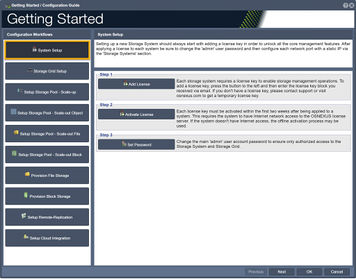
System Setup
Setting up a new Storage System should always start by adding a license key in order to unlock all the core management features. Once a license to each system has been added be sure to change the 'admin' user password and then configure each network port with a static IP via the 'Storage Systems' section.
-Step one, "Add License", guides one to add a license key to enable storage management operations.
-Step two, "Activate License", guides one to activate a License.
-Step three, "Set Password", guides one to change the Administrator's Password.
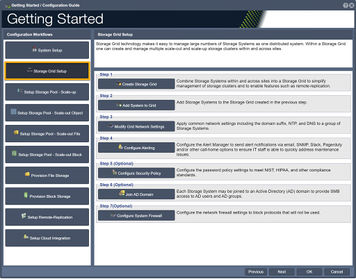
Storage Grid Setup
This procedure will assist with setting up a Storage Grid. Storage Grid technology makes it easy to manage large numbers of Storage Systems and enables access to features like remote-replication and scale-out storage.
-Step one, "Create a Storage Grid", guides one to create a Storage Grid.
-Step two, "Add System to Grid", guides one to add a Storage System to the Storage Grid.
-Step three, "Modify Grid Network Settings", guides one to modify grid network settings.
-Step four, "Configure Alerting", guides one to configure the Alert Manager so as to send alert notifications to various devices.
-Step five (Optional), "Configure Security Policy", guides one to configure the security policies.
-Step six (Optional), "Join AD Domain", guides one to join an Active Directory (AD) domain to provide SMB access to AD users and AD groups.
-Step seven (Optional), "Configure System Firewall", guides one to configure the network firewall settings.
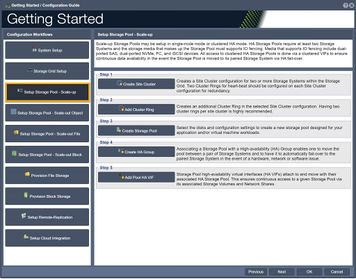
Setup Storage Pool - Scale-up
Storage pools formed from devices which are dual-connected to two storage systems may be made highly-available. This is done by creating a storage pool high-availability group to which one or more virtual network interfaces (VIFs) are added. All access to storage pools must be done via the associated VIFs to ensure continuous data availability in the event the pool is moved (failed-over) to another system.
-Step one, "Create Site Cluster", guides one to create a Site Cluster configuration for two or more Systems in the Storage Grid
-Step two, "Add Cluster Ring", guides one to create an additional Cluster Ring in the selected Site Cluster configuration.
-Step three, "Create Storage Pool", guides one to create in the selection of disks and configuration settings to create a new storage pool.
-Step four, "Create HA Group", guides one to create an HA, Highly Available, group for Storage Pools.
-Step five, "Create HA VIF", guides one to associate the storage pool with a High-availability Virtual Interfaces (HA VIF).
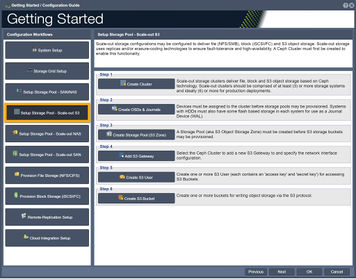
Scale-out S3 Pool Setup (Ceph RGW)
Scale-out Object and Block storage configurations enable S3/SWIFT object storage access as well as iSCSI storage access to scale-out Storage Volumes. Scale-out storage uses replicas and/or erasure-coding technologies to ensure fault-tolerance and high-availability. Ceph technology is used within the platform so a Ceph Cluster must first be created to enable this functionality.
-Step one guides one to create an Object Storage Cluster.
-Step two guides one to create Object Storage Devices, OSD's.
-Step three guides one to create an S3/SWIFT Object Storage Zone.
-Step four guides one to select a Ceph Cluster for the S3/SWIFT Gateway.
-Step five guides one to the creation of User Access Entries.
-Step six guides one to create Buckets for writing object storage via the S3/SWIFT Protocols.
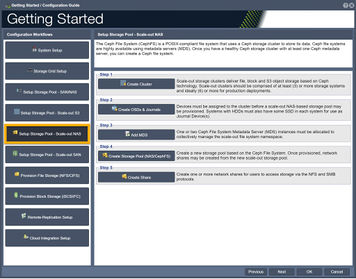
Scale-out File Pool Setup(CephFS)
The Ceph file system (CephFS) is a POSIX-compliant file system that uses a Ceph storage cluster to store its data. Ceph file systems are highly available using metadata servers (MDS). Once you have a healthy Ceph storage cluster with at least one Ceph metadata server, you can create a Ceph file system.
-Step one guides one to Create a Scale-out Storage Cluster.
-Step two guides one to Create a Ceph Object Storage Device, OSD.
-Step three guides one to Create a Ceph Meta Data Server, MDS.
-Step four (Optional) guides one to Create a Pool Profile.
-Step five guides one to Create a Ceph File System.
-Step six guides one to Create one or more Network Shares via NFS and SMB Protocols.
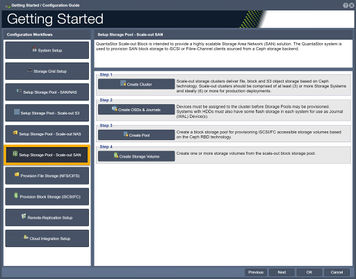
Scale-Out Block Pool Setup (Ceph RBD)
Scale-out object and block storage configurations enable S3/SWIFT object storage access as well as iSCSI storage access to scale-out storage volumes. Scale-out storage uses replicas and/or erasure-coding technologies to ensure fault-tolerance and high-availability. Ceph technology is used within the platform so a Ceph cluster must first be created to enable this functionality.
-Step one guides one to create a Storage Cluster for Ceph based file, block, or S3 object storage.
-Step two guides one to create Object Storage Devices, OSD's.
-Step three guides one to allocate one or two Ceph Metadata Server, MDS, Instances.
-Step four (Optional) guides one to create a Block Storage Pool.
-Step five guides one to create one or more Storage Volumes.
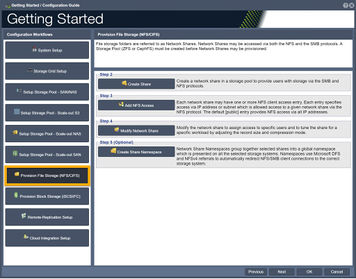
Provision File Storage (NFS/CIFS)
This procedure will assist with setting up Storage Pools and Volumes.
-Step one (Optional) guides one to configure an Active Directory (AD) domain to provide Server Message Block, SMB, access to AD users and groups.
-Step two guides one to create a network share in a storage pool which provides users with storage via the Server Message Block, SMB and Network File System, NFS .
-Step three guides one to modify a Network Share which may have one or more NFS client access entries.
-Step four guides one to modify the network share so as to assign access to specific users.
-Step five (Optional) guides one to Network Share Namespaces.
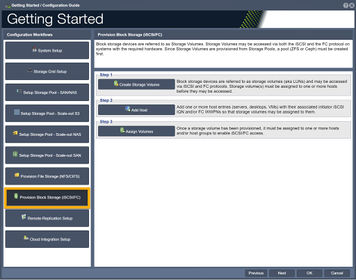
Provision Block Storage (iSCSI/FC)
File storage folders are referred to as Network Shares. Network Shares may be accessed via both the NFS and the SMB protocols.
-Step one guides one to create a Storage Volume.
-Step two guides one to add one or more hosts.
-Step three guides one to assign Volumes.
Remote-Replication Setup
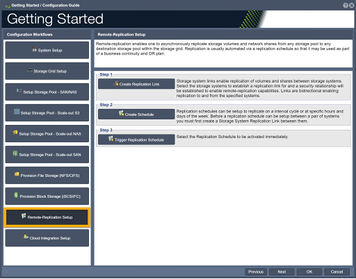
Remote-Replication enables one to asynchronously replicate storage volumes and network shares from any storage pool to any destination storage pool within the storage grid. Replication is usually automated via a replication schedule so that it may be used as part of a business continuity and DR plan.
-Step one guides one to create a Storage System Link.
-Step two guides one to create a Replication Schedule.
-Step three guides one to trigger a Replication Schedule.
Cloud Integration
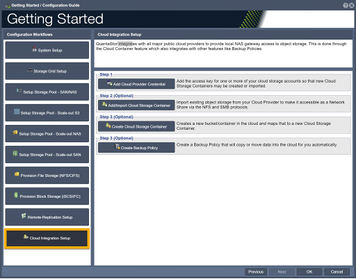
QuantaStor integrates with all major public cloud providers to provide local NAS gateway access to object storage. This is done through the Cloud Container feature which also integrates with other features like Backup Policies.
-Step one guides one to add the access key for one or more of your cloud storage accounts so that new Cloud Storage Containers may be created or imported.
-Step two, optional, guides one to import existing object storage from your Cloud Provider to make it accessible as a Network Share via the NFS and SMB protocols.
-Step three, optional, guides one to creates a new bucket/container in the cloud and maps that to a new Cloud Storage Container.
-Step four, optional, guides one to create a Backup Policy that will copy or move data into the cloud for you automatically.
For Additional Information... Getting Started Overview
