Ubuntu Software RAID1 (Legacy)
Jump to navigation
Jump to search
Depending on the operating system, creating the software RAID1 is as easy as a few extra steps during the installation process.
Below are a few screenshots of the process to create a software RAID1 with QuantaStor on Ubuntu Bionic. The process is almost identical with QuantaStor on Ubuntu Xenial.
Instructions
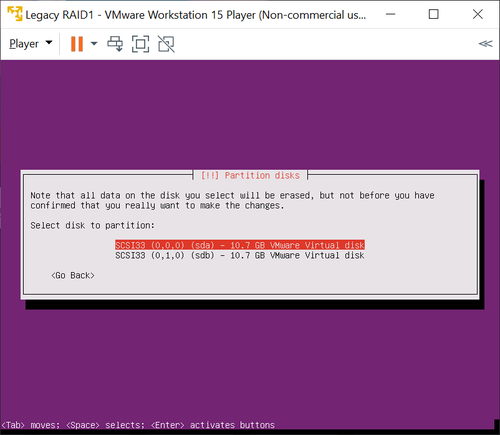
- Step 1 - When you are prompted to install QuantaStor on a disk like below, press the ‘ESC’ key
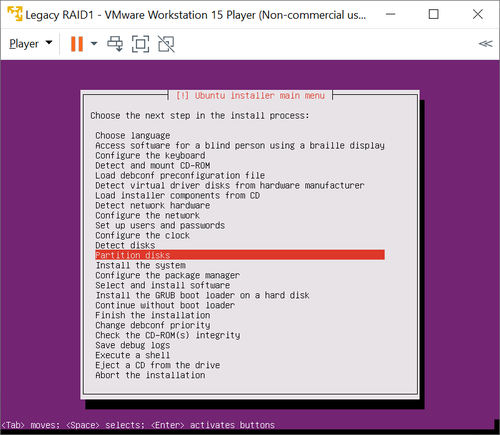
- Step 2 - Use the arrow keys to select the ‘Partition disks’ option and press the ‘Enter’ key
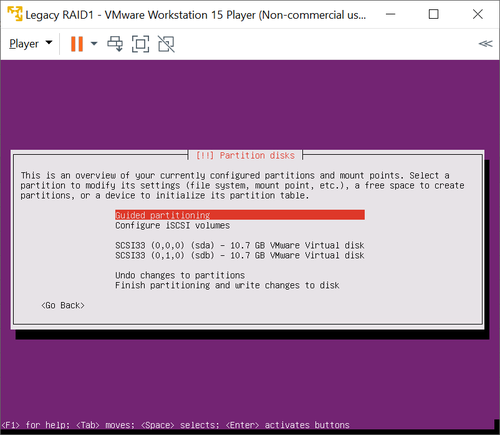
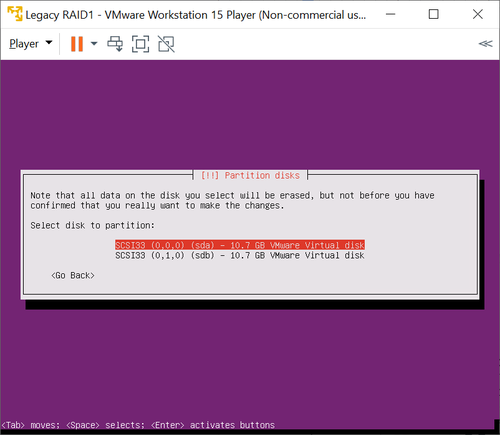
- Step 3 - You’ll be presented with your disks, use the arrow keys to select ‘Guided Partitioning’ and press the ‘Enter’ key. Using the guided partitioning mode can save time, and will create two partitions automatically, the root partition and the swap partition
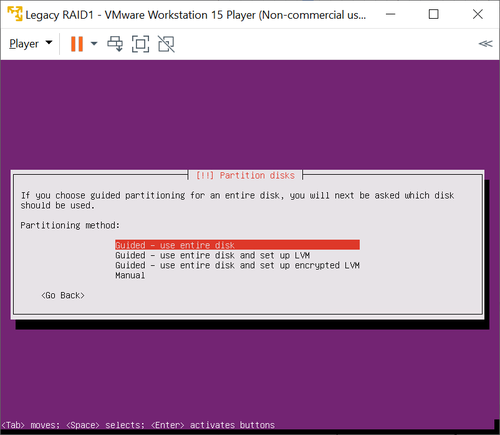
- Step 4 - Press the ‘Enter’ key to select ‘Guided - use entire disk’
- Step 5 - Press the ‘Enter’ key to select the first disk you want to use for your RAID1 boot device
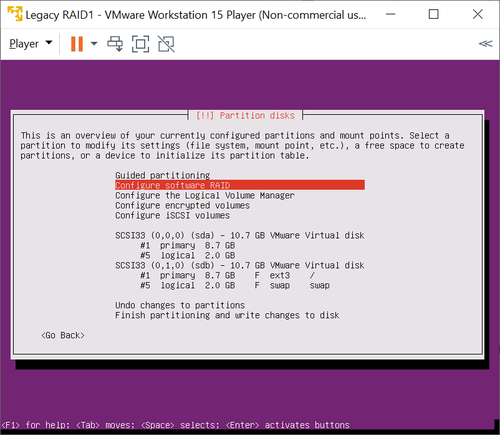
- Step 6 - Repeat steps 3 to 5 on the second disk you want to use for your RAID1 boot device. You should see two partitions on both disks you selected. Use the arrow keys to select ‘Configure software RAID’ and press the ‘Enter’ key
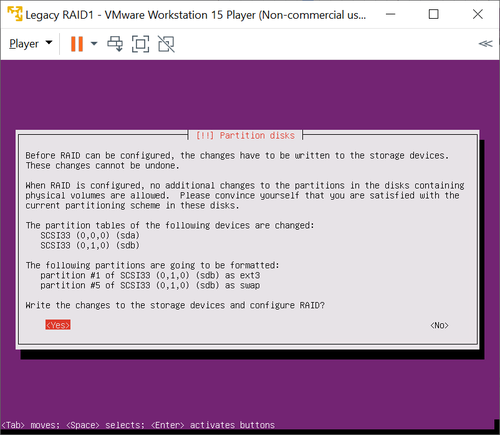
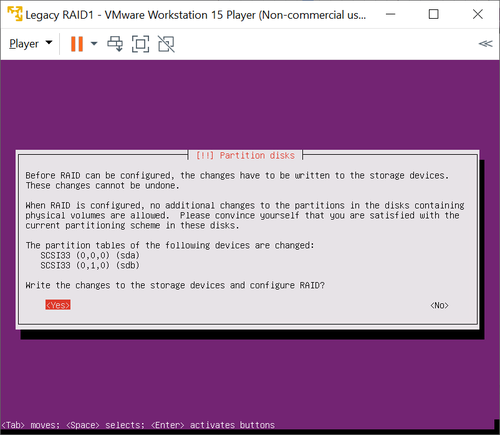
- Step 7 - You’ll be asked if you want to commit the changes to the disks you selected, use the arrow keys to select ‘<Yes>’ and press the ‘Enter’ key
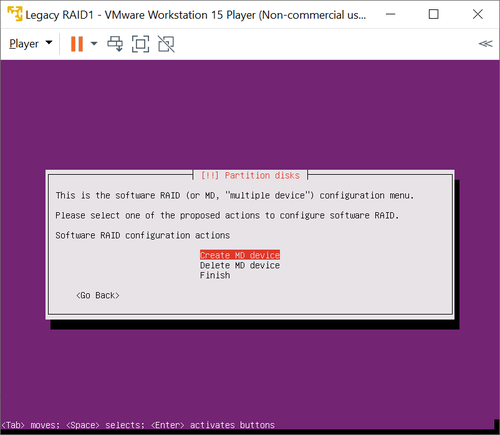
- Step 8 - Use the arrow keys to select ‘Create MD device’ and press the ‘Enter’ key
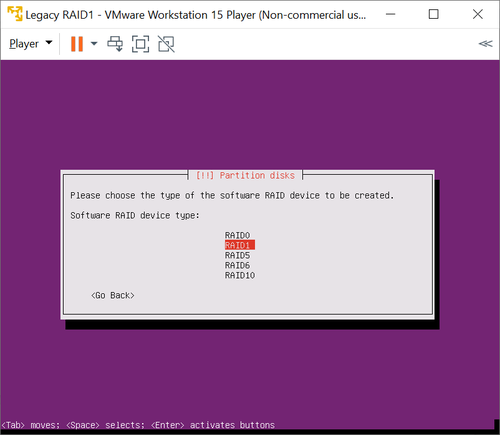
- Step 9 - Use the arrow keys to select ‘RAID1’ and press the ‘Enter’ key
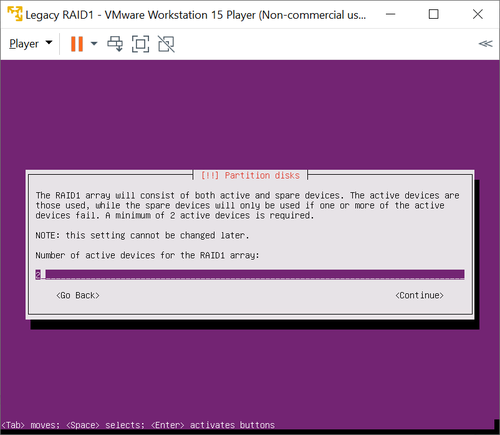
- Step 10 - Leave the default as ‘2’ and press the ‘Enter’ key
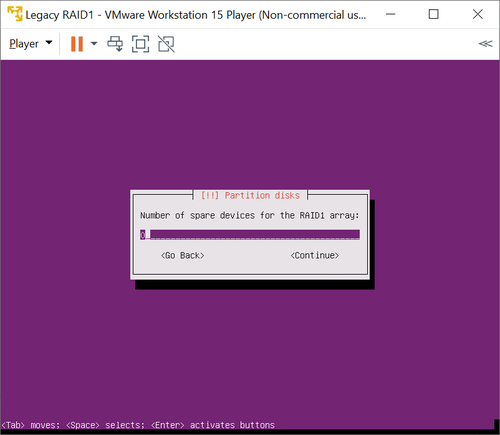
- Step 11 - Leave the default as ‘0’ and press the ‘Enter’ key
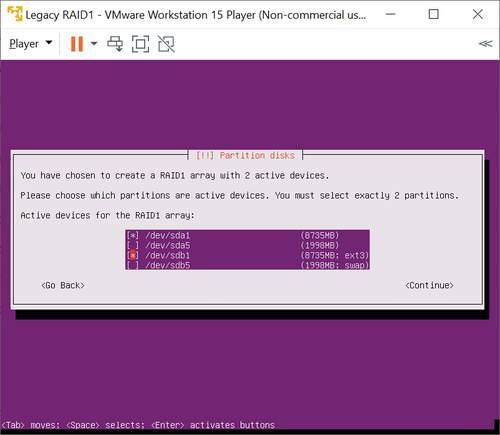
- Step 12 - Use the arrow keys and the spacebar to select the matching partitions (they should be the same size) and press the ‘Enter’ key
- Step 13 - Use the arrow keys to select ‘<Yes>’ and press the ‘Enter’ key
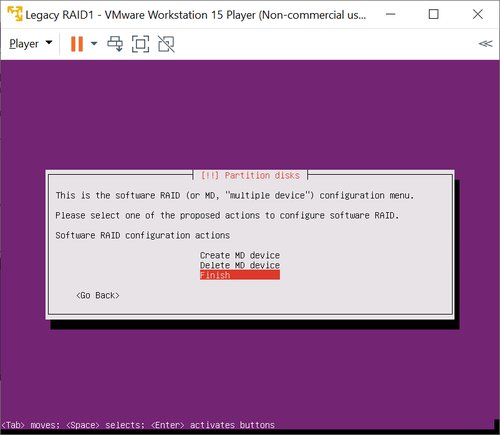
- Step 14 - Repeat the process for the other partition, then use the arrow keys to select ‘Finish’ and press the ‘Enter’ key
- Step 15 - Use the arrow keys to select the largest first RAID1 partition and press the ‘Enter’ key
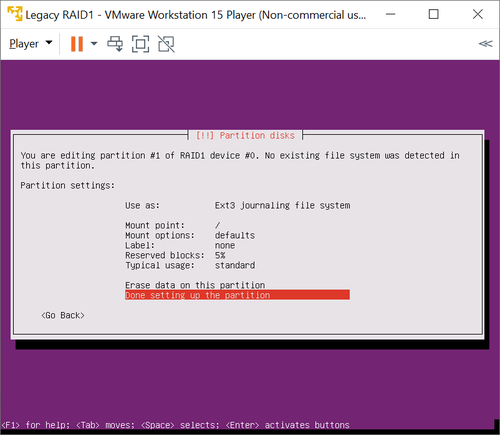
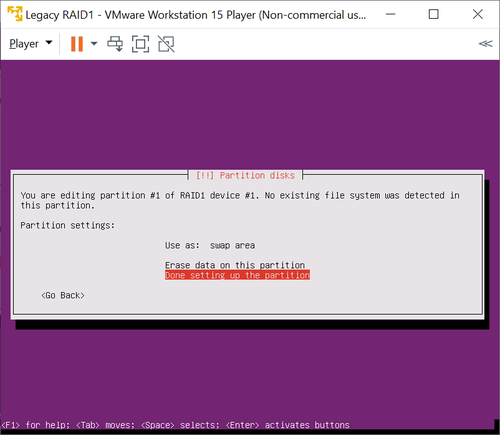
- Step 16 - Configure the partition like the below image, using the arrow keys and the ‘Enter’ key to confirm the selections. When you have configured it the same way, use the arrow keys to select ‘Done setting up the partition’ and press the ‘Enter’ key
- Step 17 - Select the other partition using the arrow keys and press the ‘Enter’ key. Configure this partition like the below image. When you have configured it the same way, use the arrow keys to select ‘Done setting up the partition’ and press the ‘Enter’ key
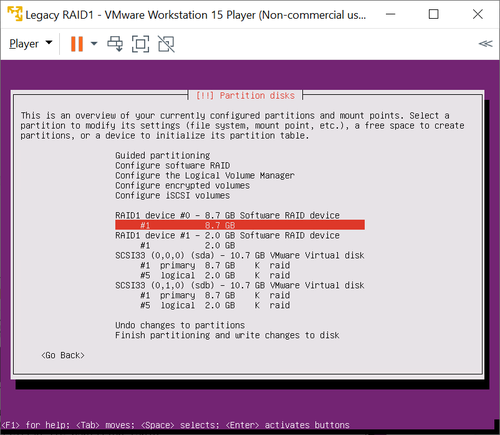
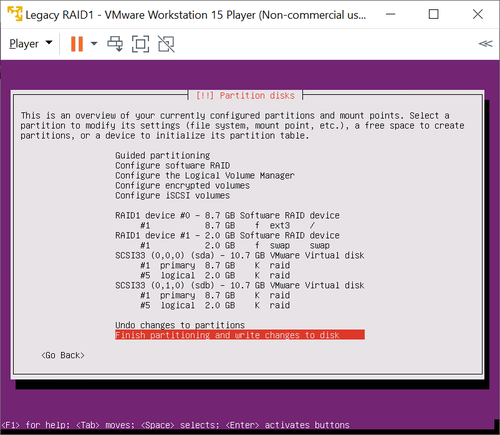
- Step 18 - If done correctly, your configuration should look similar to the below image. You will most likely be using larger disks, but ensure that your largest partition is using ext3 and the root (‘/’) directory. When you are satisfied, use the arrow keys to select ‘Finish partitioning and write changes to disk’ and press the ‘Enter’ key. QuantaStor will now install on your RAID1 partition
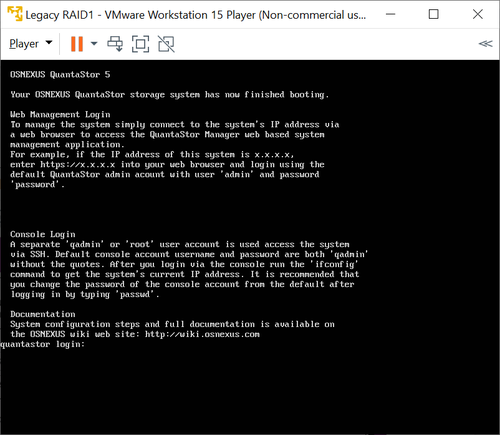
After the installation you should boot into QuantaStor normally like the below image:
- Step 19 - Log in via the console or via SSH using the IP address selected during the installation. Perform 'grub-install /dev/sdX' on both disks. Replace X with the letters of your disks, for example these could be sda and sdb.
root@quantastor:~# grub-install /dev/sda
root@quantastor:~# grub-install /dev/sdb
To check that you’re booting into your software RAID1 partition, you can use ‘df -h’. Here is an example of what you’ll likely see:
root@quantastor:~# df -h
Filesystem      Size  Used Avail Use% Mounted on
udev            957M     0  957M   0% /dev
tmpfs           199M  2.4M  197M   2% /run
/dev/md0        8.0G  3.0G  4.6G  40% /
tmpfs           994M     0  994M   0% /dev/shm
tmpfs           5.0M  4.0K  5.0M   1% /run/lock
tmpfs           994M     0  994M   0% /sys/fs/cgroup
tmpfs           199M     0  199M   0% /run/user/1000
You can also use ‘cat /proc/mdstat’ to check that your software RAID1 partitions are correctly configured. Here is an example of what you’ll likely see:
root@quantastor:~# cat /proc/mdstat
Personalities : [raid1] [linear] [multipath] [raid0] [raid6] [raid5] [raid4] [raid10]
md1 : active raid1 sdb5[1] sda5[0]
      1949696 blocks super 1.2 [2/2] [UU]

md0 : active raid1 sdb1[1] sda1[0]
      8521728 blocks super 1.2 [2/2] [UU]

unused devices: <none>
