Template:ClusteredHAPoolCreation: Difference between revisions
| Line 8: | Line 8: | ||
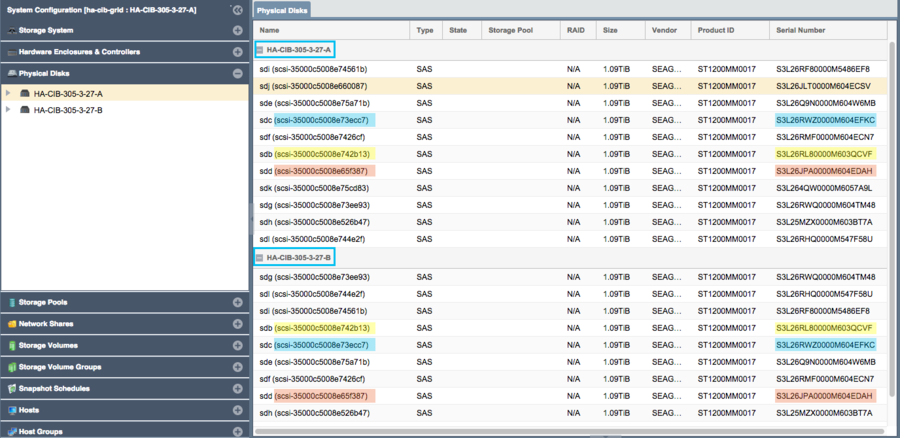
[[File:Qs_ha_verify_disks_shared_nopool.png| | [[File:Qs_ha_verify_disks_shared_nopool.png|900px]] | ||
* Note how devices with the same ID/Serial Numbers are visible on both storage appliances. This is a strict requirement for creating Storage Pool HA Groups. | * Note how devices with the same ID/Serial Numbers are visible on both storage appliances. This is a strict requirement for creating Storage Pool HA Groups. | ||
Revision as of 15:26, 16 April 2019
Cluster HA Storage Pool Creation
Creation of a HA storage pool is the same as the process for creating a non-HA storage pool. The pool should be created on the appliance that will be acting as the primary node for the pool but that is not required. Support for Encrypted Storage Pools is available in QuantaStor v3.17 and above.
Disk Connectivity Pre-checks
Any storage Storage Pool which is to be made Highly-Available must be configured such that both appliances used in the HA configuration both have access to all disks used by the storage pool. This necessarily requires that all devices used by a storage pool (including cache, log, and hot-spare devices) must be in a shared external JBOD or SAN. Verify connectivity to the back-end storage used by the Storage Pool via the Physical Disks section of the WebUI.
- Note how devices with the same ID/Serial Numbers are visible on both storage appliances. This is a strict requirement for creating Storage Pool HA Groups.
- Dual-ported SAS drives must be used when deploying a HA configuration with a JBOD backend.
- Enterprise and Data Center (DC) grade SATA drives can be used in a Tiered SAN HA configuration with QuantaStor appliances used as back-end storage rather than a JBOD.
Storage Pool Creation (ZFS)


Once the disks have been verified as visible to both nodes in the cluster, proceed with Storage Pool creation using the following steps:
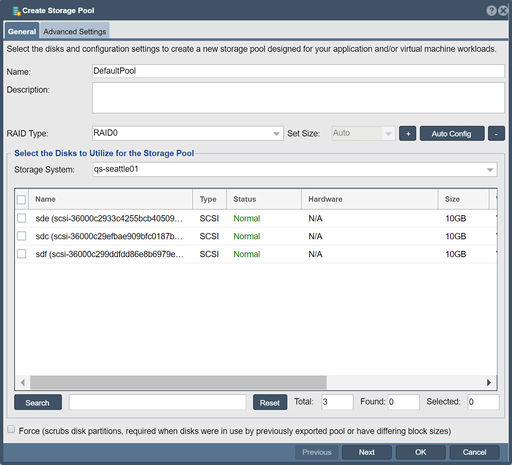
- Configure the Storage Pool on one of the nodes using the Create Storage Pool dialog.
- Provide a Name for the Storage Pool
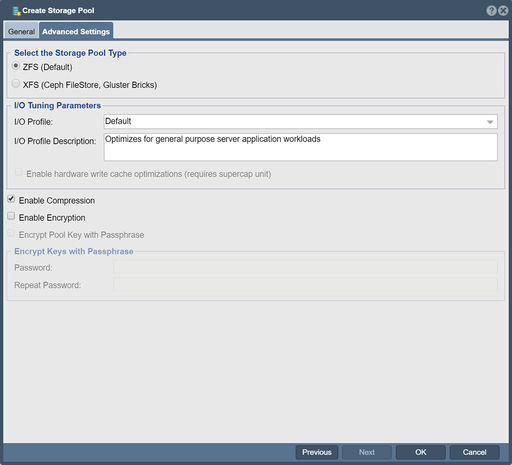
- Choose the Pool Type of Default (zfs)
- Choose the RAID Type and I/O profile that will suit your use case best, more details are available in the Soultion Design Guide.
- Select the shared storage disks that you would like to use that will suit your RAID type and that were previosuly confirmed to be accessible to both QuantaStor Appliances.
- Click 'OK' to create the Storage Pool once all of the Storage pool settings are configured correctly.
Back-end Disk/LUN Connectivity Checklist
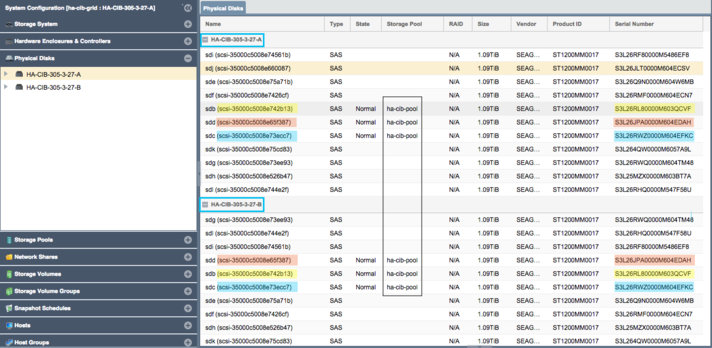
Following pool creation, return to the Physical Disks view and verify that the storage pool disks show the Storage Pool name for all disks on both nodes.
See the Troubleshooting section below for suggestions if you are having difficulties establishing shared disk presentation between nodes.

