QuantaStor 6 - Software RAID1 Install Procedure
Creating the software RAID1 is as easy as a few extra steps during the installation process.
Below are a few screenshots of the process to create a software RAID1 with QuantaStor on Ubuntu Focal. The process is almost identical with QuantaStor on Ubuntu Xenial.
Instructions
- Step 1 - When first prompted, select 'Install OSNEXUS QuantaStor'. If you would like to skip checking the media, select 'Install (skip Media Check)'
- Step 2 - Configure the networking as desired, and press the Enter key on 'Done'
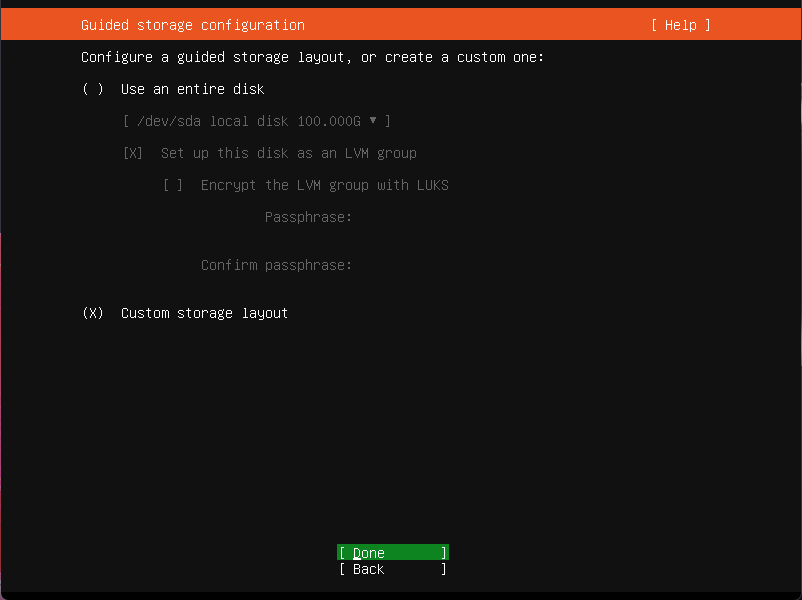
- Step 3 - Make sure 'Custom storage layout' is selected, and press the Enter key on 'Done'
- Step 4 - Go to the first device you wish to use for RAID1, and press the Enter key. Select 'Use As Boot Device' and press the Enter key
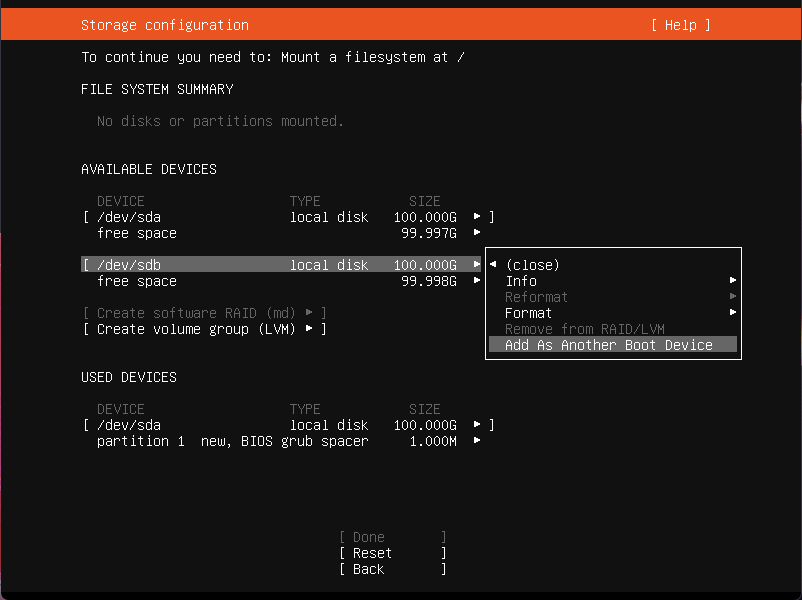
- Step 5 - Repeat the same step for the second device you wish to use for RAID1, and press the Enter key. Select 'Use As Another Boot Device' and press the Enter key
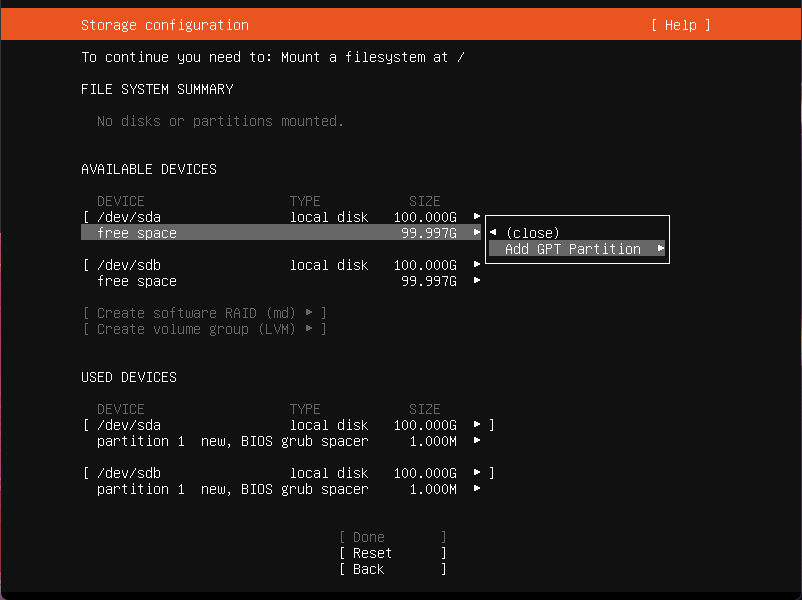
- Step 6 - Go to the free space on the first device you wish to use for RAID1, and press the Enter key. Select 'Add GPT Partition' and press the Enter key
- Step 7a - Type the desired space in the 'Size' field. Make sure 'Leave unformatted' is in the 'Format' field. Select 'Create' and press the Enter key
- Step 7b - Repeat steps 6 and 7 for the second device you wish to use for RAID1
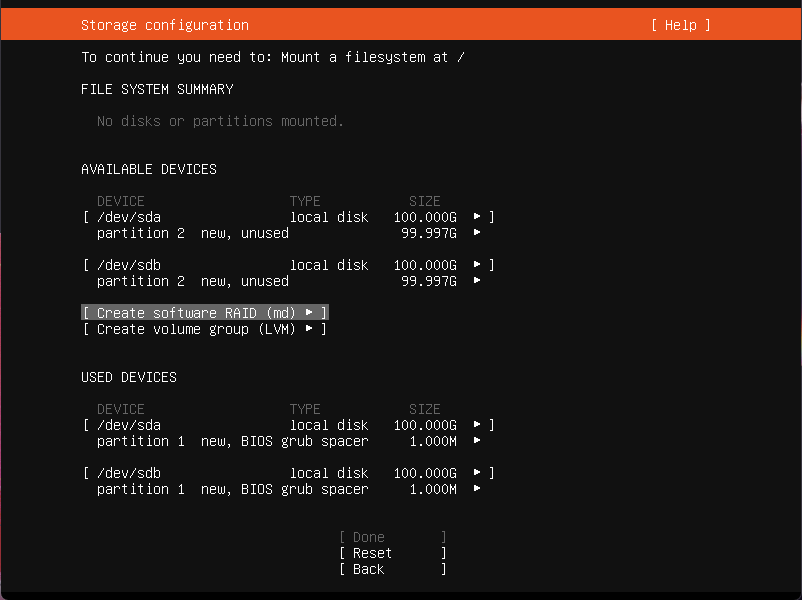
- Step 8 - Select 'Create software RAID (md)' and press the Enter key
- Step 9 - Make sure both partitions created in steps 6 and 7 are ticked. Select 'Create' and press the Enter key
- Step 10 - Select 'Create volume group (LVM)' and press the Enter key
- Step 11 - Make sure the software RAID created in step 8 is ticked. Select 'Create' and press the Enter key
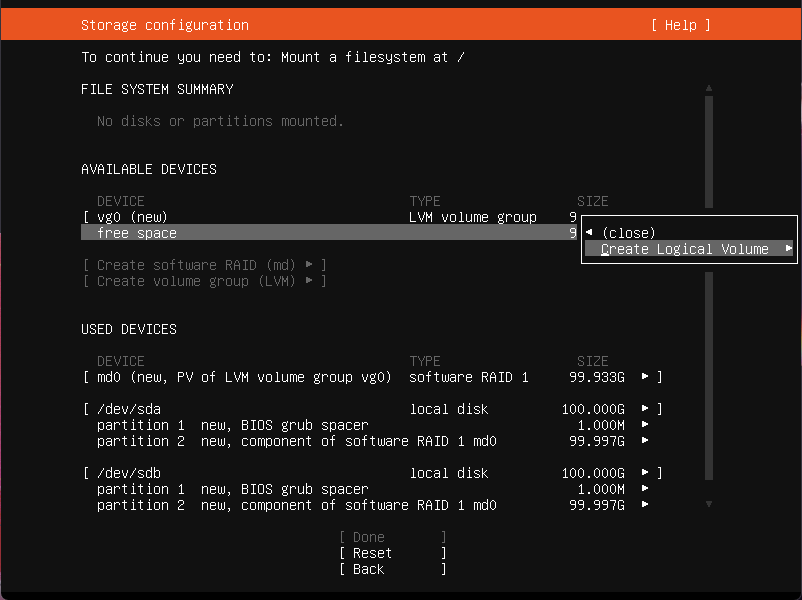
- Step 12 - Go to the free space below the volume group created in step 11, and press the Enter key. Select 'Create Logical Volume' and press the Enter key
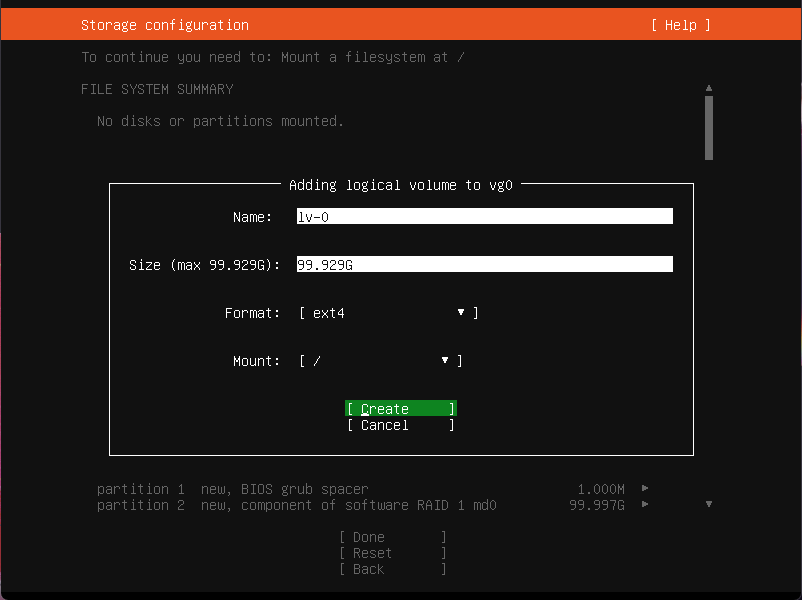
- Step 13 - Type the desired space in the 'Size' field. Make sure 'ext4' is in the 'Format' field. Make sure '/' is in the 'Mount field. Select 'Create' and press the Enter key
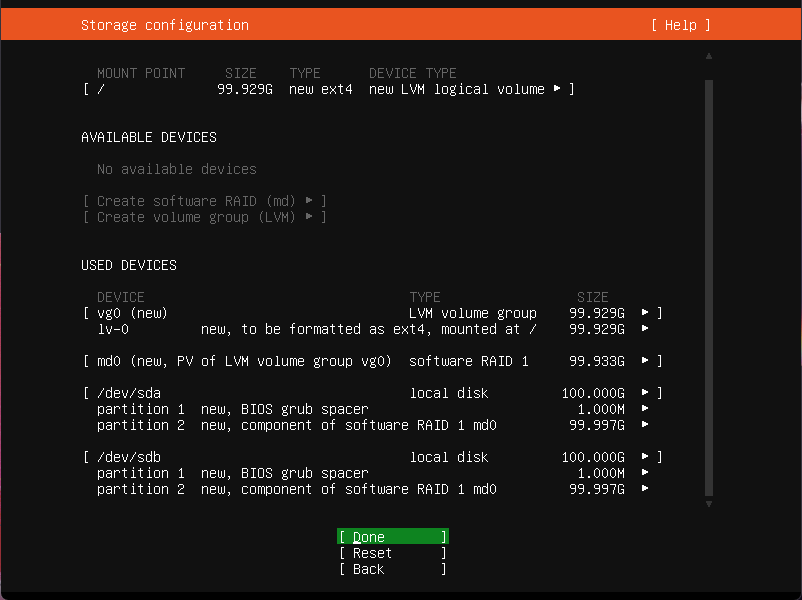
- Step 14 - Go to the bottom, select 'Done' and press the Enter key
- Step 15 - You will be prompted to 'Confirm destructive action'. Select 'Continue' and press the Enter key. This will now start installing QuantaStor.
If you run into any difficulties whilst following the above steps. Please contact support@osnexus.com for assistance.


