QuantaStor 6 - Software RAID1 Install Procedure
Creating the software RAID1 is as easy as a few extra steps during the installation process.
Below are a few screenshots of the process to create a software RAID1 with QuantaStor 6 and newer using QuantaStor ISO media based on Ubuntu 20.04 (Focal) and 22.04 (Jammy).
Instructions
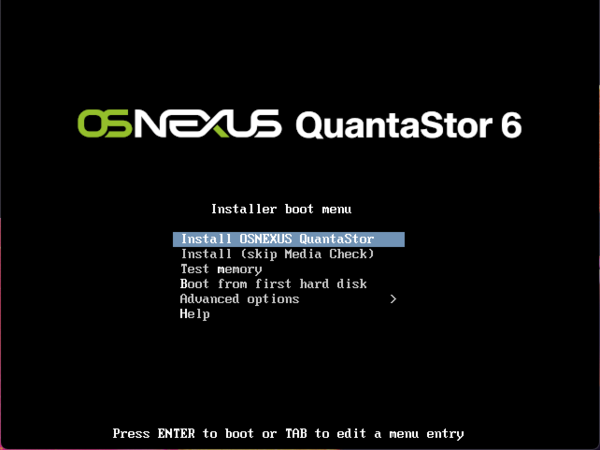
- Step 1 - When first prompted, select 'Install OSNEXUS QuantaStor'. If you would like to skip checking the media, select 'Install (skip Media Check)'
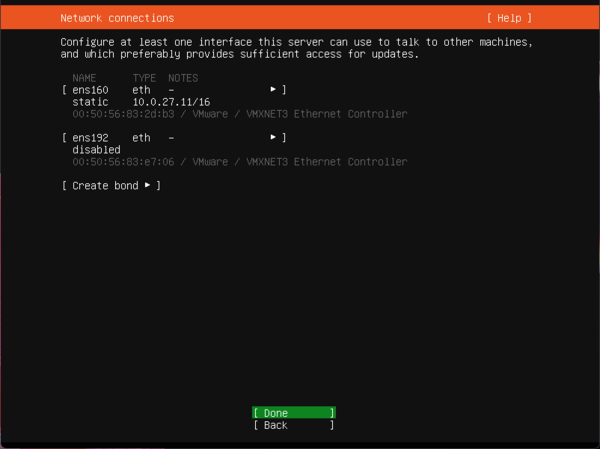
- Step 2 - Configure the networking as desired, and press the Enter key on 'Done'
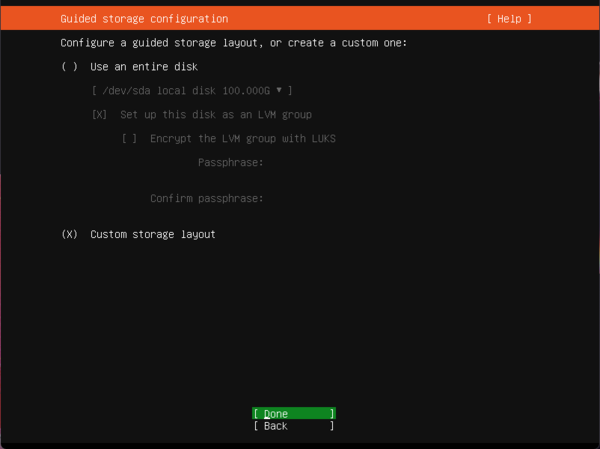
- Step 3 - Make sure 'Custom storage layout' is selected, and press the Enter key on 'Done'
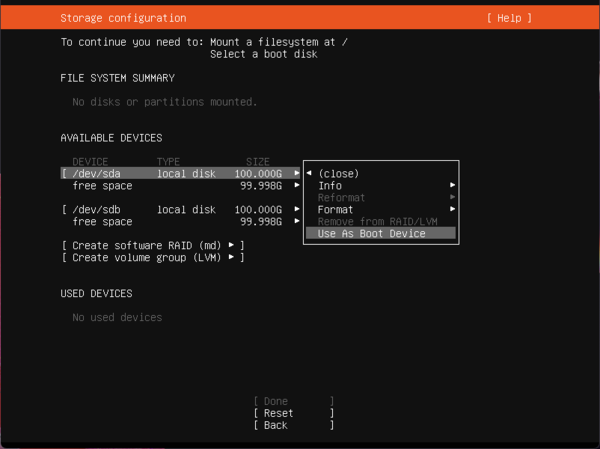
- Step 4 - Go to the first device you wish to use for RAID1, and press the Enter key. Select 'Use As Boot Device' and press the Enter key
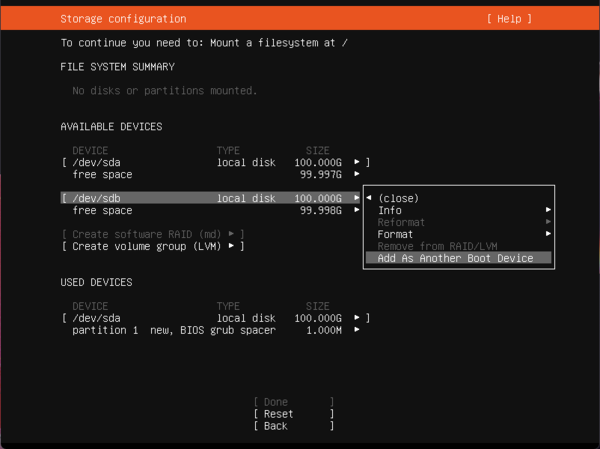
- Step 5 - Repeat the same step for the second device you wish to use for RAID1, and press the Enter key. Select 'Use As Another Boot Device' and press the Enter key
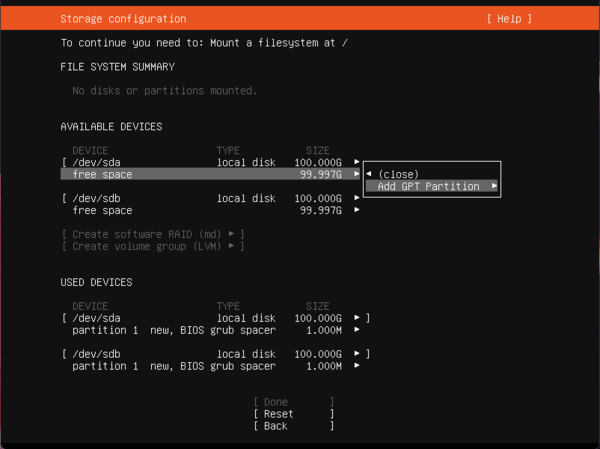
- Step 6 - Go to the free space on the first device you wish to use for RAID1, and press the Enter key. Select 'Add GPT Partition' and press the Enter key
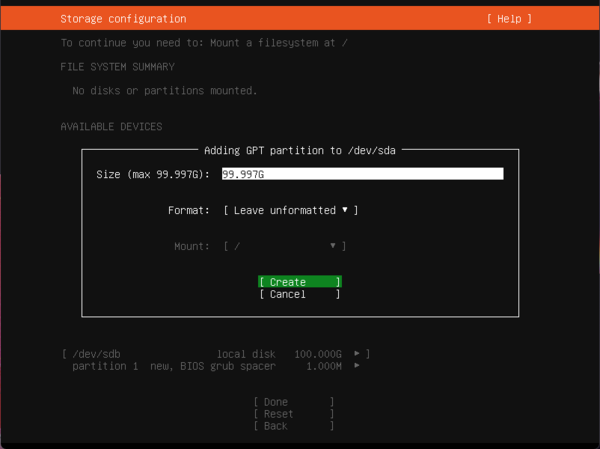
- Step 7a - Type the desired space in the 'Size' field. Make sure 'Leave unformatted' is in the 'Format' field. Select 'Create' and press the Enter key
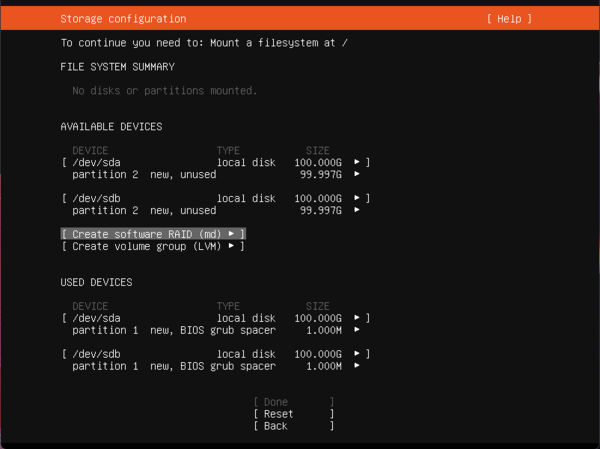
- Step 7b - Repeat steps 6 and 7a for the second device you wish to use for RAID1
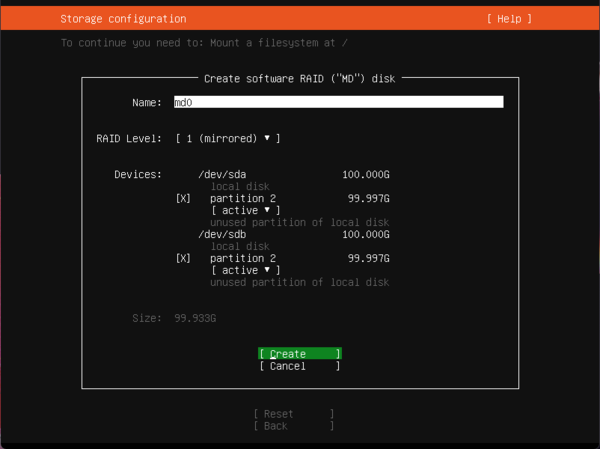
- Step 8 - Select 'Create software RAID (md)' and press the Enter key
- Step 9 - Make sure both partitions created in steps 6 and 7 are ticked. Select 'Create' and press the Enter key
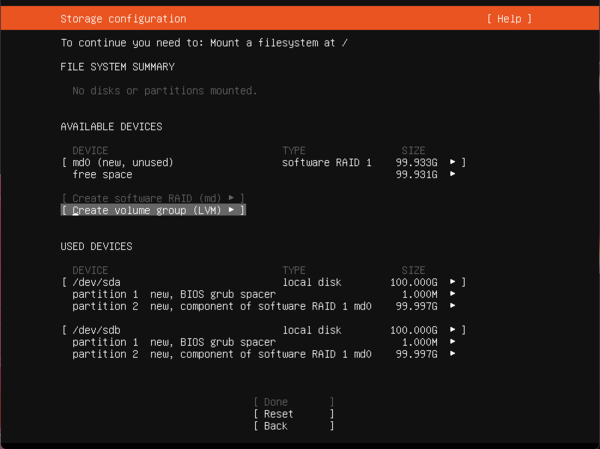
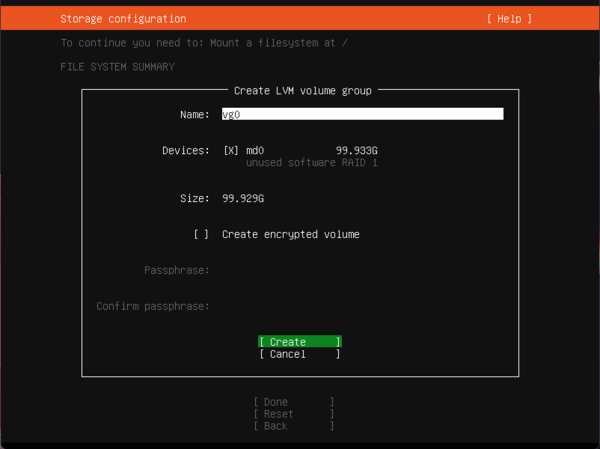
- Step 10 - Select 'Create volume group (LVM)' and press the Enter key
- Step 11 - Make sure the software RAID created in step 8 is ticked. Select 'Create' and press the Enter key
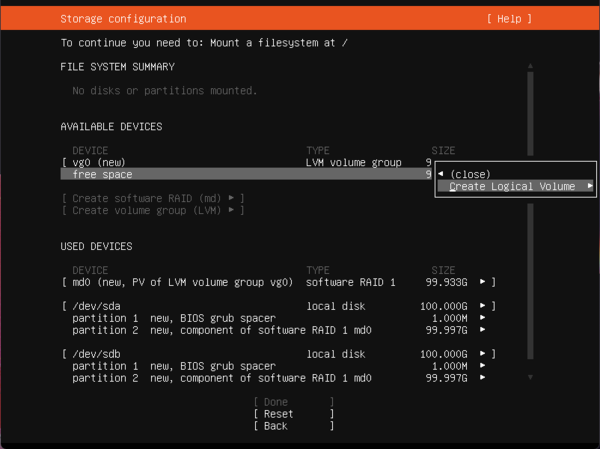
- Step 12 - Go to the free space below the volume group created in step 11, and press the Enter key. Select 'Create Logical Volume' and press the Enter key
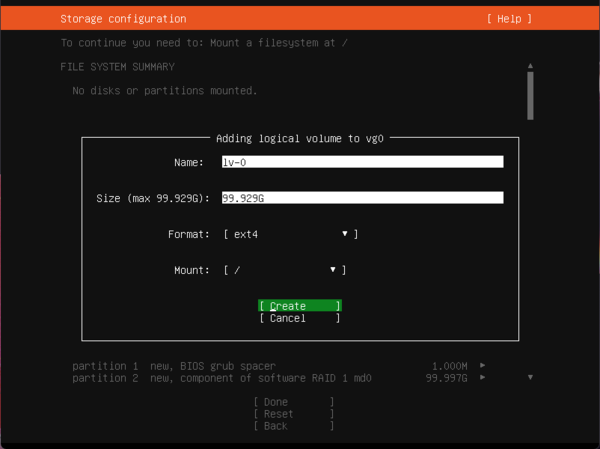
- Step 13 - Type the desired space in the 'Size' field. Make sure 'ext4' is in the 'Format' field. Make sure '/' is in the 'Mount field. Select 'Create' and press the Enter key
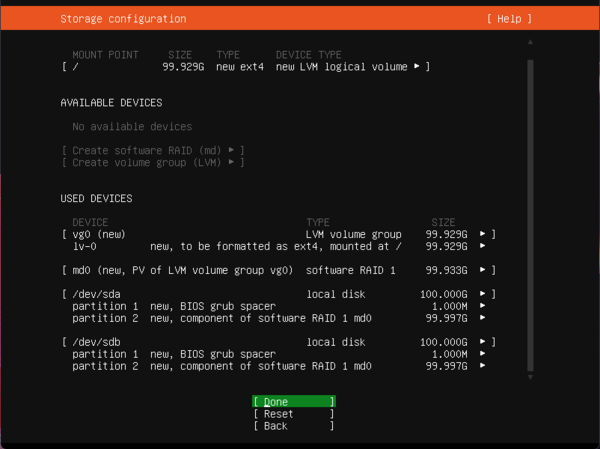
- Step 14 - Go to the bottom, select 'Done' and press the Enter key
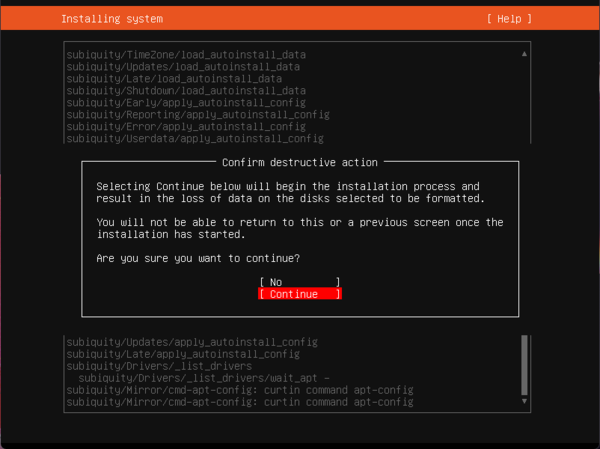
- Step 15 - You will be prompted to 'Confirm destructive action'. Select 'Continue' and press the Enter key. This will now start installing QuantaStor.
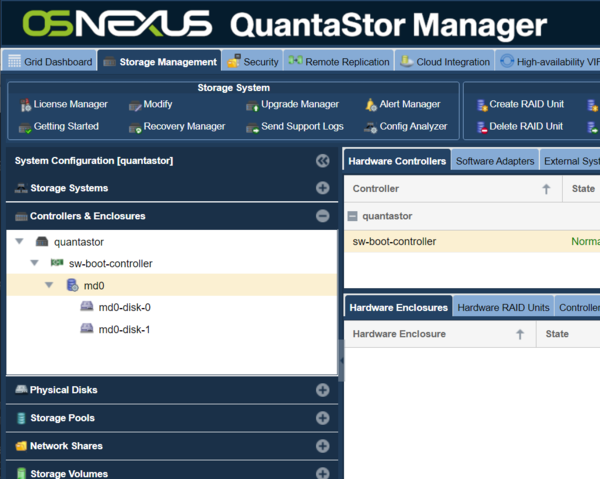
After installation is complete, navigate to the 'Controllers & Enclosures' section and you'll see a Software Boot Controller listed in that section that represents your mirrored boot configuration. You can use the WUI in the future to add a replacement device as a hot-spare to repair the mirror in the event one of your boot devices needs replacement.
If you run into any difficulties whilst following the above steps. Please contact support@osnexus.com for assistance.
